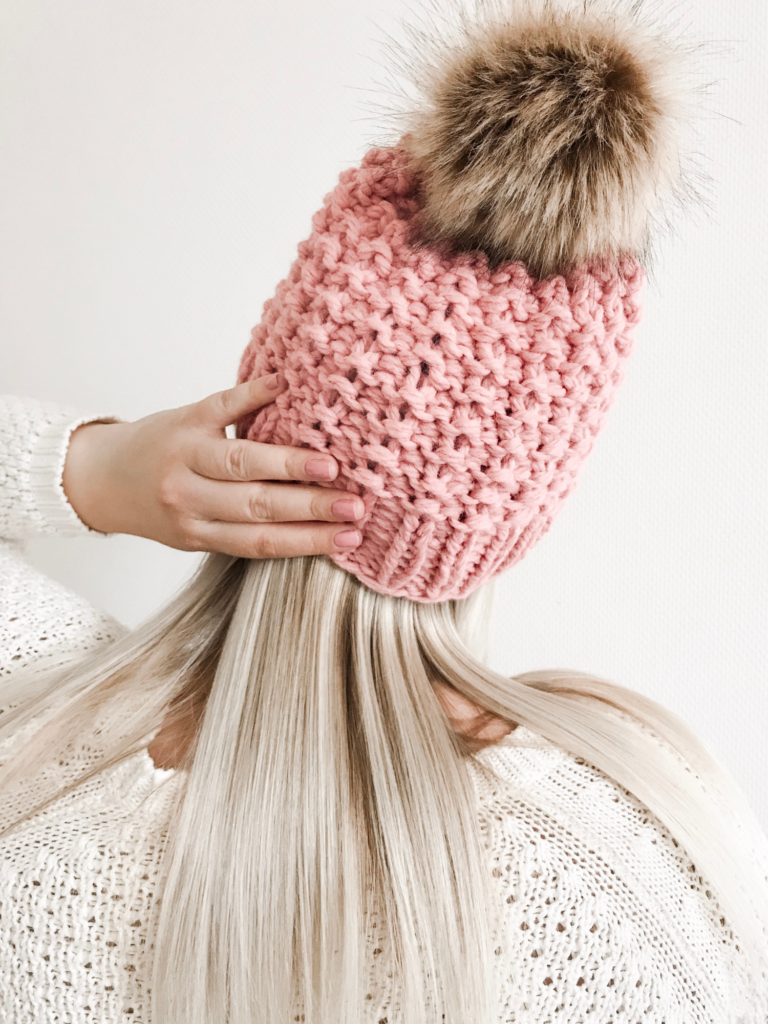
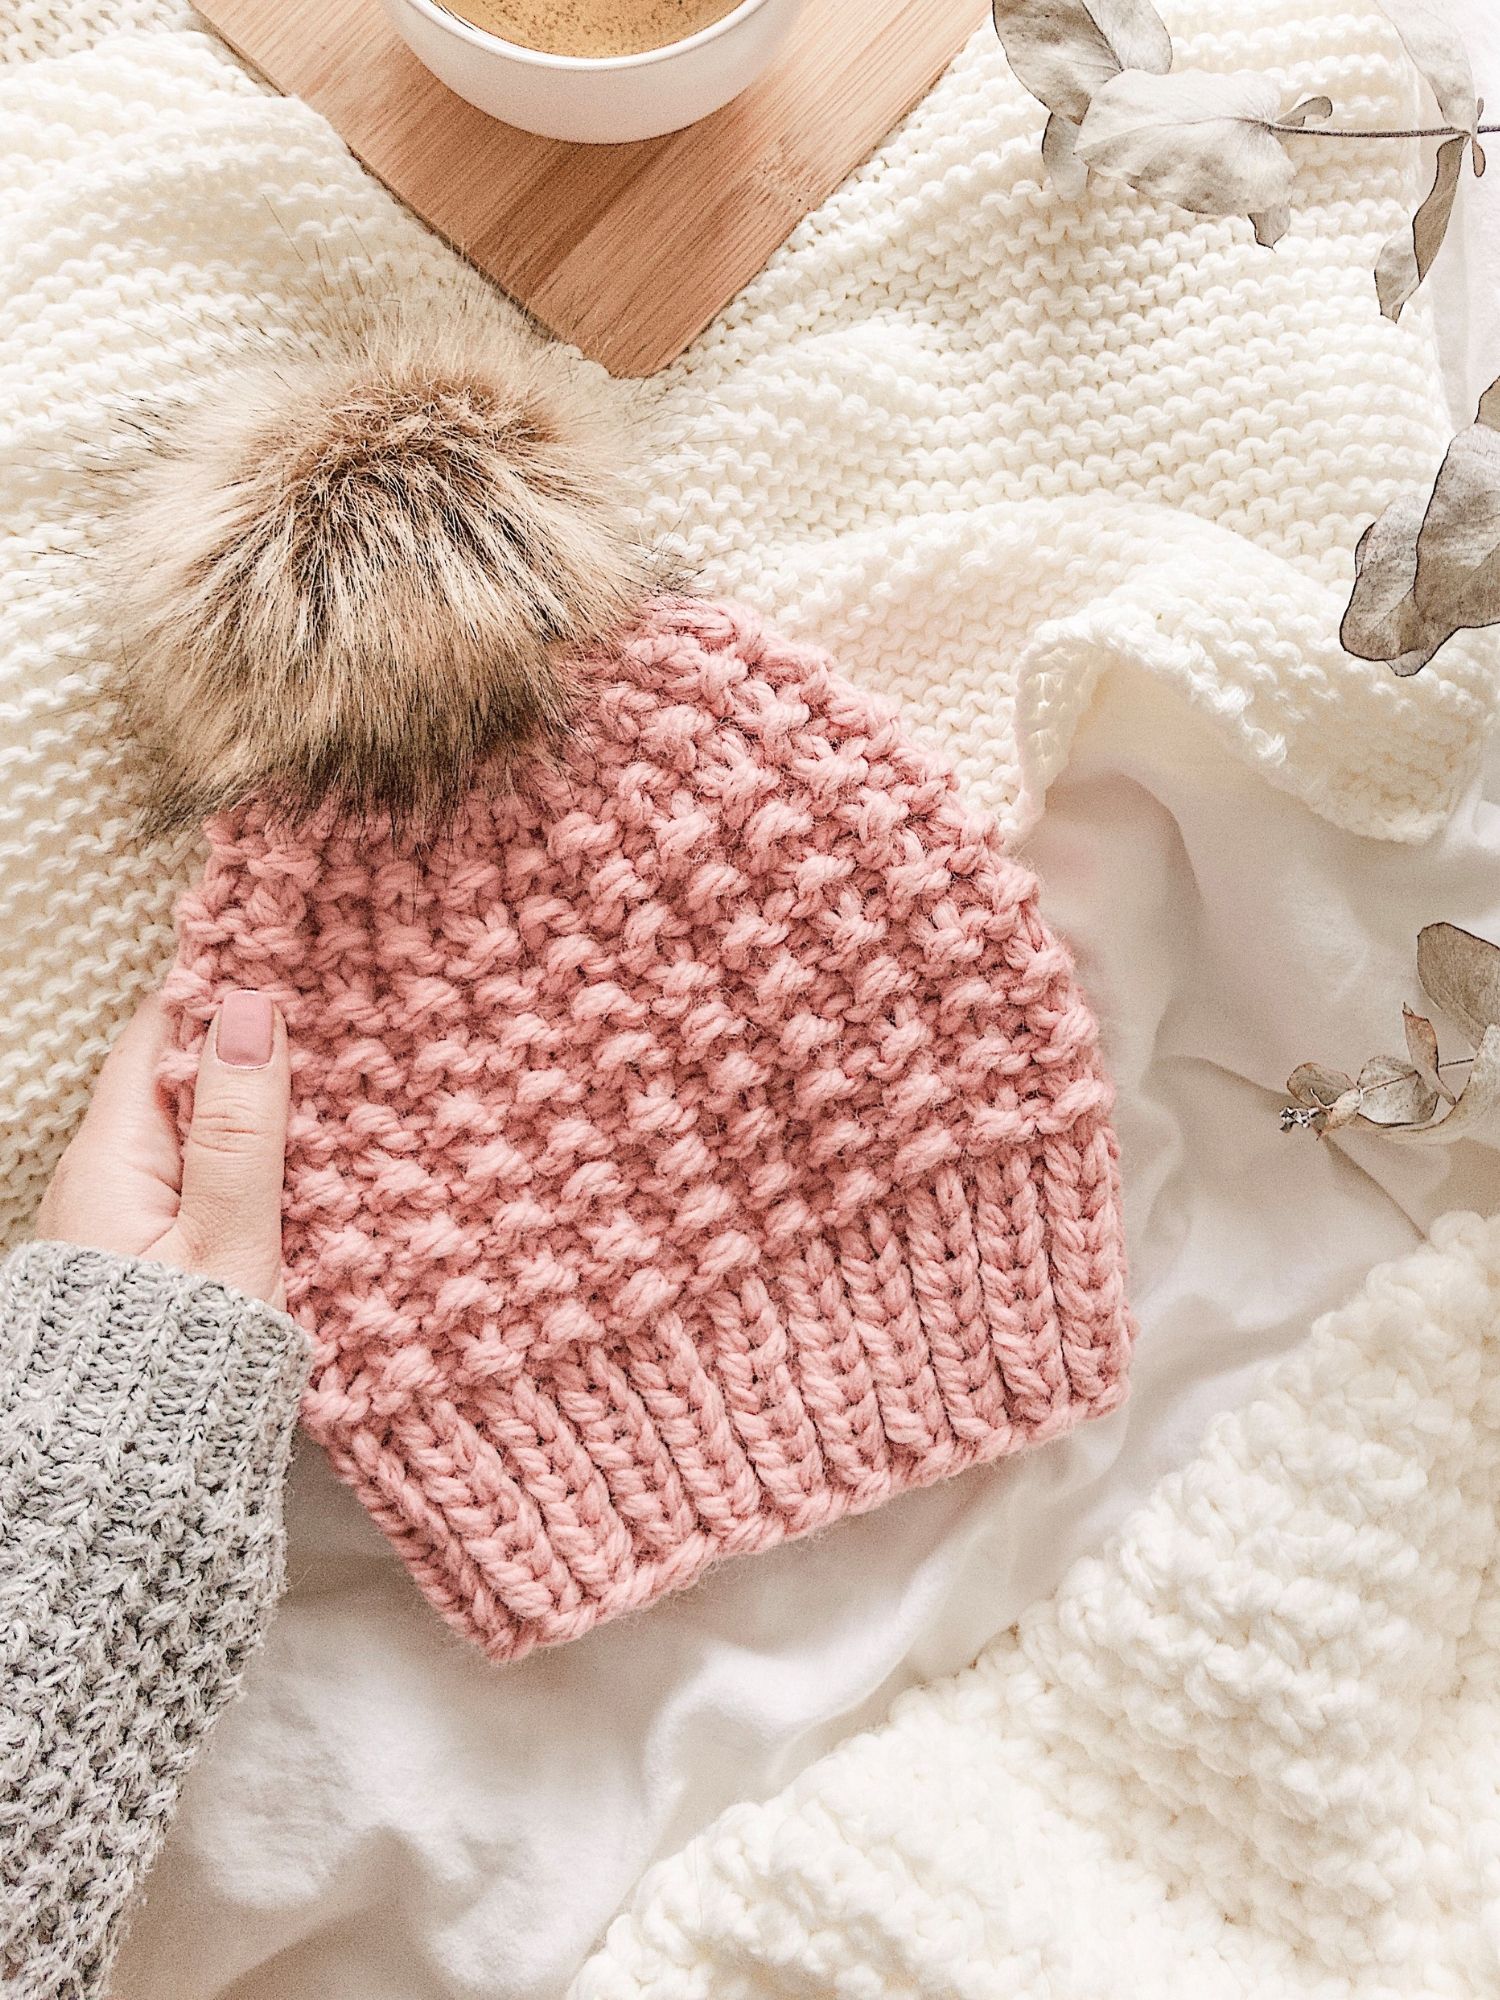
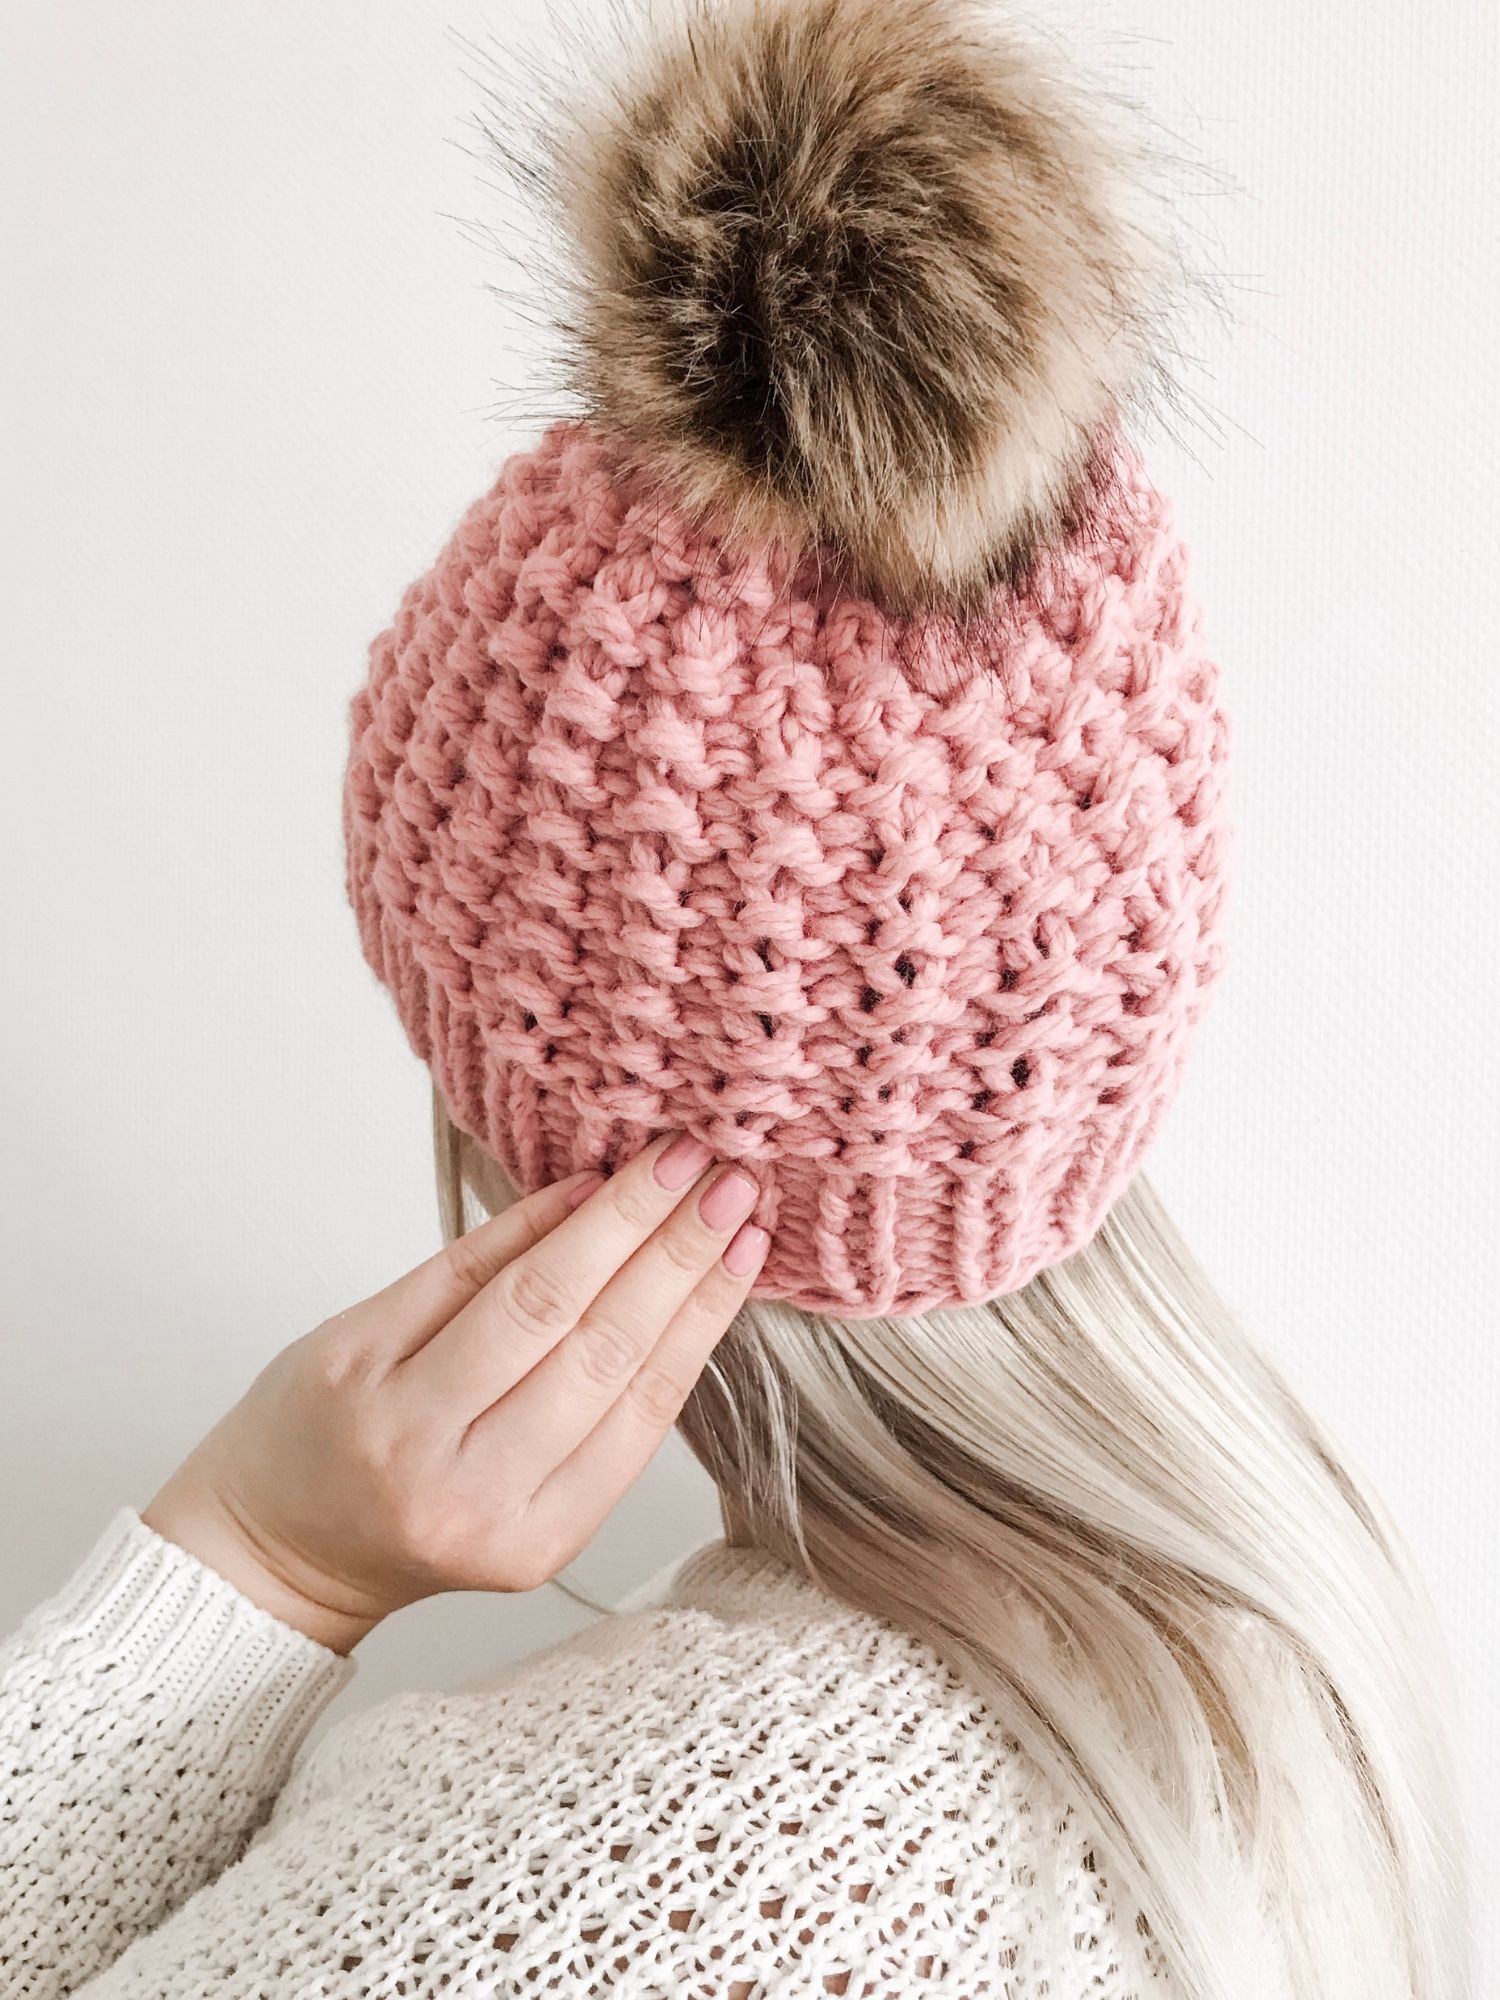
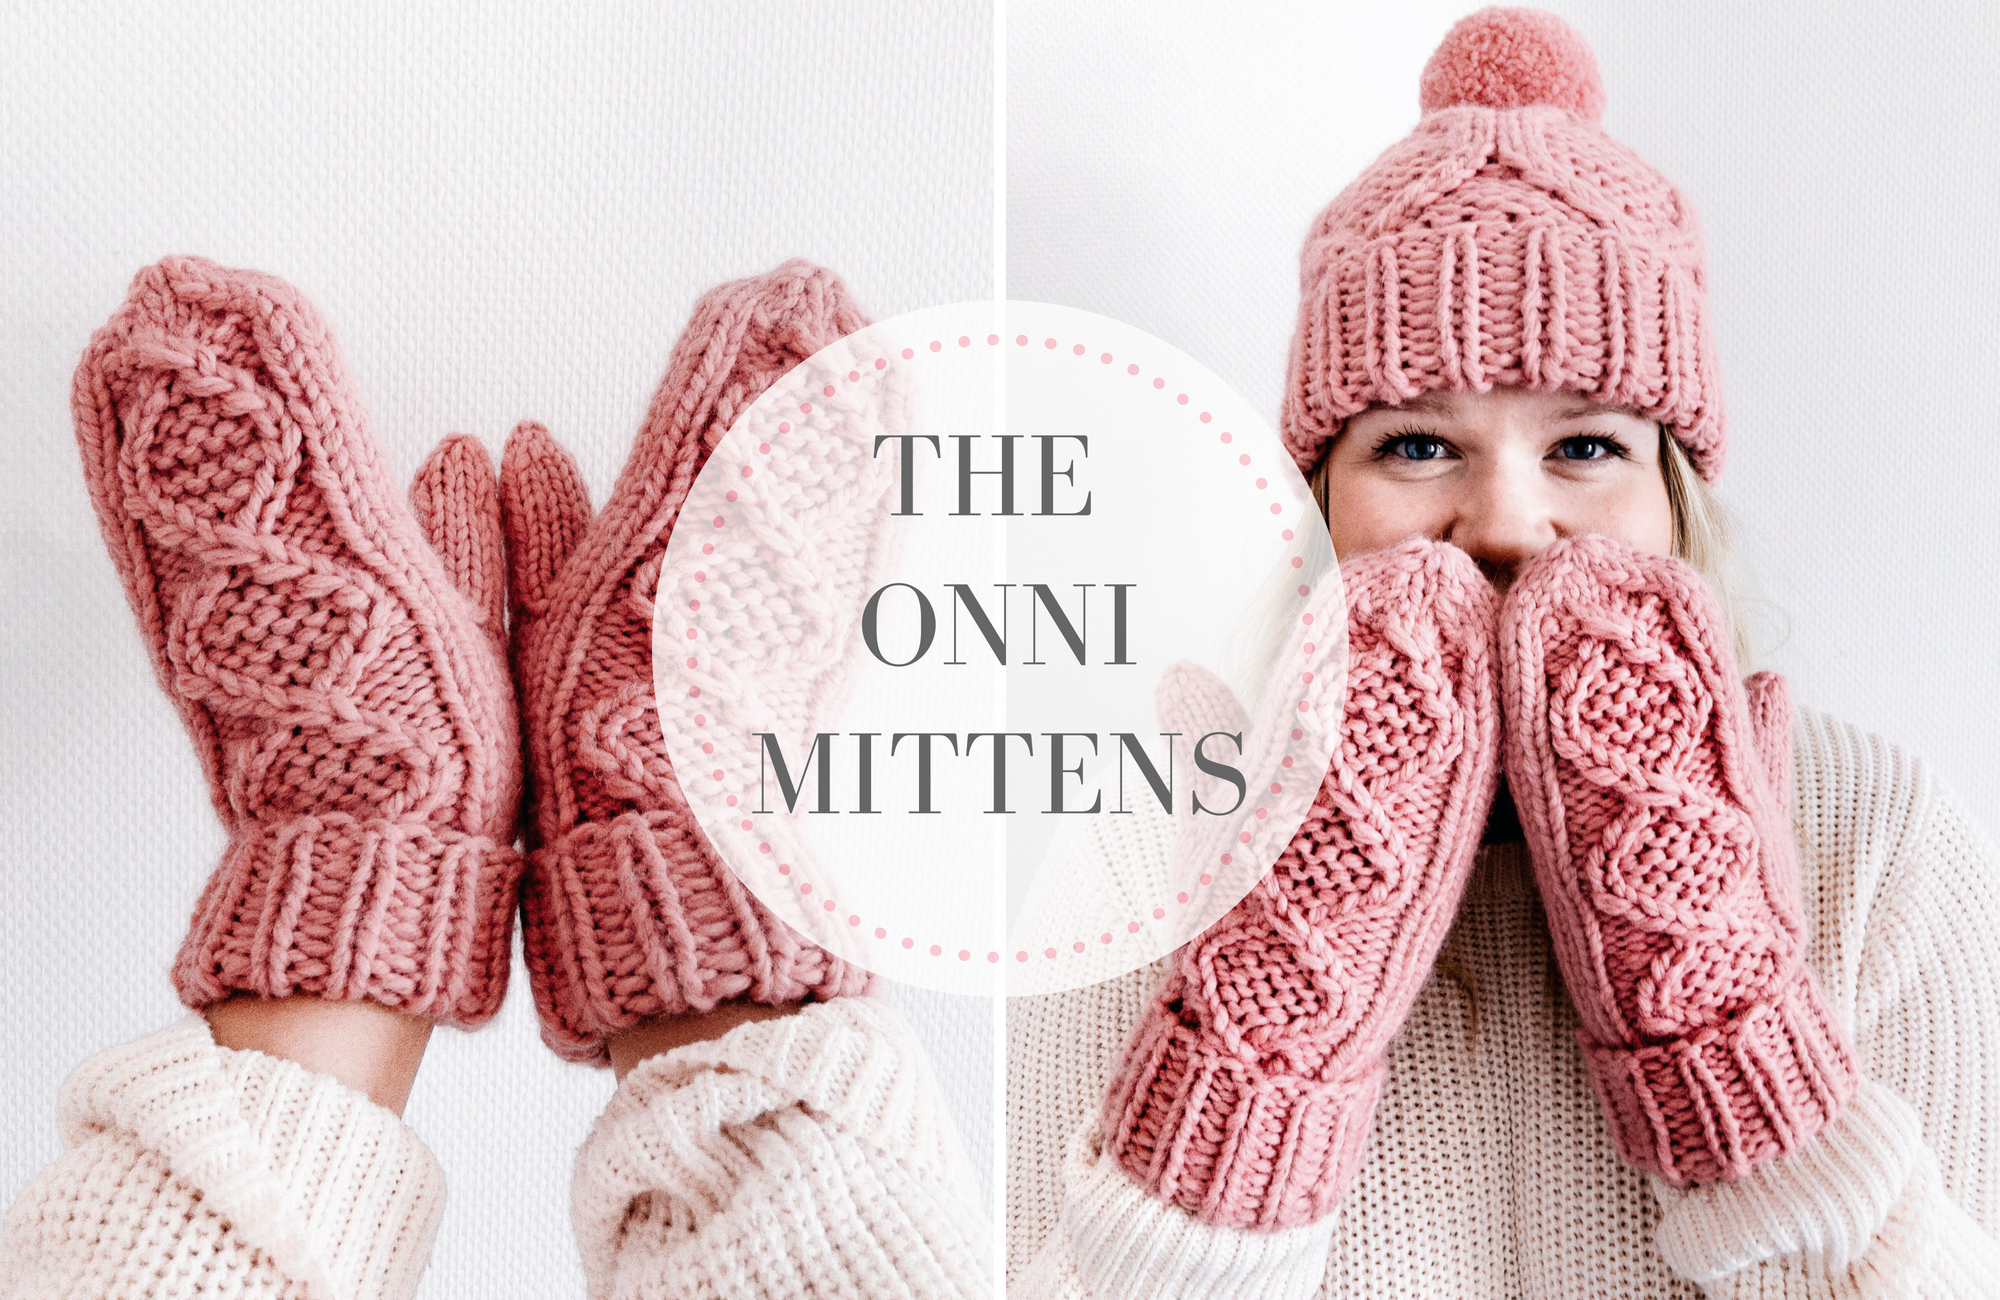
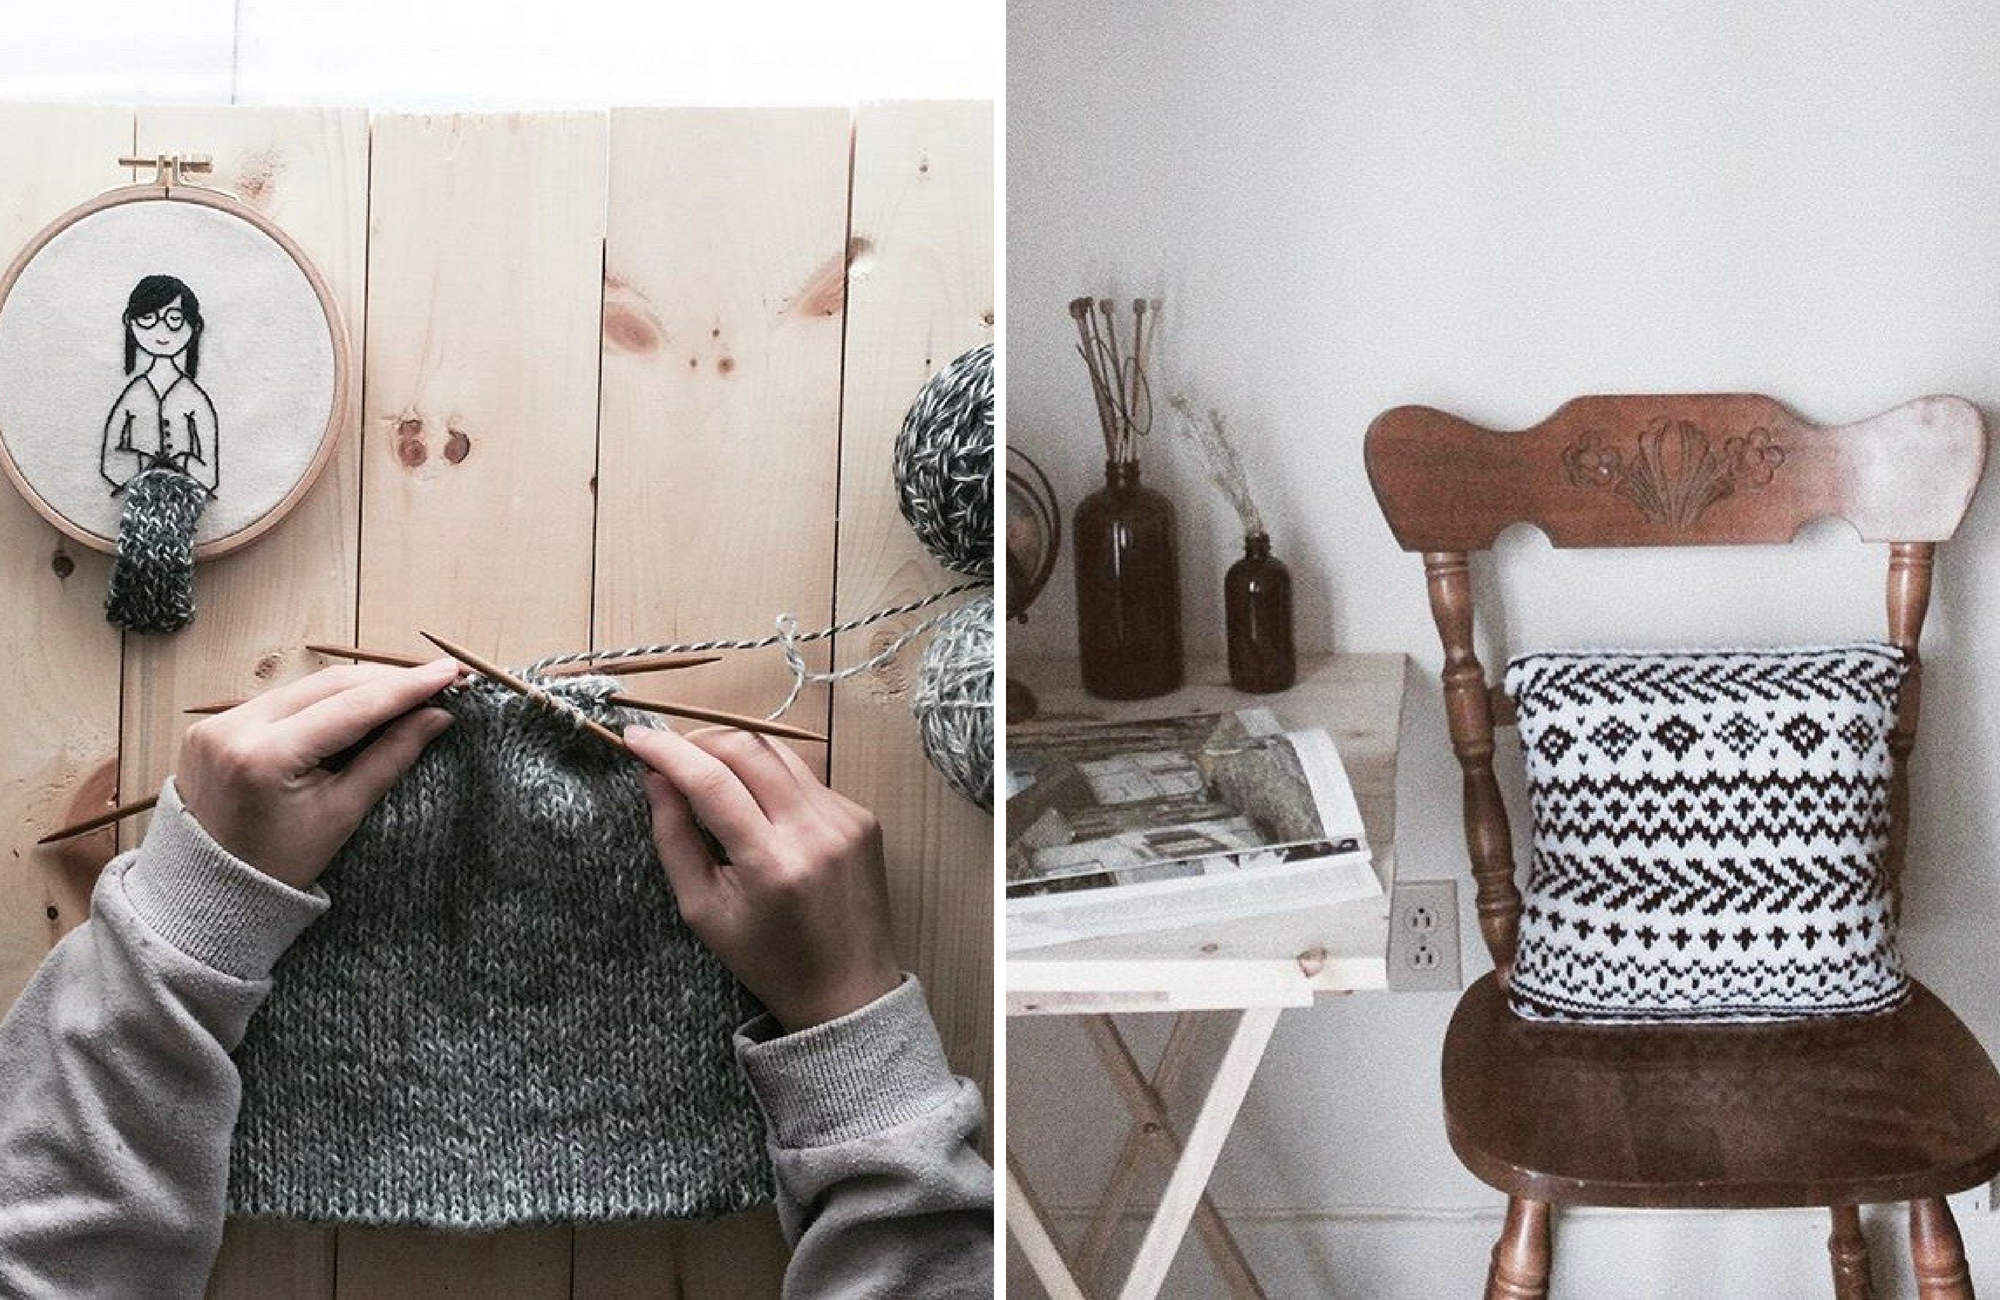
Hi there folks, so glad to see you’ve found your way to this free mitten pattern so let me present to you: The Onni Mittens! Onni is the Finnish word for happiness and if you ask me, keeping your hands warm when the first snow falls and you’re drinking hot chocolate from a take away cup while enjoying the cool, crisp air should definitely be the dictionary definition of comfy (might’ve gotten a little poetic there but let me have my delusions about the perfect winter that doesn’t include rain, wind that makes the snow hurt your face and gloomy skies!). But anyway, back to the mittens. They have an intermediate cable pattern, a double cuff and thanks to the bulky yarn, they work up in no time!
In this free pattern you’ll find full written instructions on how to make the mittens from start to finish and a knitting chart for the pattern as well. The pattern is actually worked like any other cable pattern or chart would be (even if it doesn’t really look like traditional cables…) but don’t let the cables scare you – once you get the hang of the pattern you’ll be knitting the mittens up in no time! In this mitten pattern, by slipping stitches onto the cable needle you’re actually changing the places of the knit and purl stitches and this way creating the diamond like shape.
If at any point you have any questions don’t hesitate to leave a comment on this post or send me an email at kati@katimaaria.com!
Also if you share a picture of the mittens on Instagram, please tag me @katimaariaknits and use the hashtag #onnimittens – I can’t wait to see your designs! You may also sell the finished product but please give credit to the designer.
So let’s get knitting!
Measurements
One size, will fit an average woman. Length with the cuff folded: approximately 24cm/9.4 inches
Yarn & needle variations
First things first: if you identify yourself as a tight knitter, opt for bigger needles!
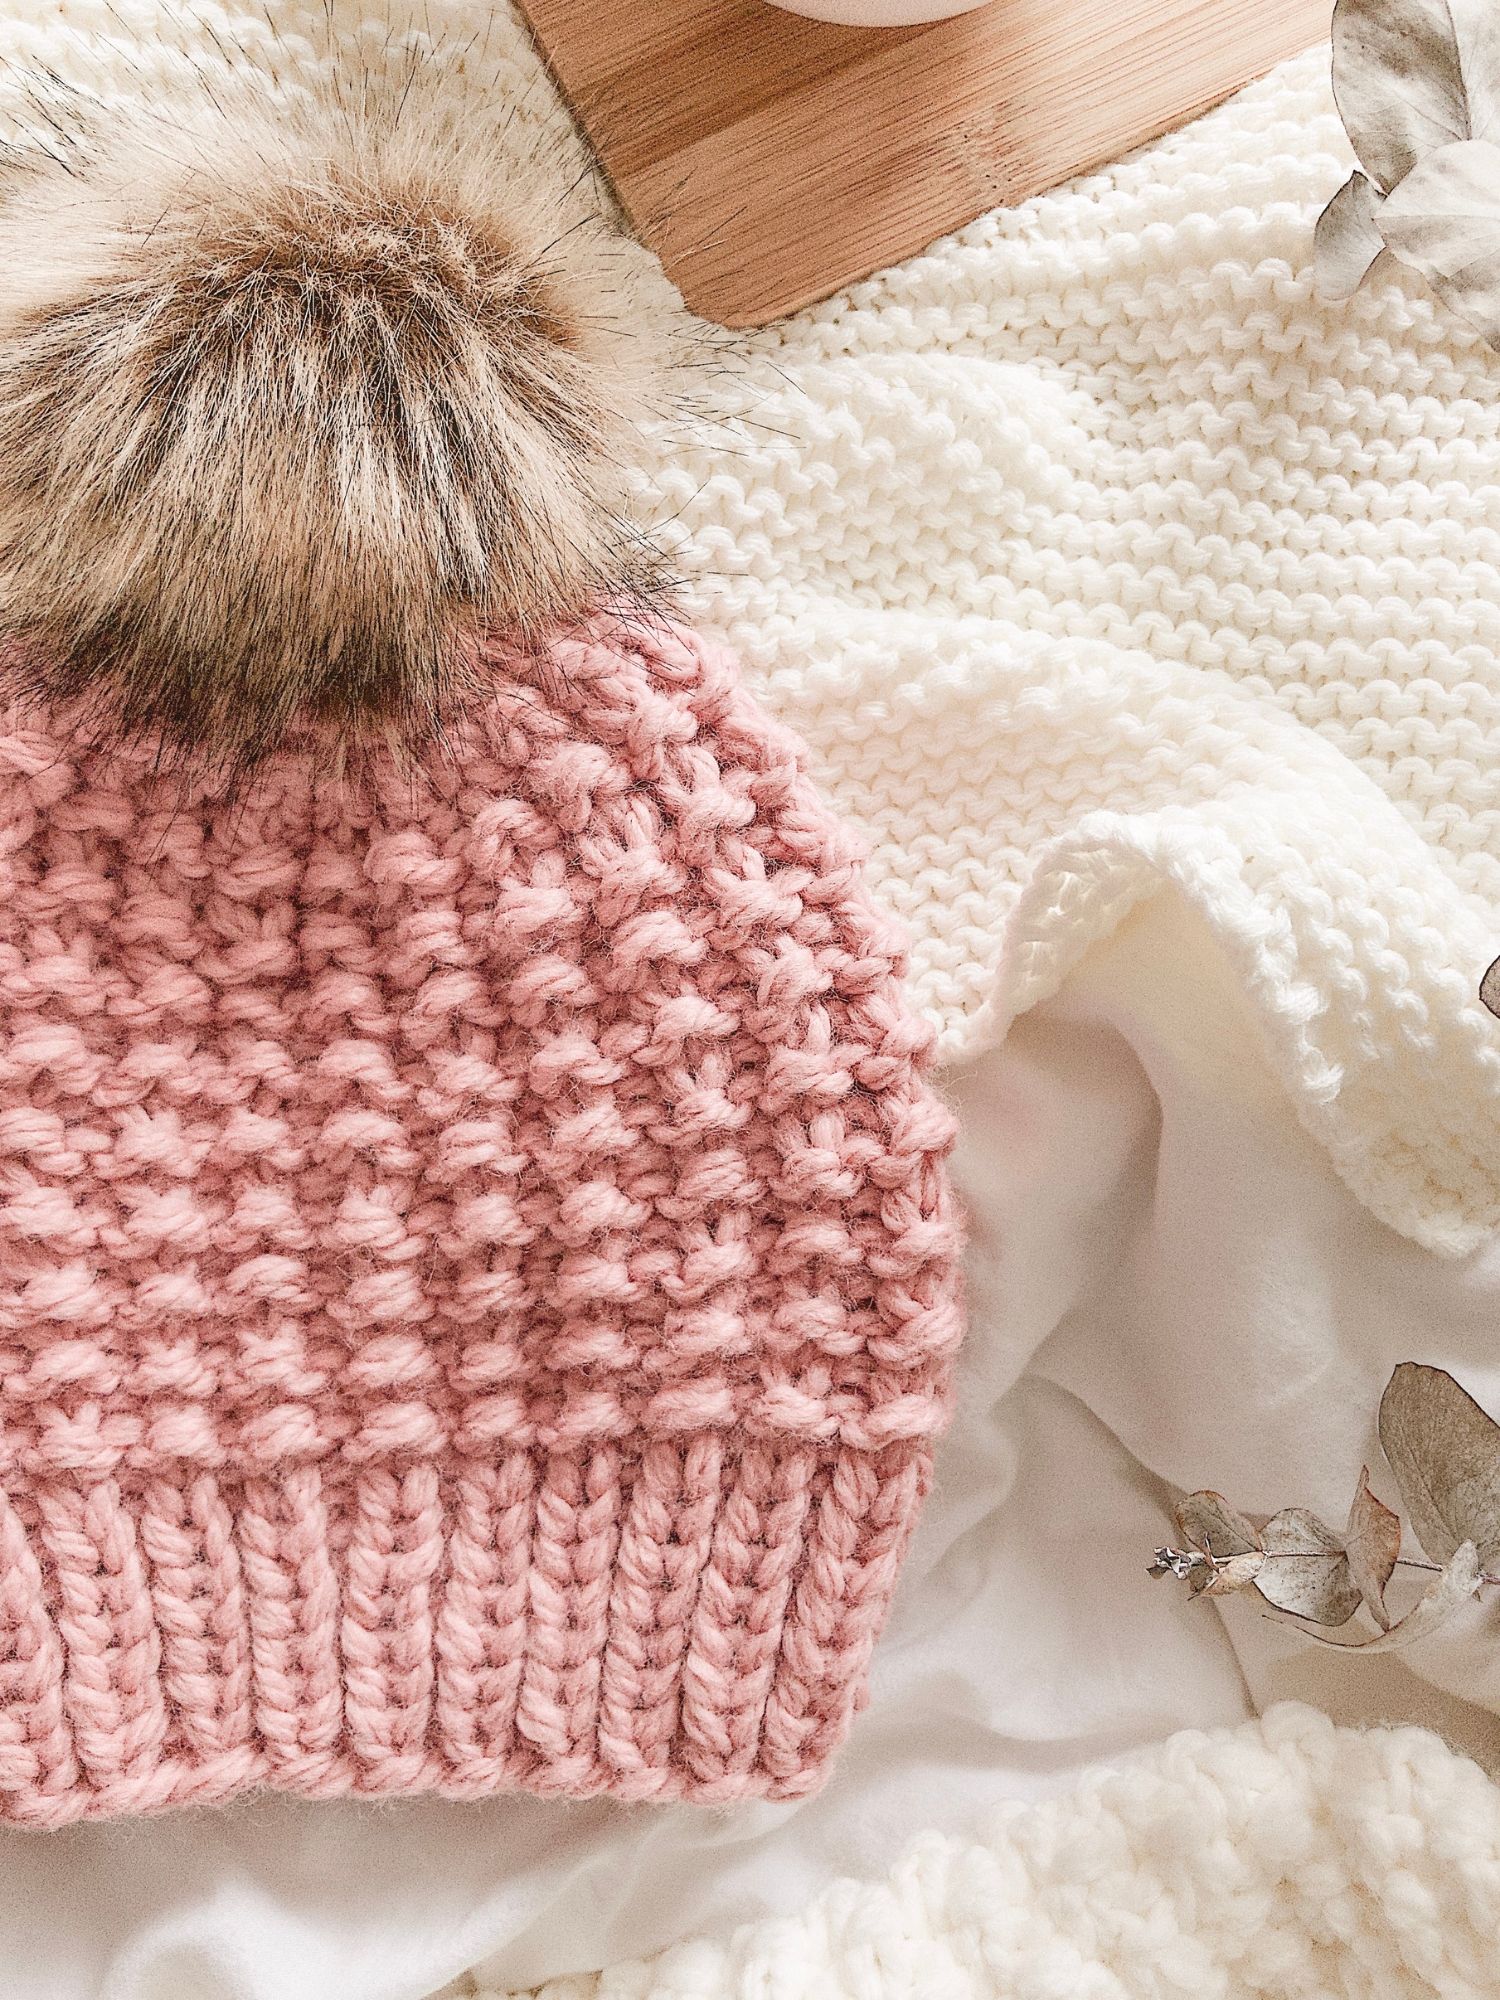
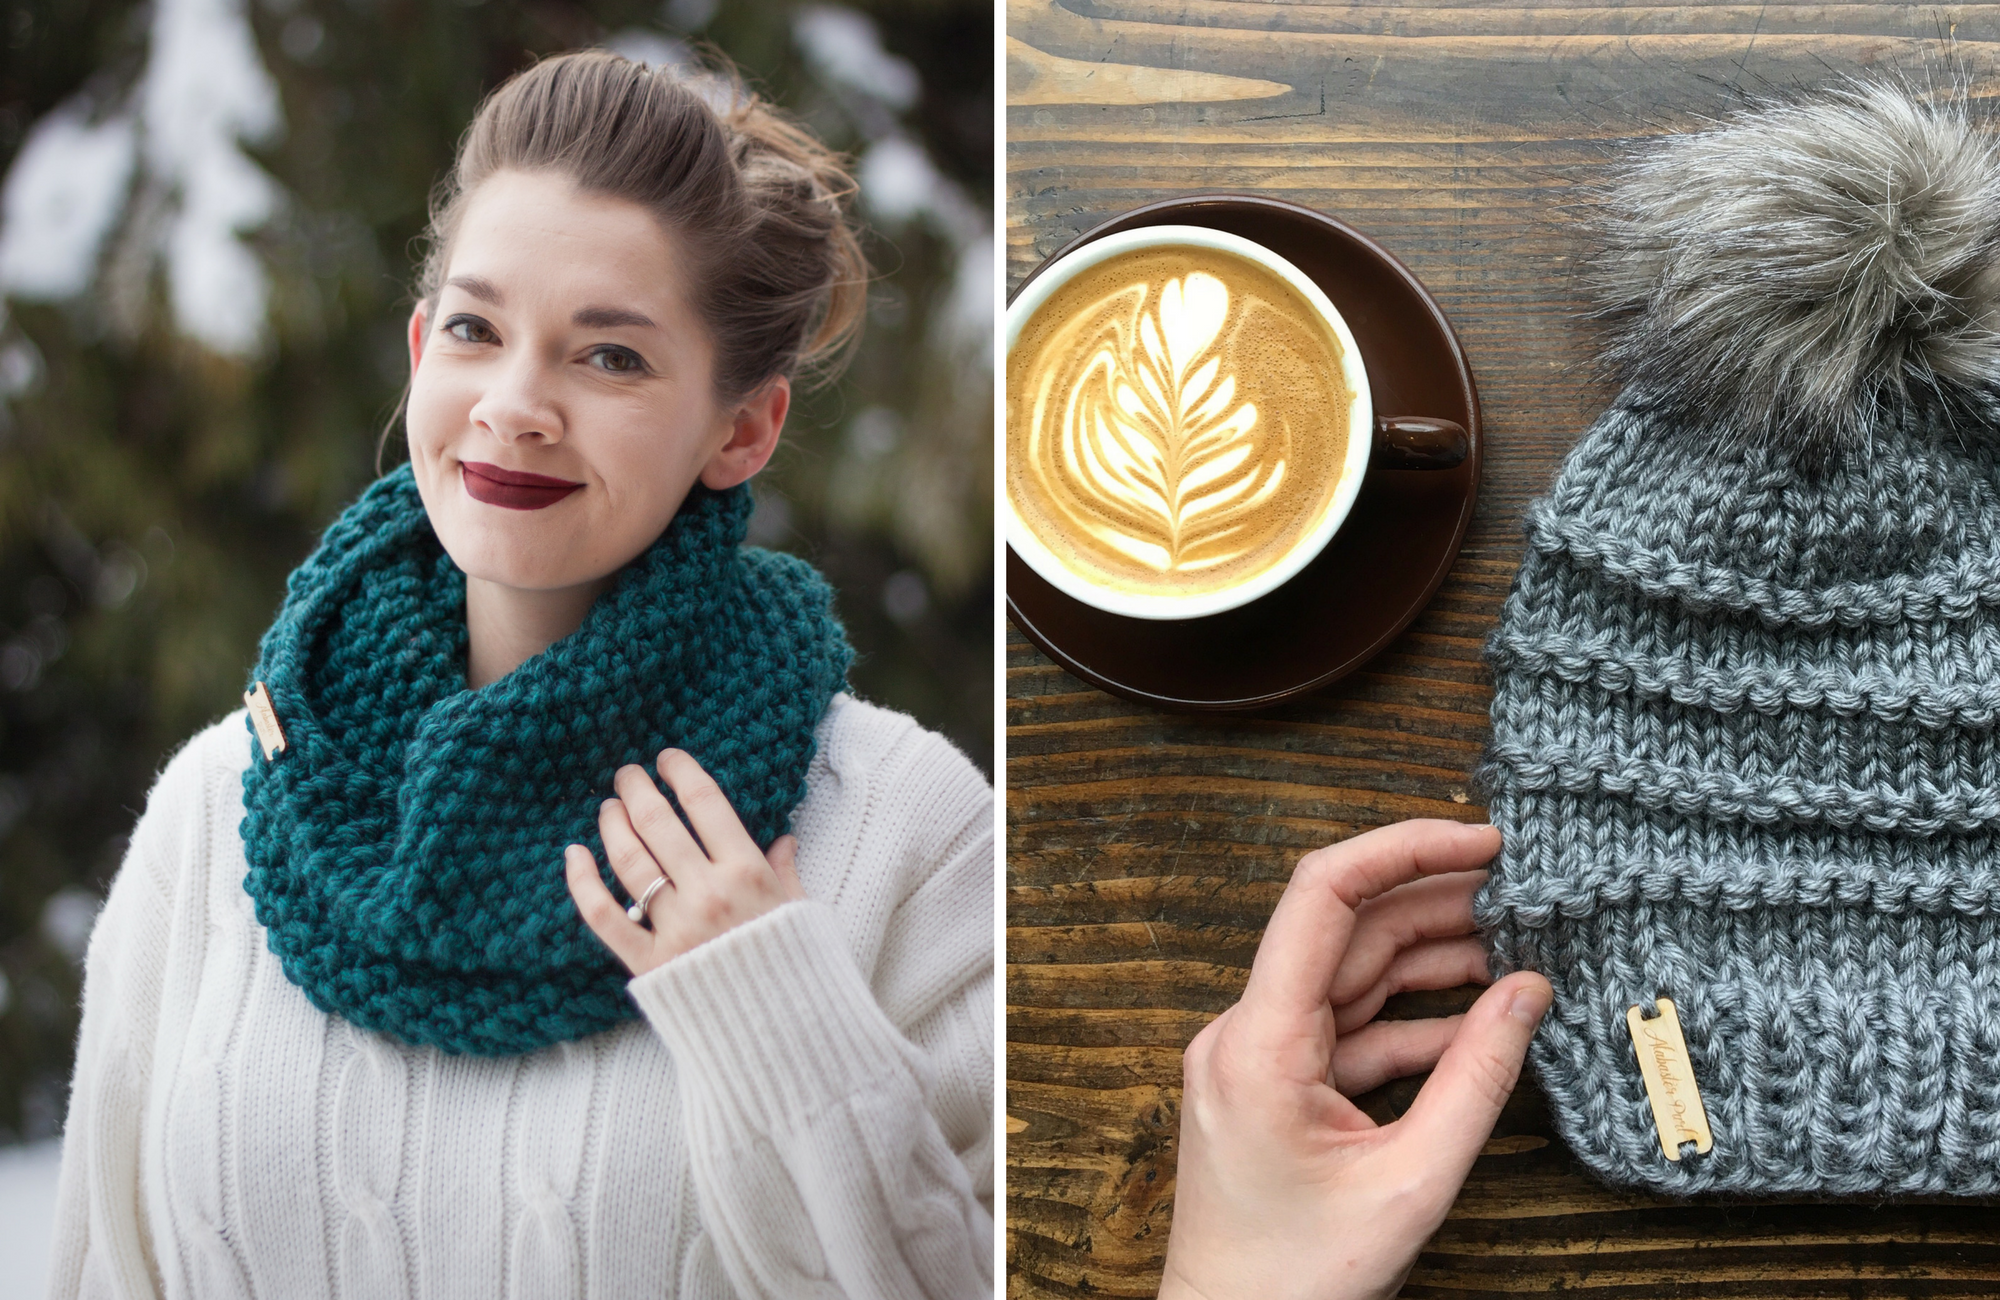
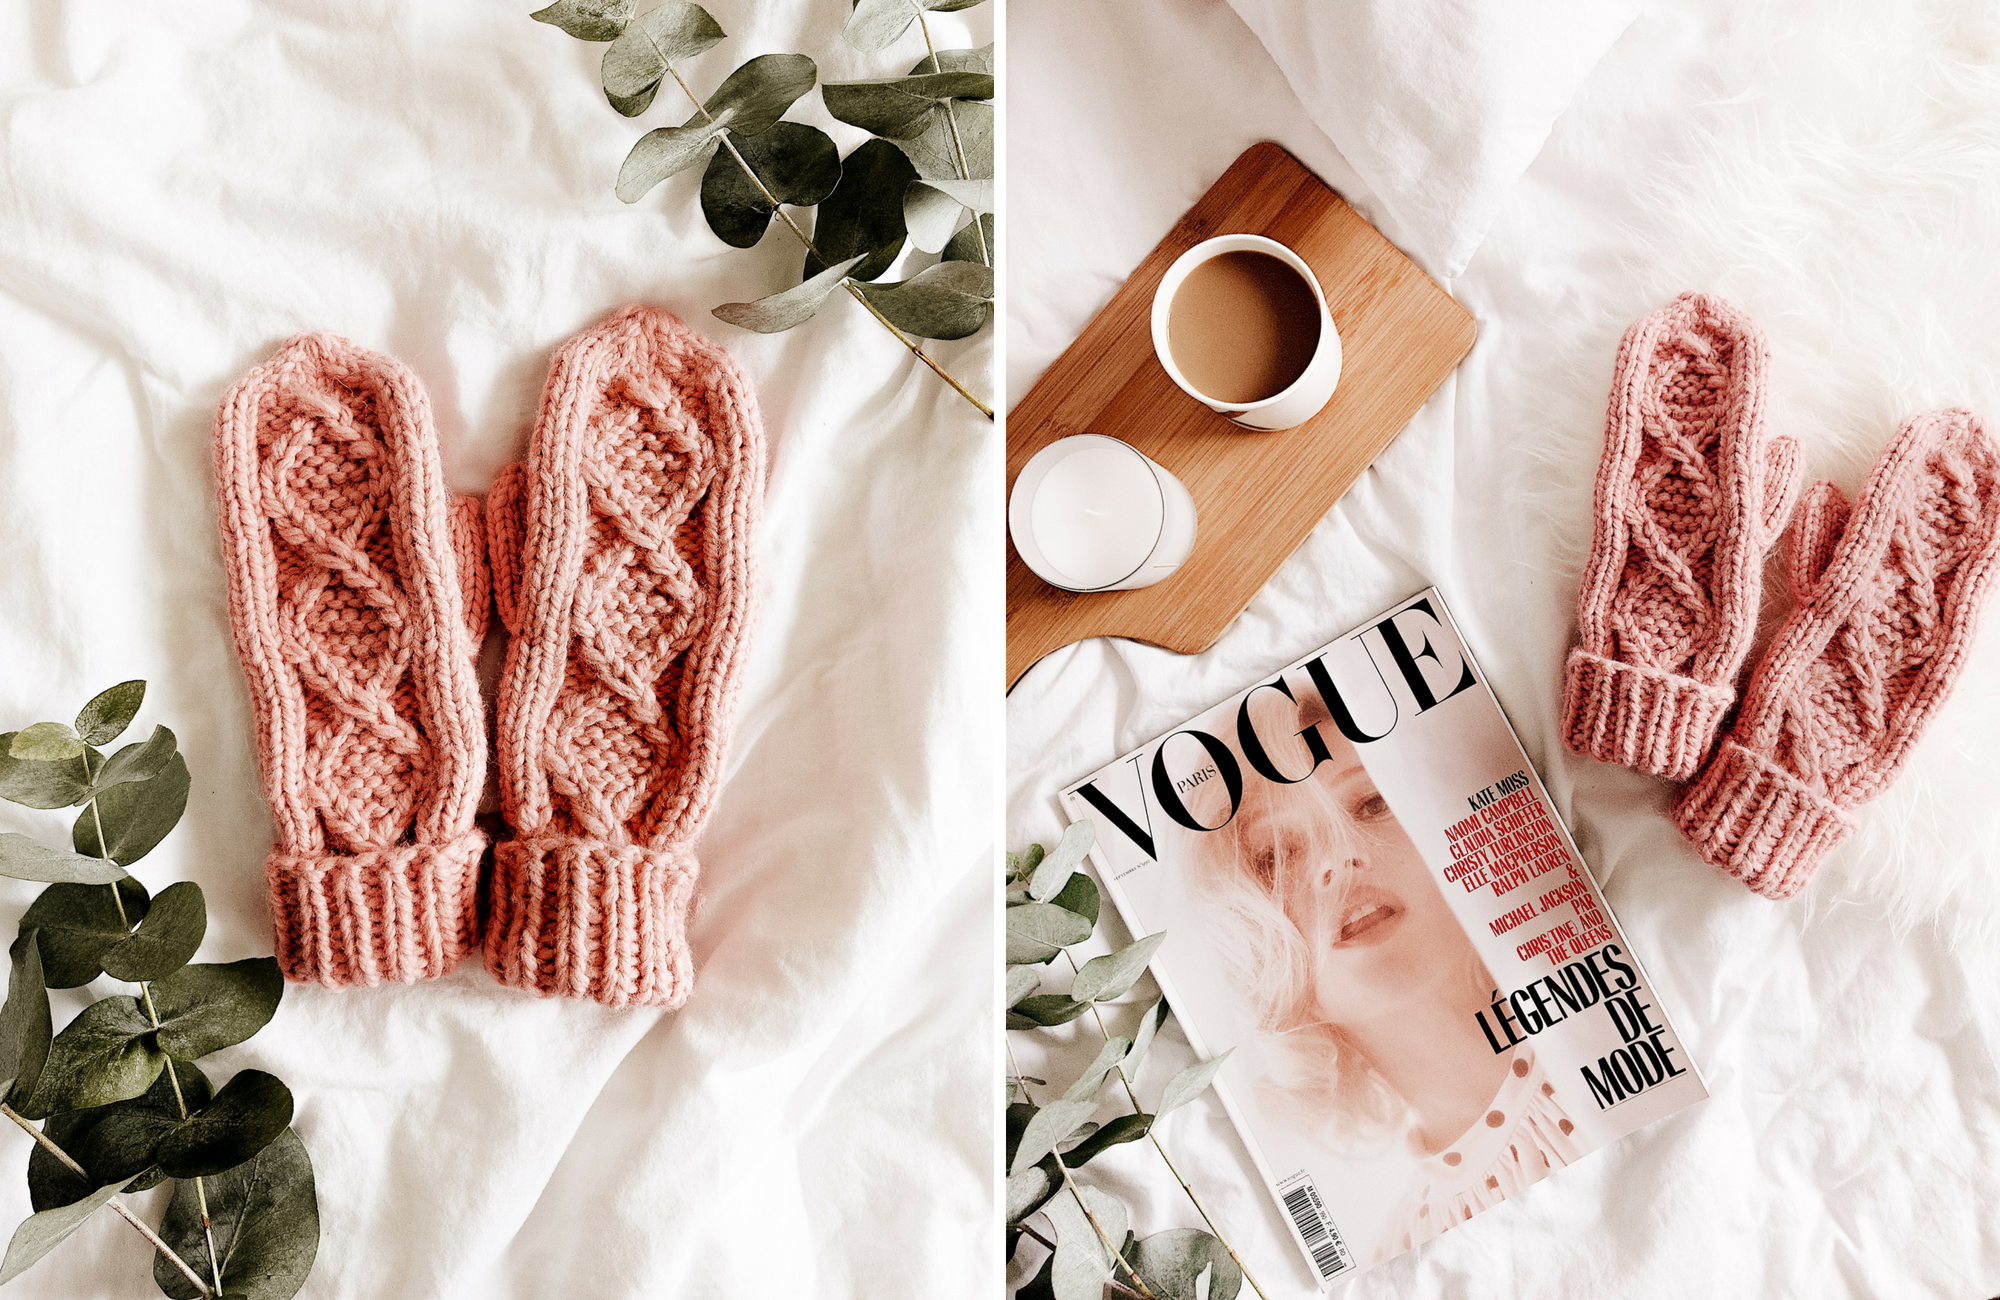
The pattern is designed for bulky yarn (weight category #5) and 6mm/US 10 needles. If you wish to make the mittens more chunky you can choose a bulkier yarn or for example knit with double stranded bulky yarn (like I did with the pink mittens) but keep the needle size at 6mm/US 10 or any needle size to obtain the gauge. I’ve found that this way, you’ll get more texture to the work but as the needle size remains the same and rather small for chunkier yarn, the gauge doesn’t radically change and you can still follow this pattern from start to finish.
For example, the chunky pink mittens in the pictures are knit with double stranded bulky yarn (Phil Looping by Phildar, find it here!) using 6mm/US 10 needles.
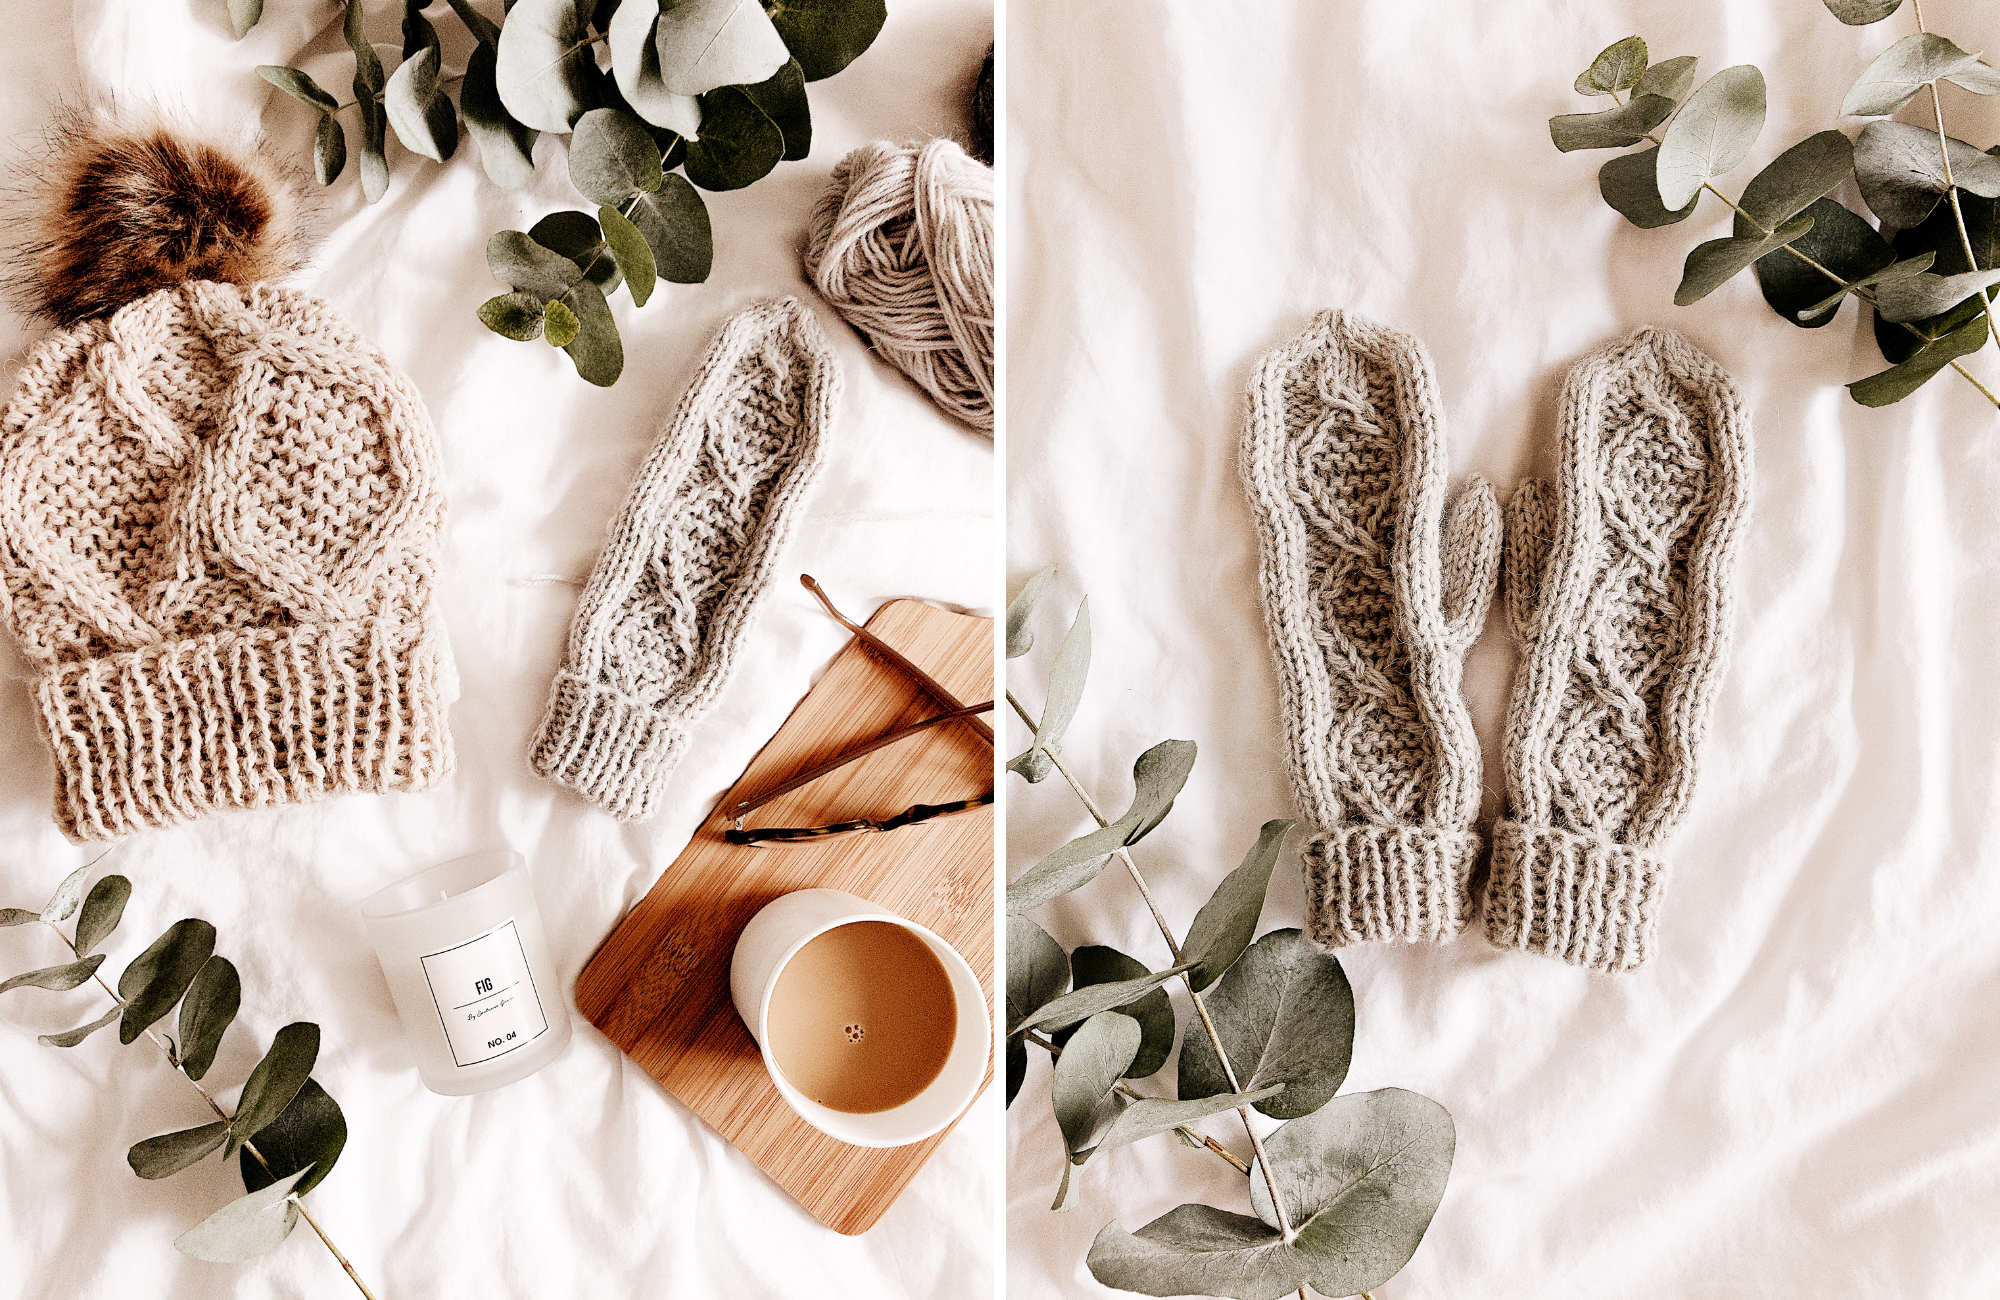
The grey mittens are knit with double stranded worsted yarn (Alpaca Wool by Novita, find it here!) using 6mm/US 10 needles, making the yarn an equivalent to a category #5 yarn.
Materials
- 6mm/US 10 DPNs or any needles to obtain the gauge (if you’re a tight knitter, give 8mm/US 11 needles a try for example!)
- Approximately 100m/109 yards of bulky yarn (weight category #5) with the following gauge: 10x10cm/4×4″ of stockinette stitch with 6mm/US 10 needles = 14 stitches, 22 rows
- Cable needle or extra DPN
- A little piece of contrasting color yarn for the thumb hole
- Tapestry needle
Abbreviations
K = knit
P = purl
M1 = make one stitch by picking up the yarn in between two stitches with your left needle and knitting it through the back loop
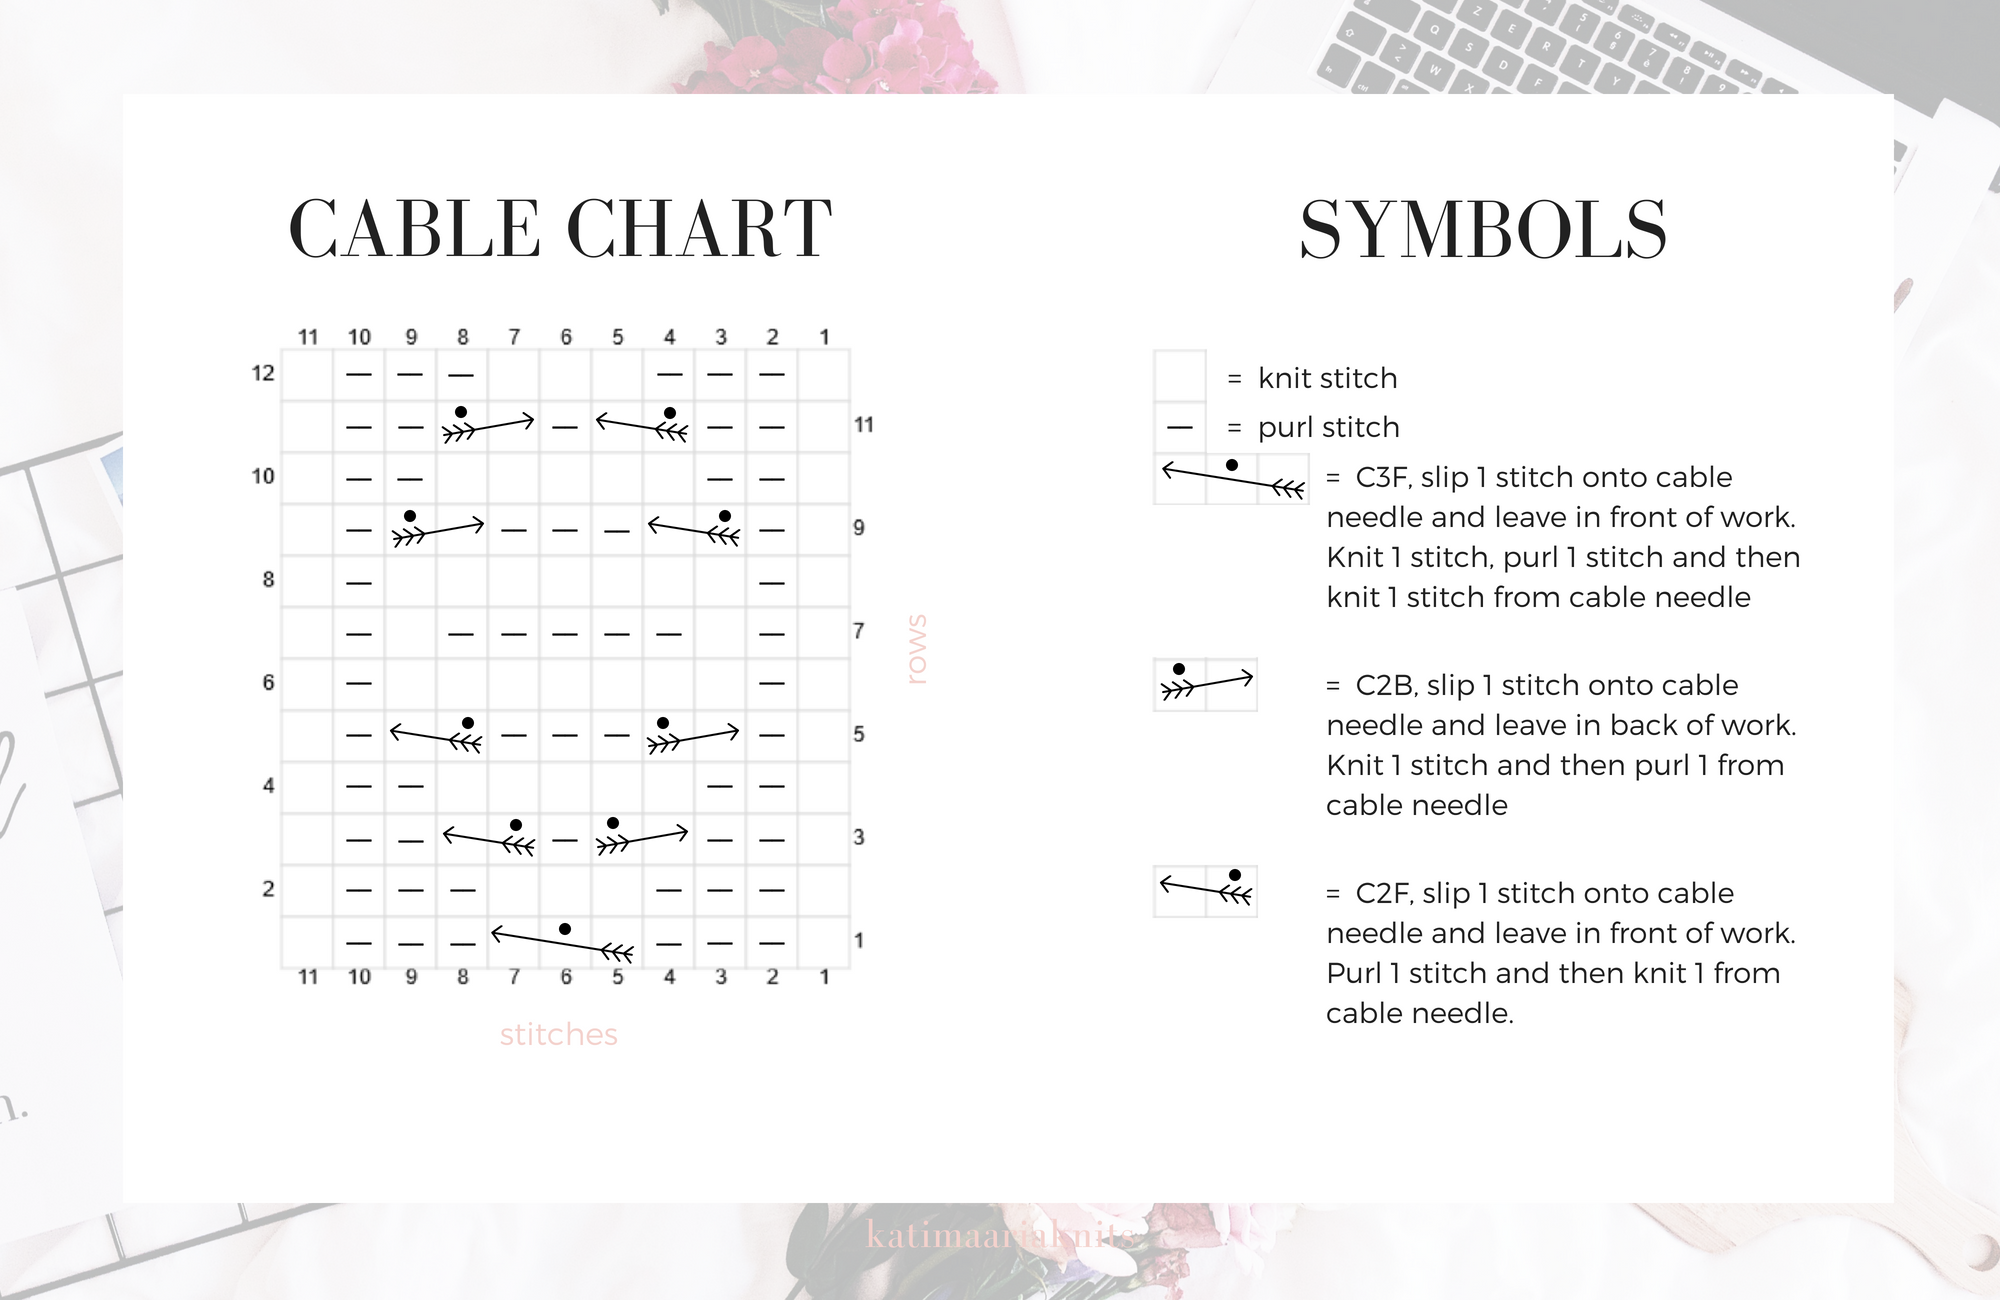
C3F = slip 1 stitch onto cable needle and leave in front of work. Knit 1 stitch, purl 1 stitch and then knit 1 stitch from cable needle.
C2B = slip 1 stitch onto cable needle and leave in back of work. Knit 1 stitch and then purl 1 from cable needle.
C2F = slip 1 stitch onto cable needle and leave in front of work. Purl 1 stitch and then knit 1 from cable needle.
K2tog = knit 2 stitches together
Skp = slip 1 stitch, knit 1 stitch and pass the slipped stitch over the knit stitch
Cuff
Cast on 24 stitches on your 6mm/US 10 needles. Work the mittens with 4 needles: keep the work on 3 needles in a triangle shape and knit with the fourth one. Share the stitches evenly so that you have 8 stitches per needle. The beginning of the round is between the 1st and the 3rd needle (see needle map below!).
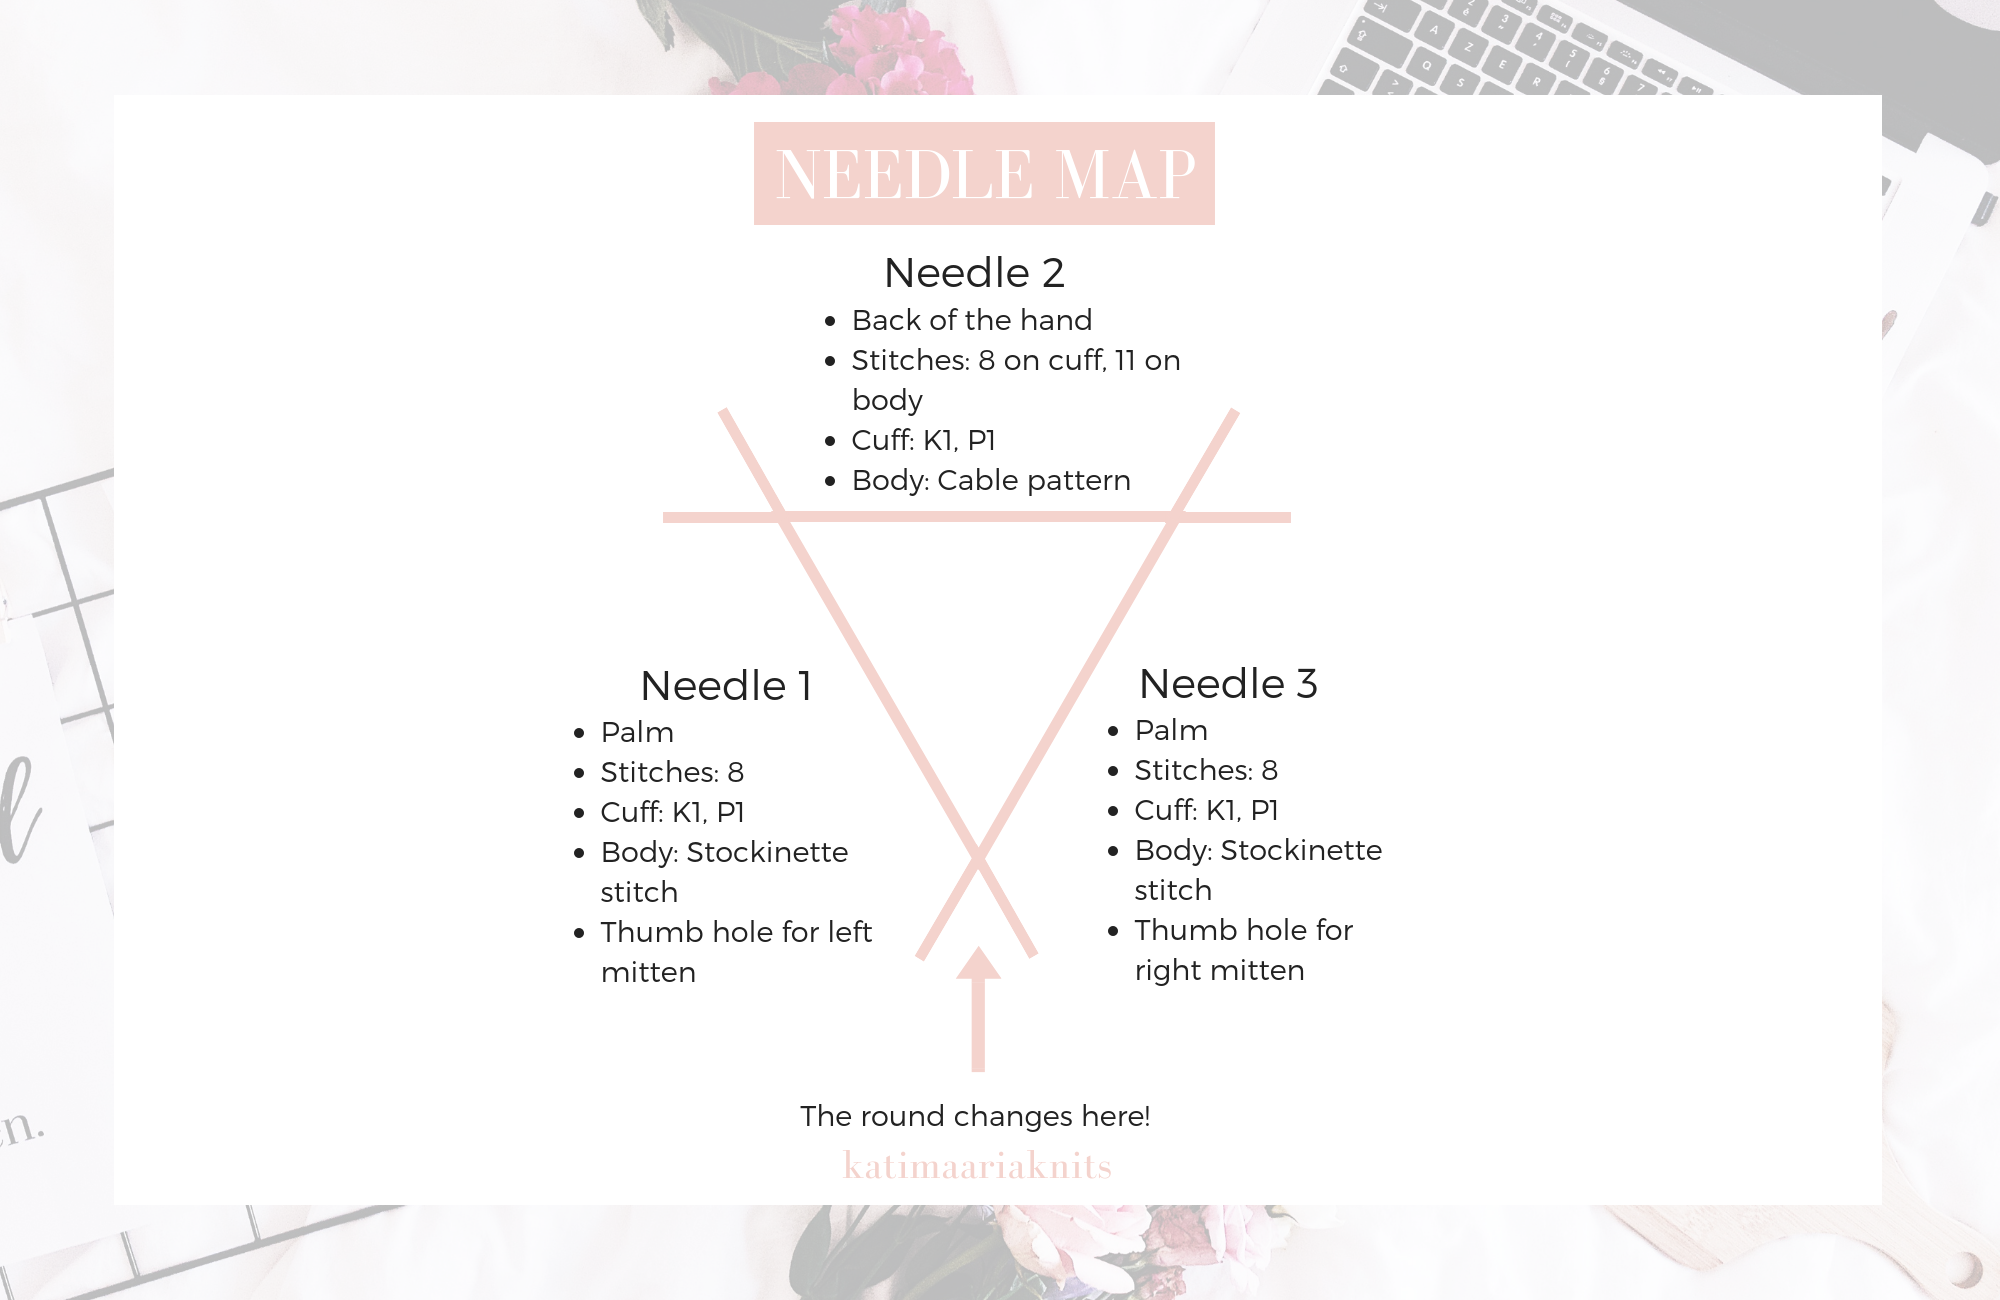
Click the image to open it bigger!
Join the work in the round and *K1, P1* all around (round 1) and repeat round 1 for another 17 times, knitting a total of 18 rounds for the cuff or until it measures 10cm/4 inches.
Increase round
1st needle: no increases, knit 8 stitches
2nd needle: increase 3 stitches evenly, for example in the following way:
- K1, M1, K3, M1, K3, M1, K1
3rd needle: no increases, knit 8 stitches
Body
After the increases, you’ll have 27 stitches on the work: 8 stitches on needle 1, 11 stitches on needle 2 and 8 stitches on needle 3. You’ll knit stockinette stitch on the 1st and the 3rd needle until the end of the mitten and work the cable pattern on the 2nd needle.
The following written instructions are only for the 2nd needle, knit stockinette stitch on the 1st and the 3rd needle.
Round 1: K1, P3, C3F, P3, K1
Round 2: K1, P3, K3, P3, K1
Round 3: K1, P2, C2B, P1, C2F, P2, K1
Round 4: K1, P2, K5, P2, K1
Round 5: K1, P1, C2B, P3, C2F, P1, K1
Round 6: K1, P1, K7, P1, K1
Round 7: K1, P1, K1, P5, K1, P1, K1
Round 8: K1, P1, K7, P1, K1
Round 9: K1, P1, C2F, P3, C2B, P1, K1
Round 10: K1, P2, K5, P2, K1
Round 11: K1, P2, C2F, P1, C2B, P2, K1
Round 12: K1, P3, K3, P3, K1
The knitting chart for the cable pattern can be found at the end of the post!
Repeat rounds 1-12 twice more (you’ll knit the rounds three times total) and finish by knitting round 1 once more before starting the decreases.
When you’re knitting rounds 1-12 for the second time, make the thumb hole on round 4 (round 16 on the total row count after starting the cable pattern).
- For the right mitten, make the thumb hole on the 3rd needle: knit 2 stitches, then knit 4 stitches with a contrasting color yarn and move these 4 stitches back to the left hand needle. Finish the needle by knitting stockinette stitch and continue onto round 5.
- For the left mitten, make the thumb hole on the 1st needle: knit 2 stitches, then knit 4 stitches with a contrasting color yarn and move these 4 stitches back to the left hand needle. Finish the needle by knitting stockinette stitch and continue the round normally.
Decreasing
Round 1:
- 1st needle: K5, K2tog, K1
- 2nd needle: skp, K7, K2tog
- 3rd needle: K1, skp, K5
- stitch count after the round: 23
Round 2:
- 1st needle: K4, K2 tog, K1
- 2nd needle: skp, K5, K2tog
- 3rd needle: K1, skp, K4
- stitch count after the round: 19
Round 3:
- 1st needle: K3, K2tog, K1
- 2nd needle: skp, K3, K2tog
- 3rd needle: K1, skp, K3
- stitch count after the round: 15
Round 4:
- 1st needle: K2, K2tog, K1
- 2nd needle: skp, K1, K2tog
- 3rd needle: K1, skp, K2
- stitch count after the round: 11
Round 5:
- 1st needle: K1, K2tog, K1
- 2nd needle: K3
- 3rd needle: K1, skp, K1
- stitch count after the round: 9
Cut yarn and pull through remaining 9 stitches, tighten and secure the end well by weaving in on the wrong side of the work.
Thumb
Remove the help yarn and pick up the 7 stitches the yarn was holding. Pick up 5 extra stitches from around the thumb hole adding the total amount of stitches to 12 (if you want to make a bigger thumb you can pick more stitches from around the thumb hole). Share the stitches evenly on 3 needles so that you have 4 stitches per needle. To avoid stretching the stitches and making holes at the core of the thumb, knit all the stitches through the back loop on the first round. After the first round, continue knitting stockinette stitch until the thumb covers approximately half of your thumb nail.
Decrease by knitting 2 stitches together at the end of every needle (repeat on every round) until you have a total of 6 stitches left on the thumb. Cut yarn and pull through remaining 6 stitches, tighten and secure the end well by weaving in on the wrong side of the work.
Knitting chart
And here’s the visual for the cable pattern! After knitting the cuff, you’ll repeat rows 1-12 for a total of three times and then knit row 1 once more before starting the decreases (no chart for the decreasing part so head back up a little to see the written instructions!).
Click the image to open it bigger!
And there you have it, your Onni mittens are now ready (you see, I told you they would work up in no time)!
I hope you’ve enjoyed this pattern and will be making all the mittens for the winter!
xx, Kati