Hi friends! If you’re anything like me, you’ll often find yourself in front of your laptop actively thinking about writing a new blog post but seem to have lost all your inspiration, motivation and ability to say anything remotely interesting. But not to worry, I’m here to the rescue (both yours and mine)! In this blog post, I’ll be sharing with you my 40 blog post ideas for makers – I hope these will inspire you and maybe even encourage you to start your own blog if you don’t have one yet!
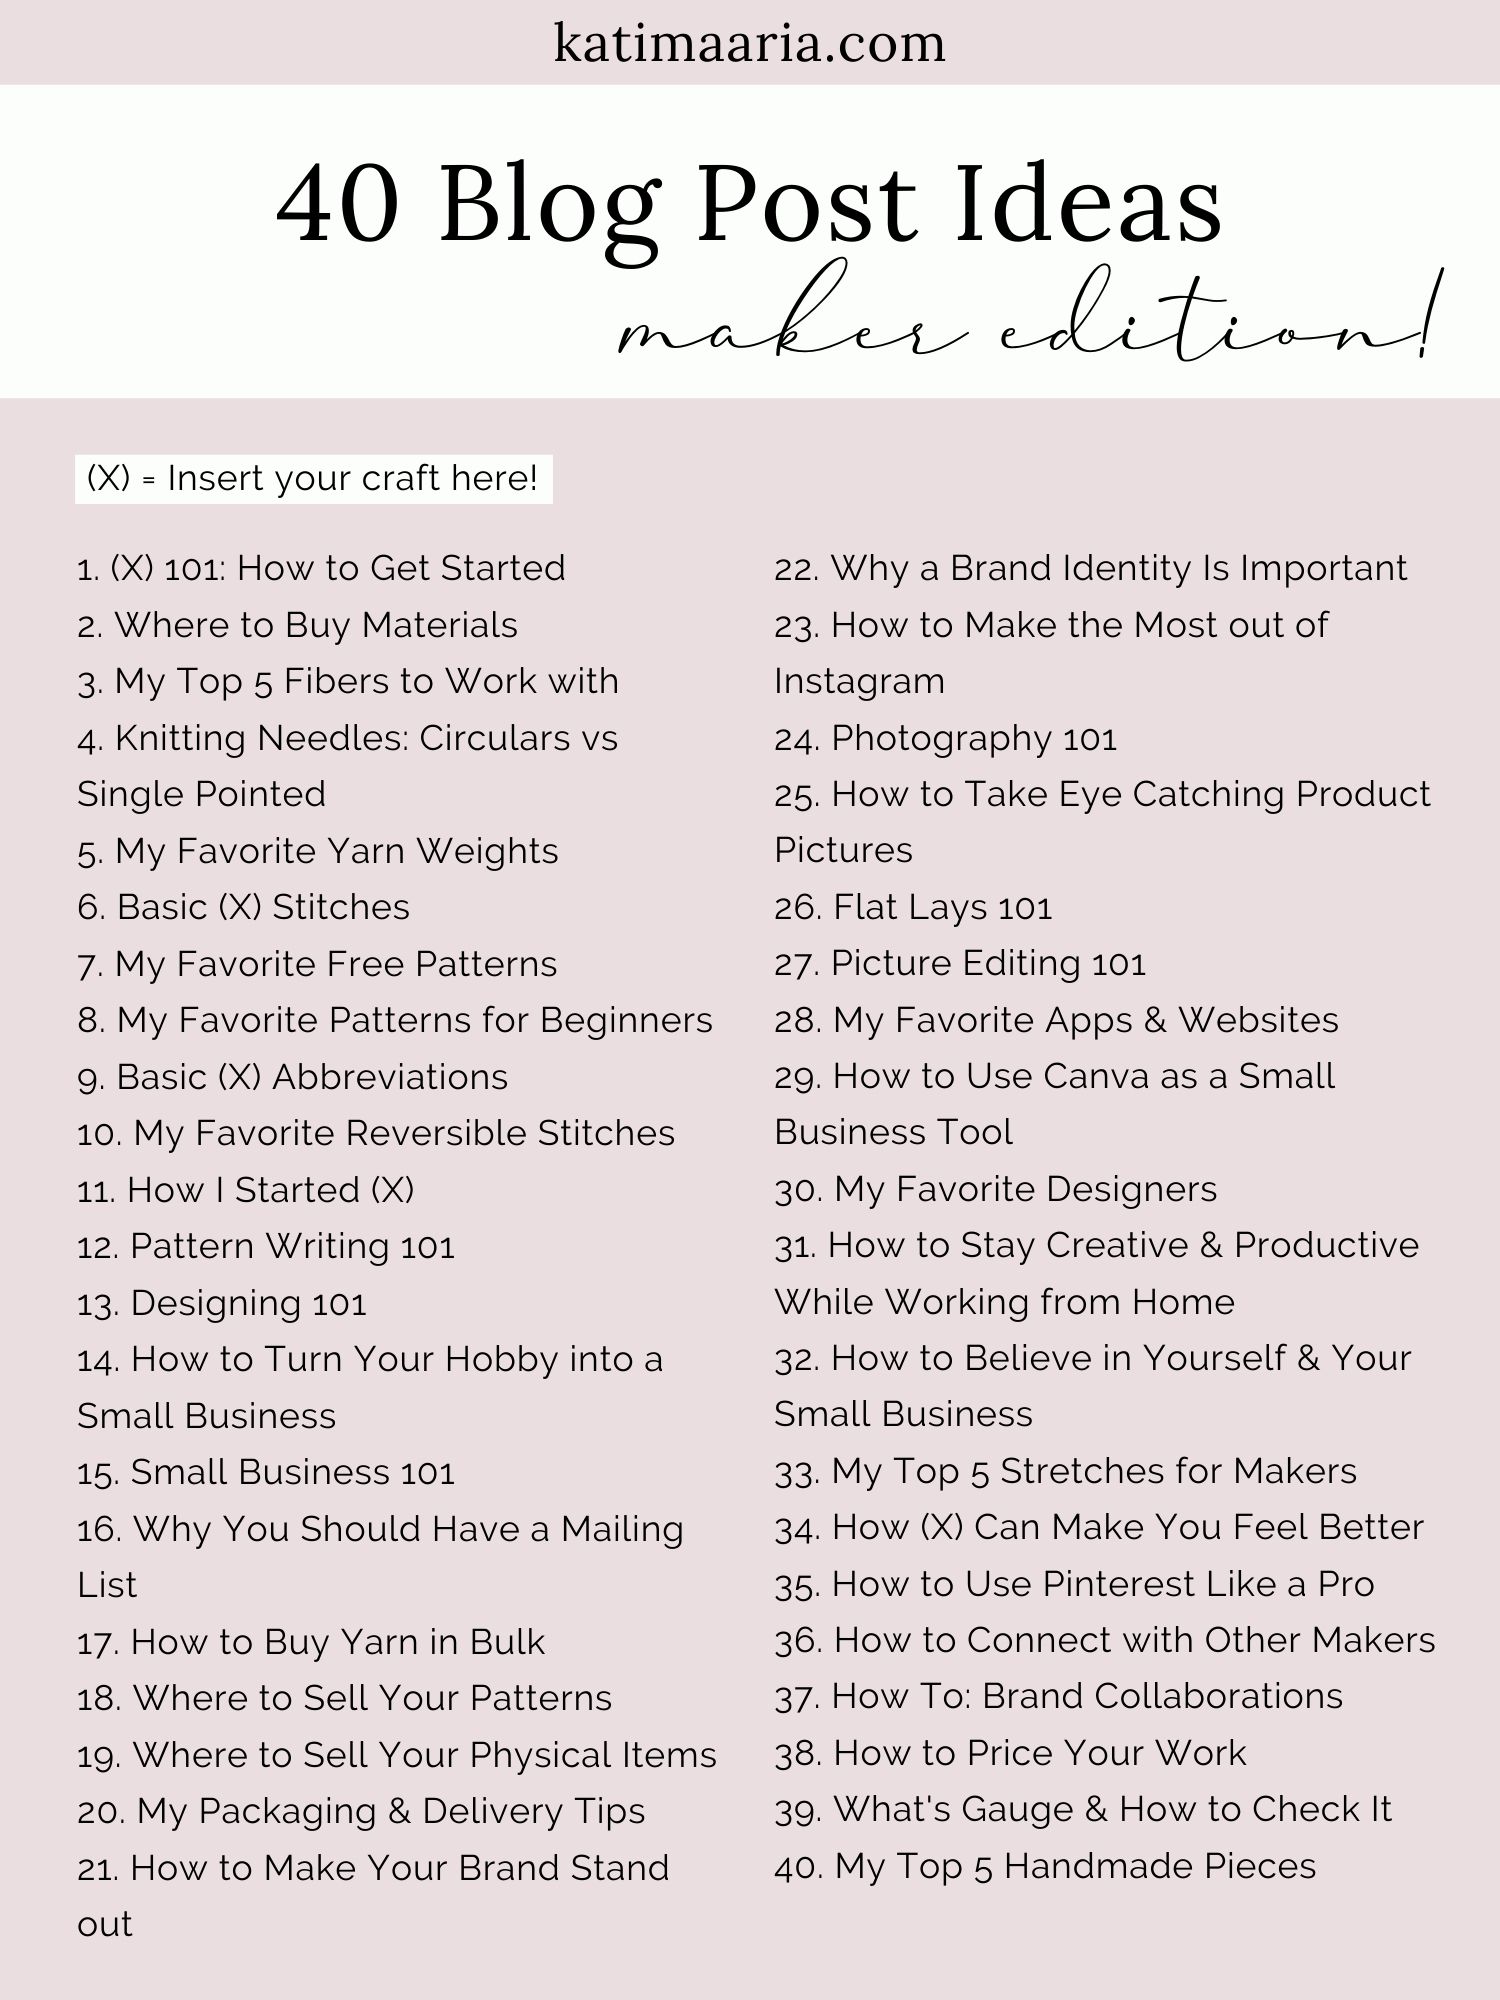
(X) = Insert your craft here!
1. (X) 101: How to Get Started
2. Where to Buy Materials
3. My Top 5 Fibers to Work with
4. Knitting Needles: Circulars vs Single Pointed
5. My Favorite Yarn Weights
6. Basic (X) Stitches
7. My Favorite Free Patterns
8. My Favorite Patterns for Beginners
9. Basic (X) Abbreviations
10. My Favorite Reversible Stitches
11. How I Started (X)
12. Pattern Writing 101
13. Designing 101
14. How to Turn Your Hobby into a Small Business
15. Small Business 101
16. Why You Should Have a Mailing List
17. How to Buy Yarn in Bulks
18. Where to Sell Your Patterns
19. Where to Sell Your Physical Items
20. My Packaging & Delivery Tips
21. How to Make Your Brand Stand out
22. Why a Brand Identity Is Important
23. How to Make the Most out of Instagram
24. Photography 101
25. How to Take Eye Catching Product Pictures
26. Flat Lays 101
27. Picture Editing 101
28. My Favorite Apps & Websites
29. How to Use Canva as a Small Business Tool
30. My Favorite Designers
31. How to Stay Creative & Productive While Working from Home
32. How to Believe in Yourself & Your Small Business
33. My Top 5 Stretches for Makers
34. How (X) Can Make You Feel Better
35. How to Use Pinterest Like a Pro
36. How to Connect with Other Makers
37. How To: Brand Collaborations
38. How to Price Your Work
39. What’s Gauge & How to Check It
40. My Top 5 Handmade Pieces
And voilà, there you have it – I hope these 40 blog post ideas for makers will give you inspiration for your future posts!
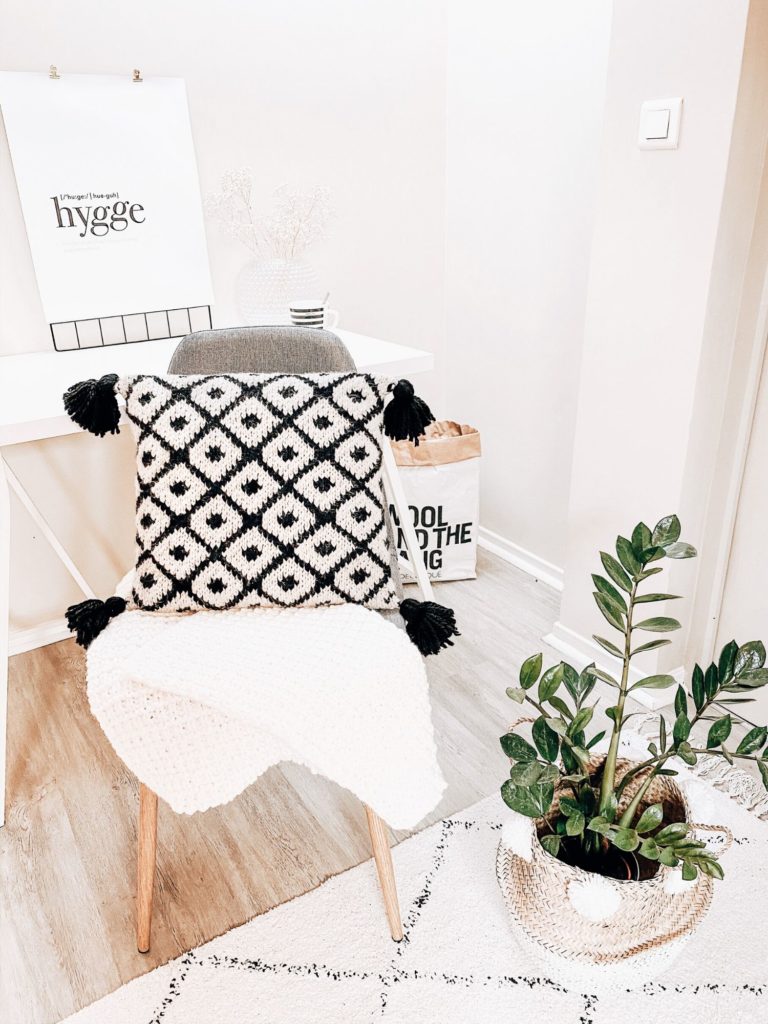
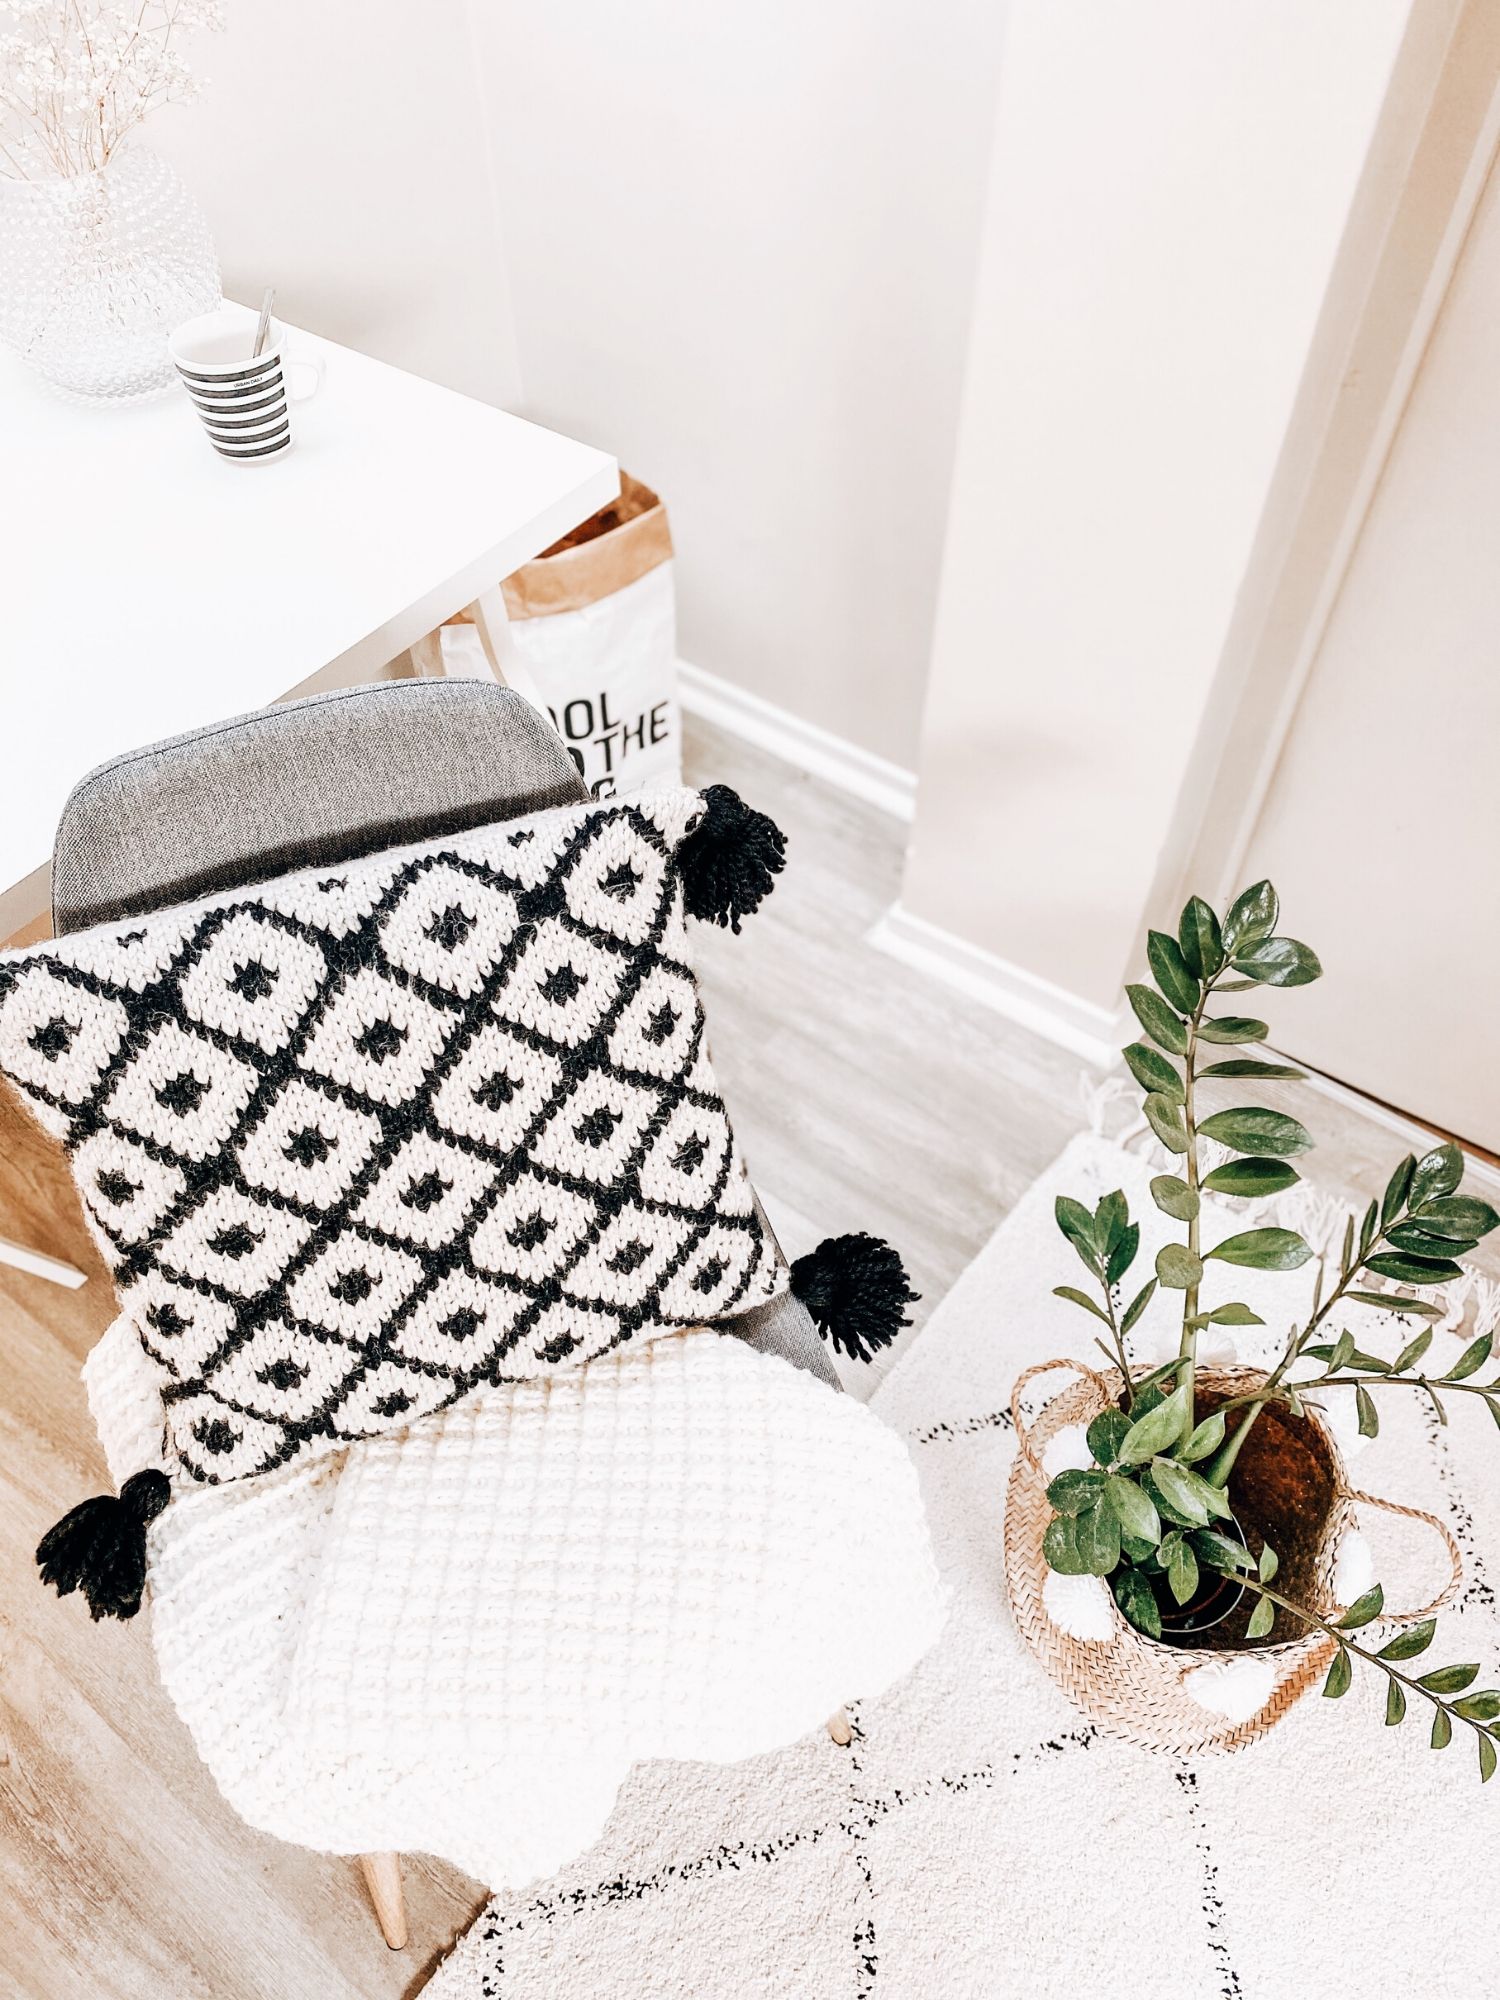
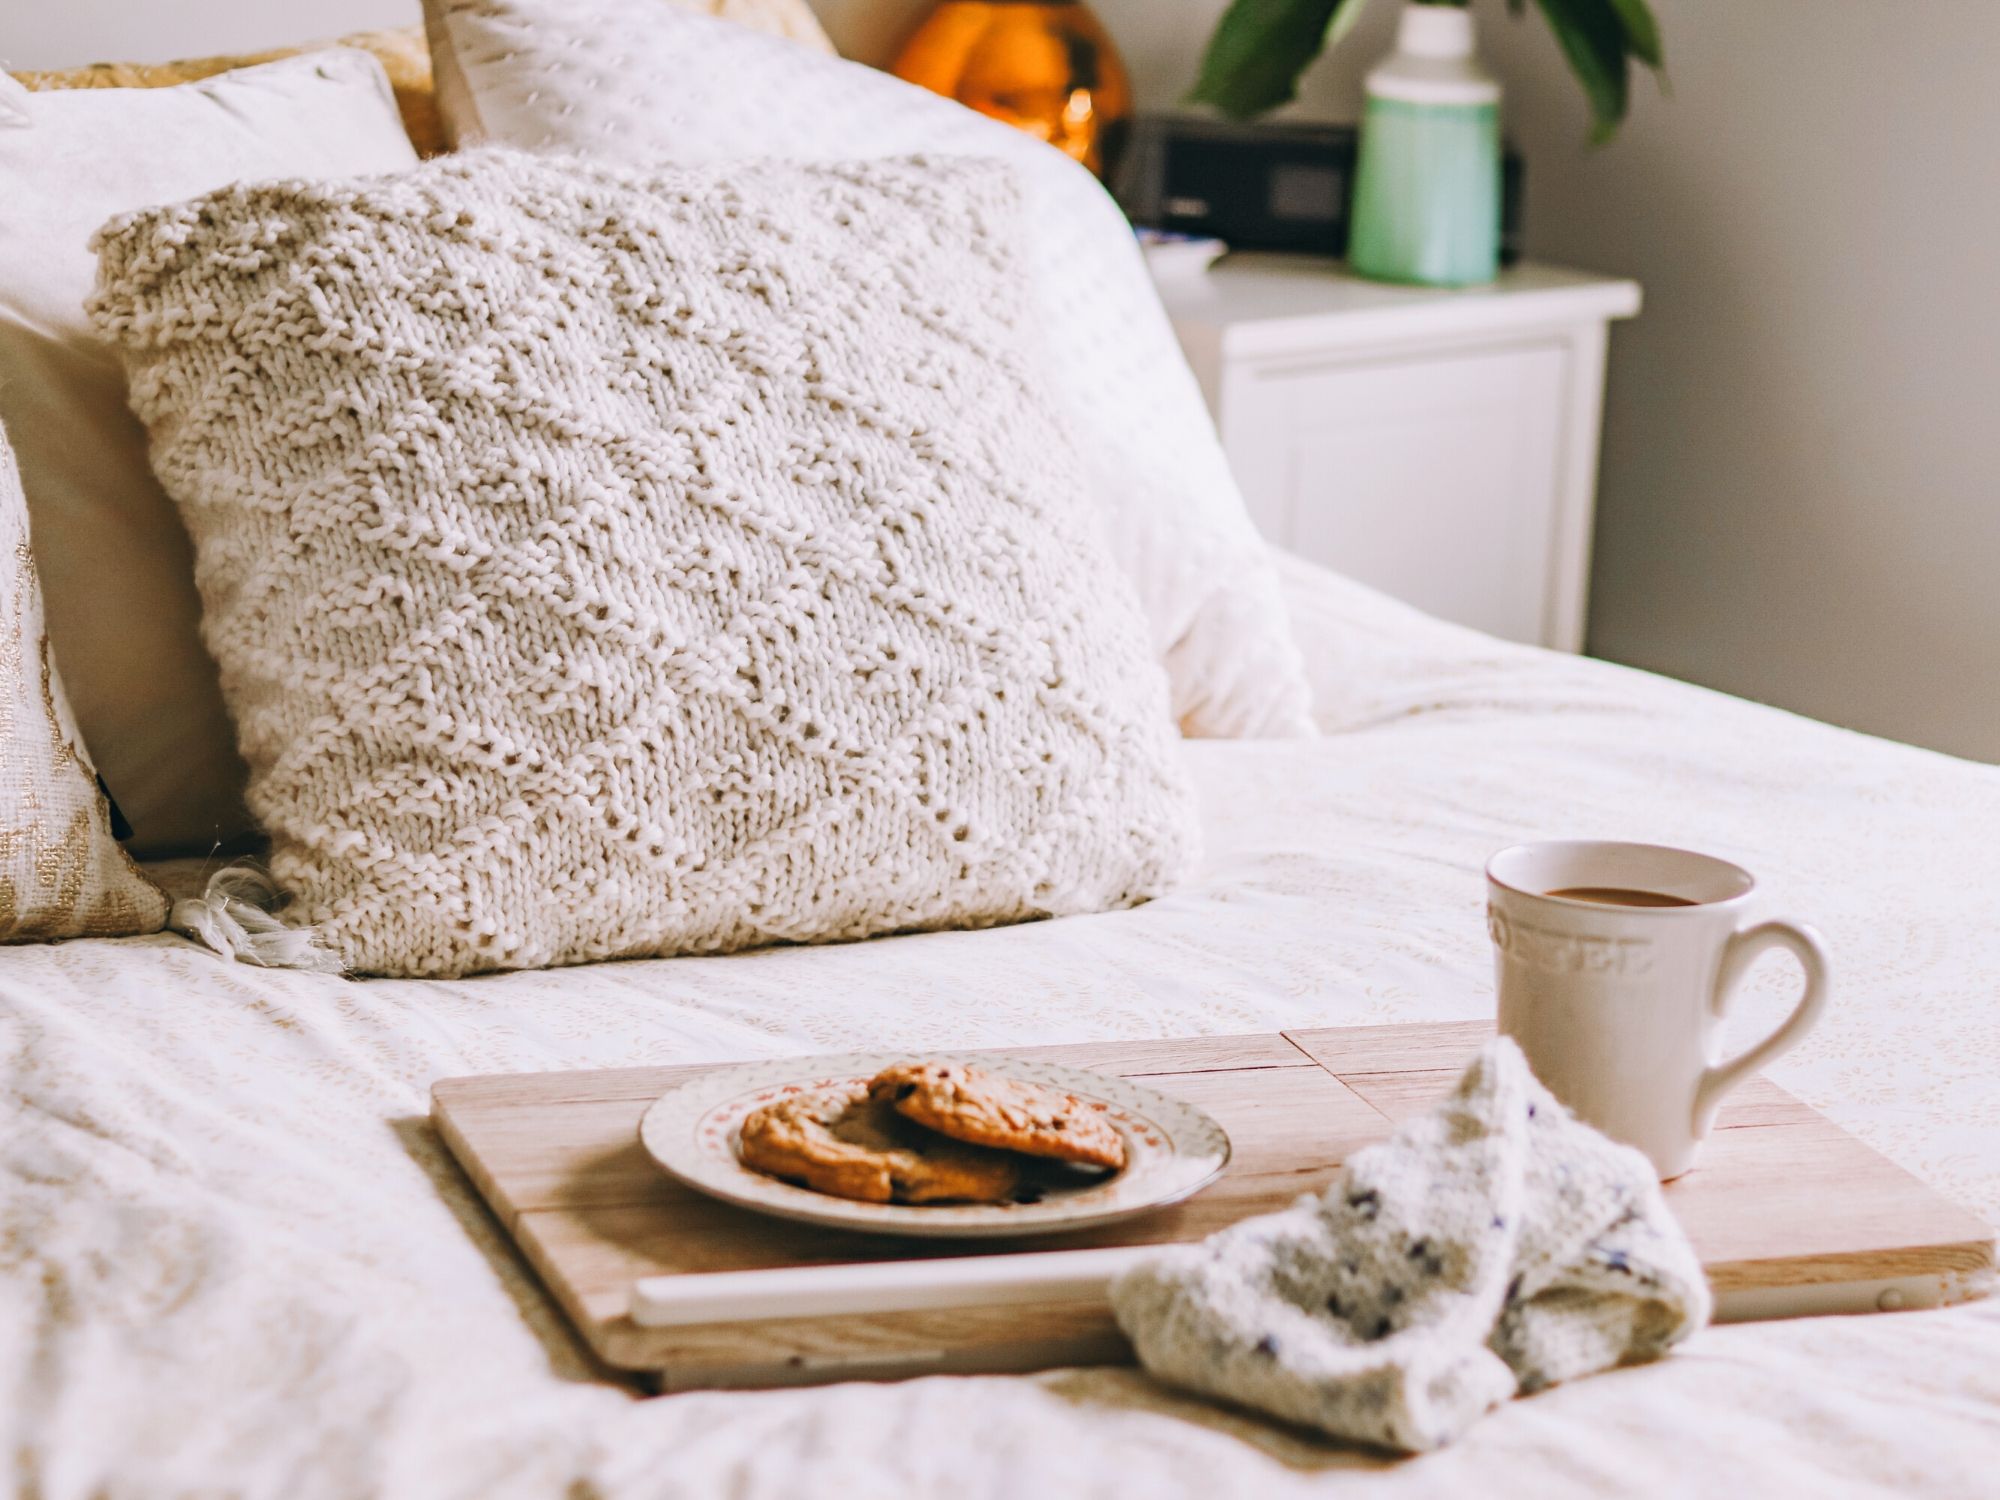
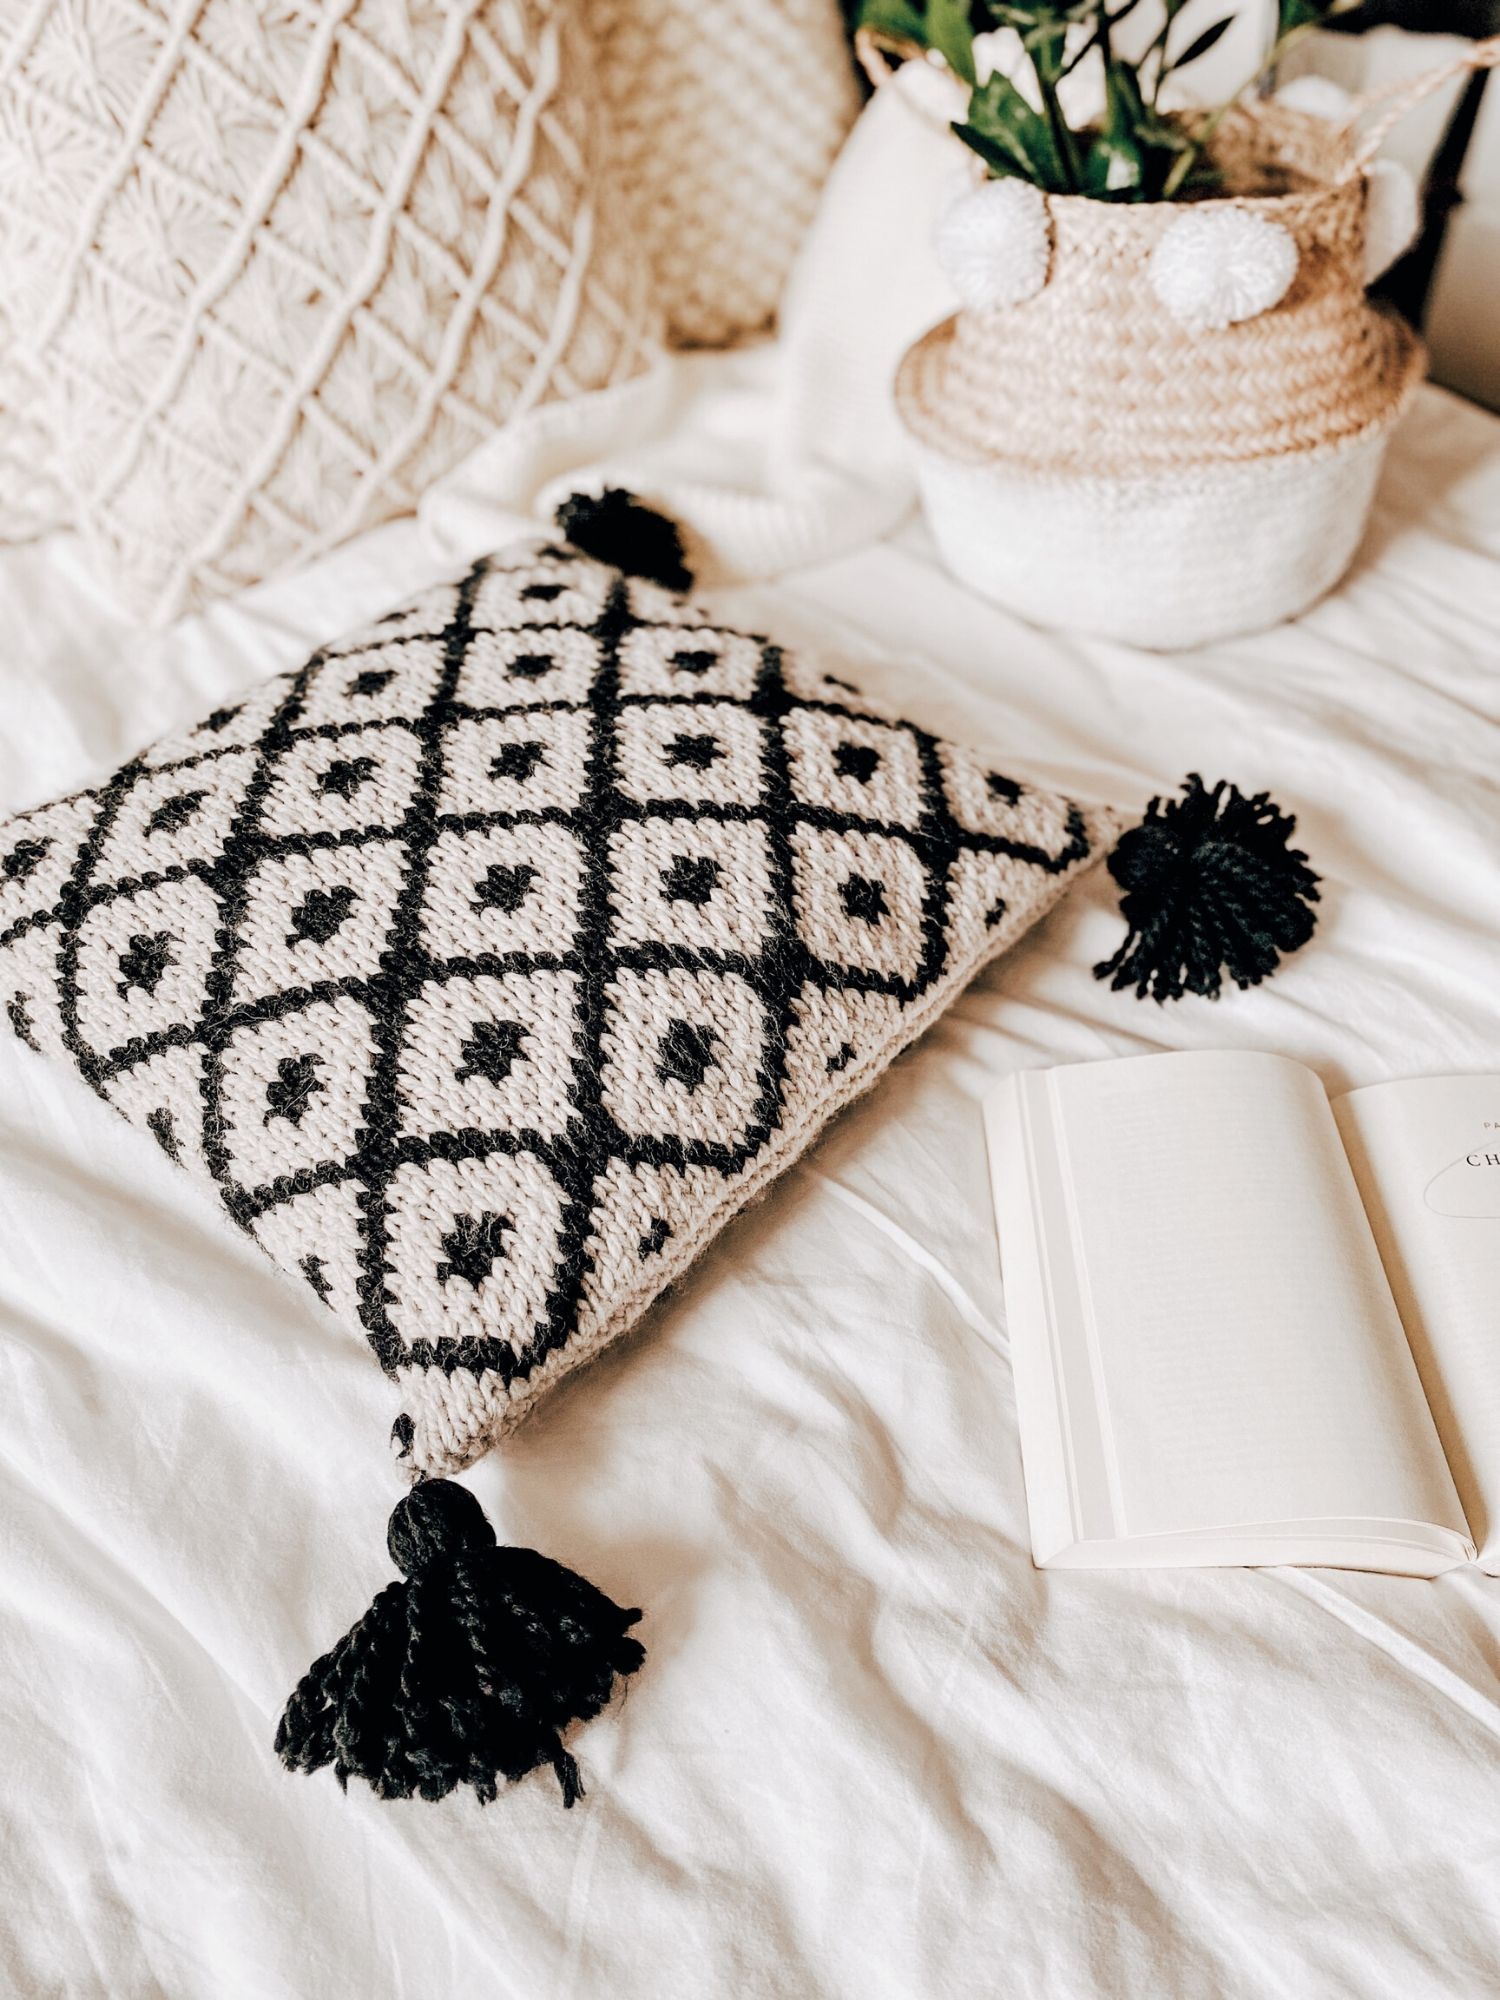
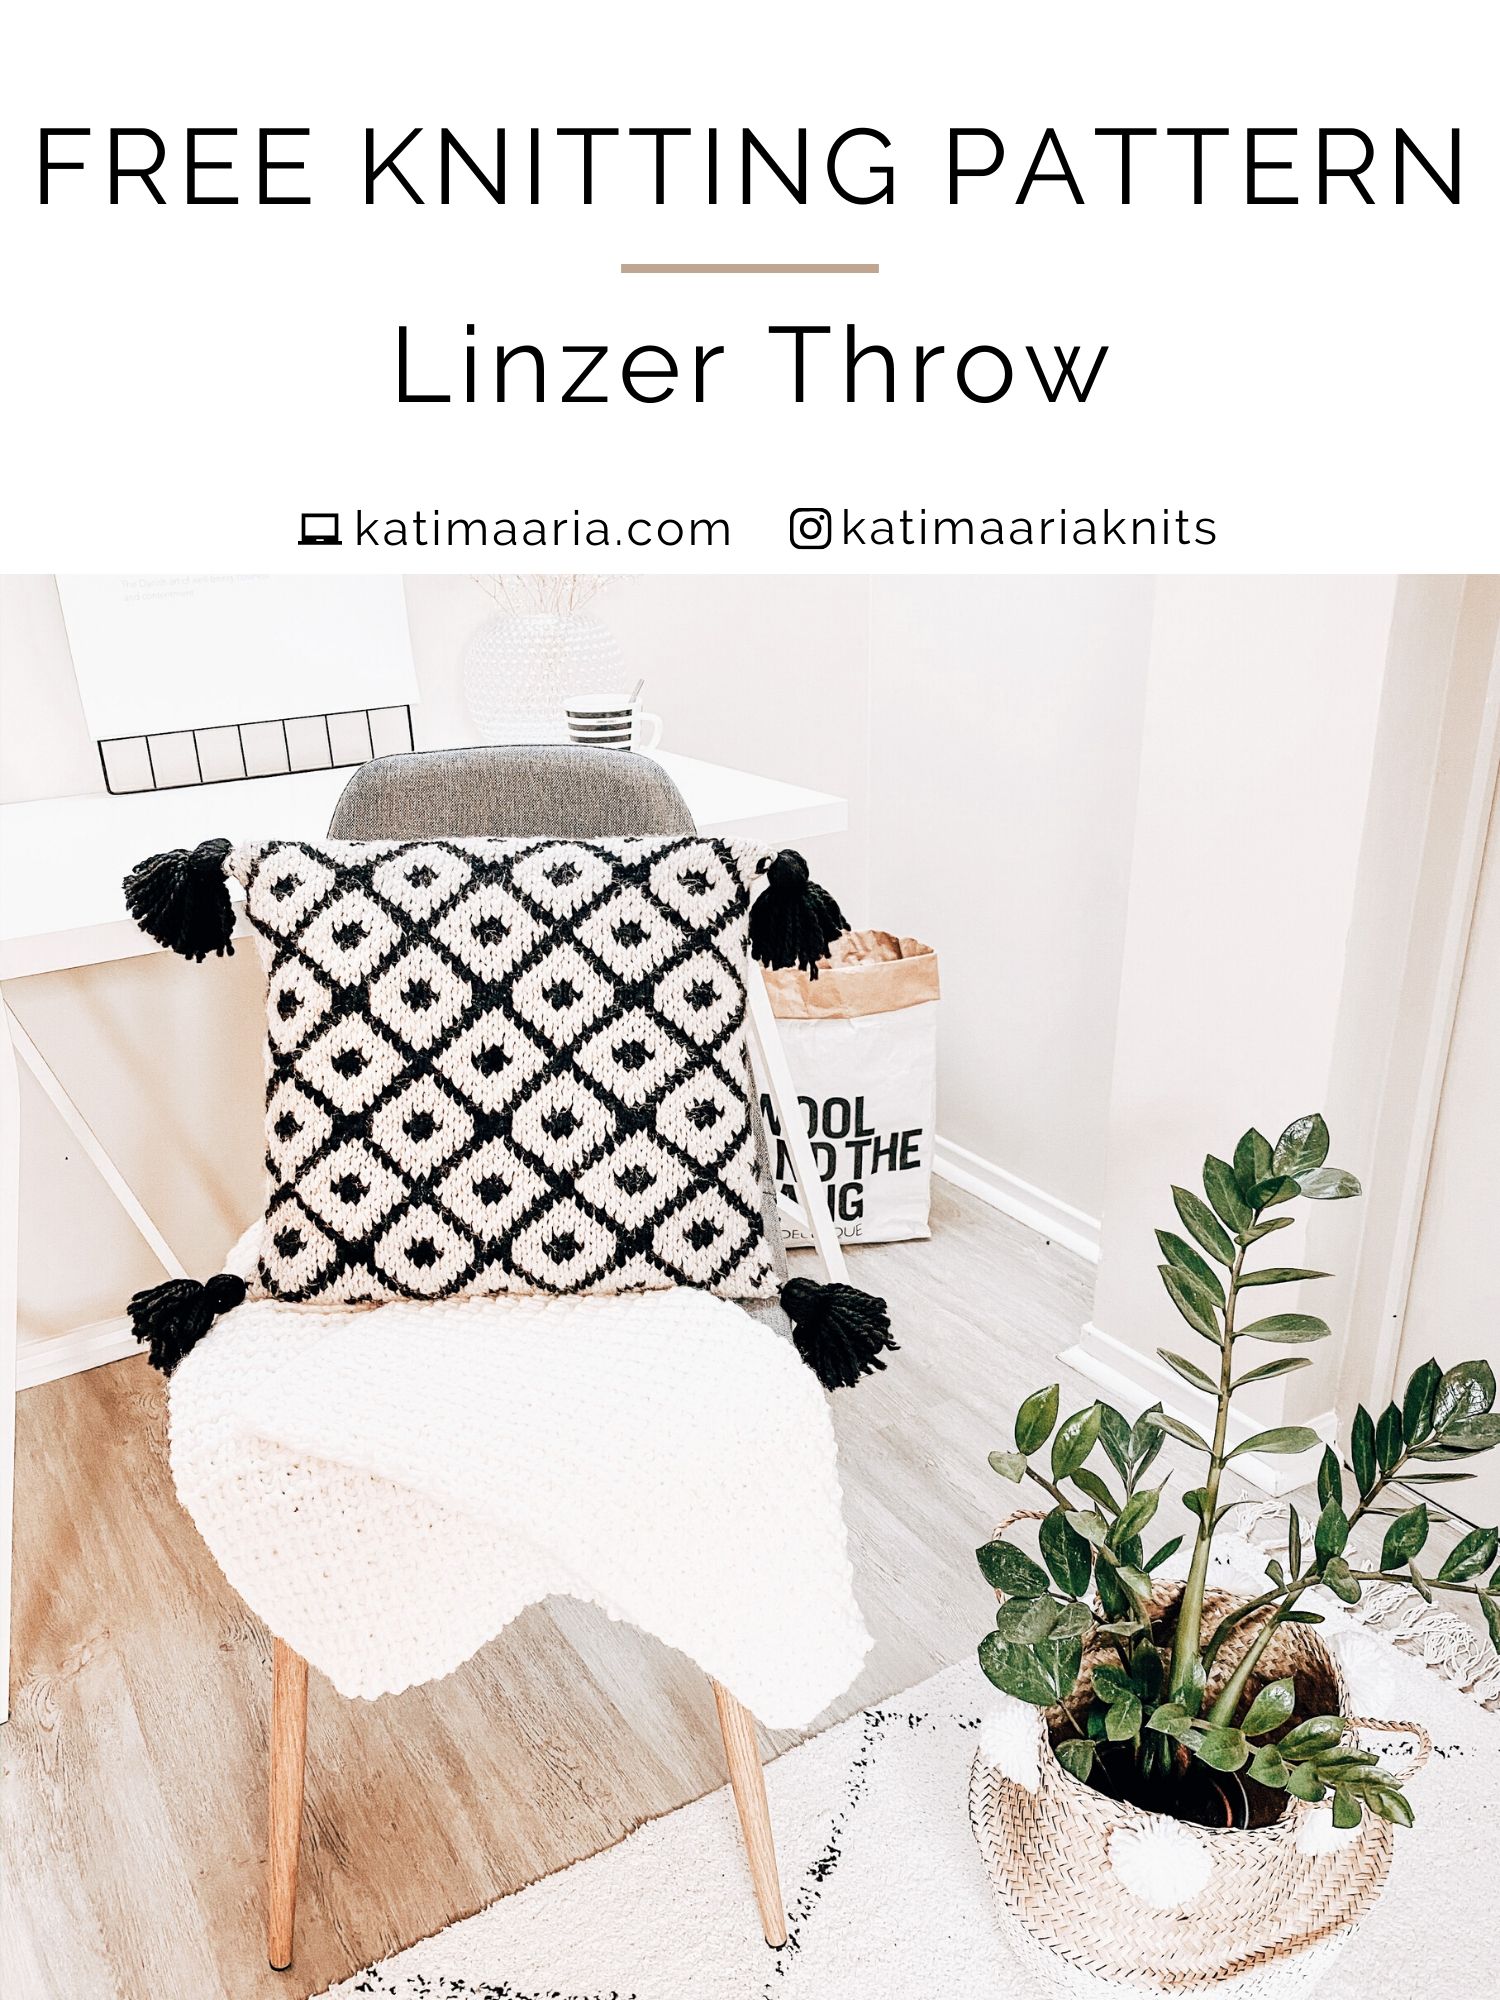
Hi friends! When I say this design has been in the making for the past forever, forever being exactly one year, I’m definitely not joking. So after one year of originally writing and even having the pattern tested, I’d like you to finally meet the Linzer Throw Pillow!
This bohemian pillow is knit with bulky weight (category 5) yarn, 8mm/US 11 circular needles and it’s worked in the round which means you’ll be knitting stockinette stitch throughout the work and only seaming two openings (a big yes to this right)! The pattern also comes with two alternatives: a fair isle version with 2 colors, and a textured version with 1 color!
Should you have any questions about the pattern, you can always send me a message on Instagram or an email at kati@katimaaria.com
Use the hashtag #linzerthrow and tag me @katimaariaknits if you share a picture of the design on Instagram – this way I won’t miss it!
So without further ado, get your needles & yarn ready and happy knitting!
MEASUREMENTS One size: 40x40cm / 16×16 inches
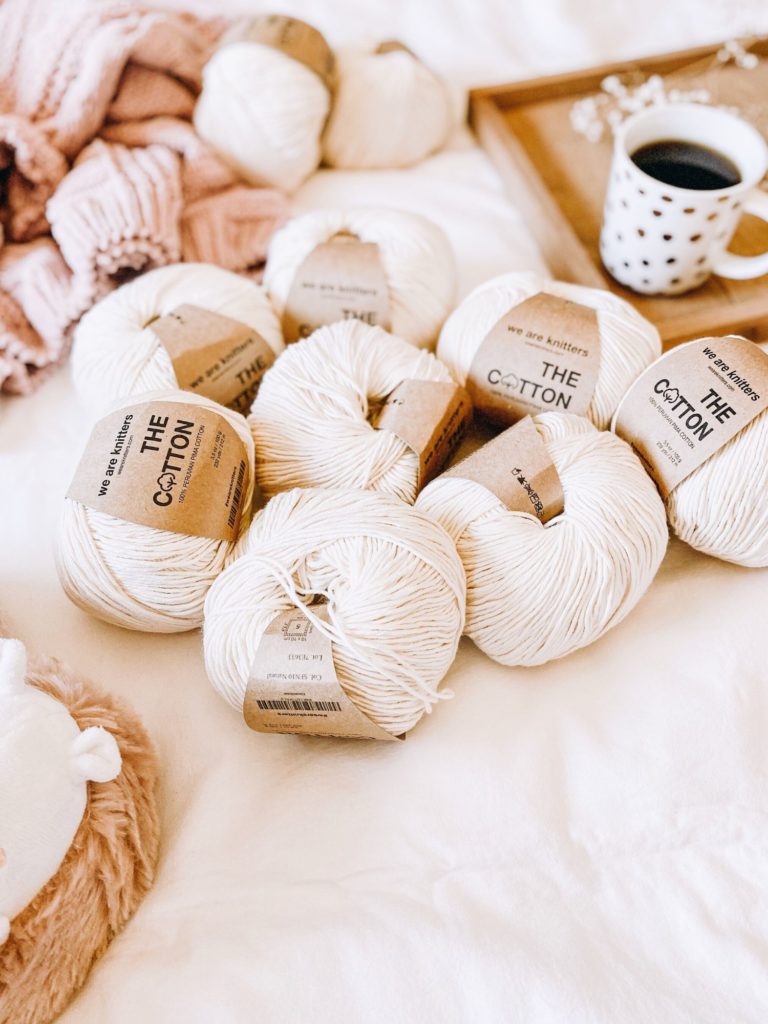
MATERIALS
8mm/US 11 circular needles (60cm/24″) OR any needles to obtain the gauge
Approximately 163m/178 yards (main color) and 98m/107 yards (contrast color) of bulky weight (category 5) yarn
Gauge: 10x10cm/4×4″ of stockinette stitch in fair isle with 8mm/US 11 needles = 14 stitches, 14 rounds
Tapestry needle
40x40cm/16×16″ pillow
Optional: extra yarn for tassels
ABOUT THE PATTERN This pillow is knit in the round and only consists of stockinette stitch (all stitches are knit). Knitting in the round makes the seaming a breeze – you’ll only need to seam together the cast-on edge and the bind-off edge!
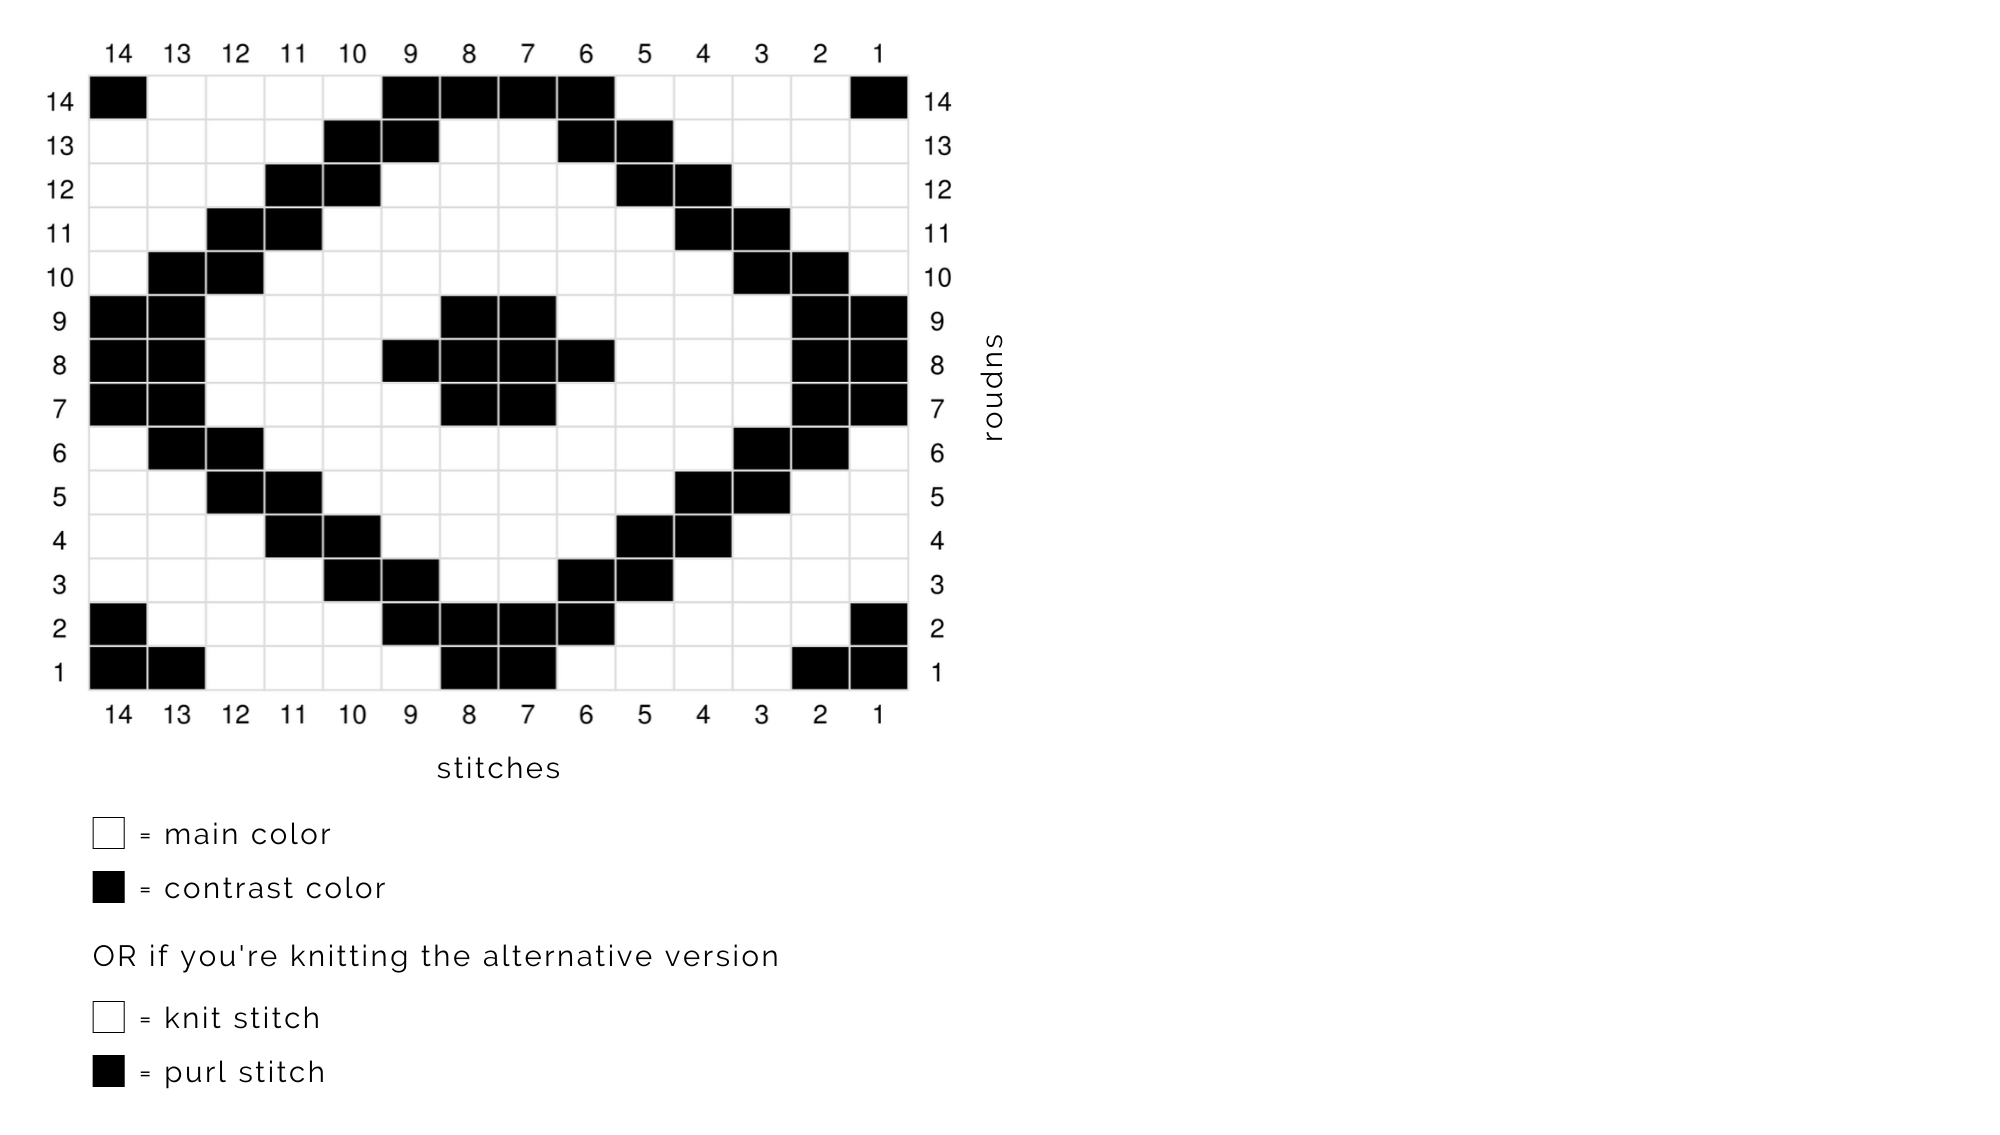
The fair isle pattern is a 14-stitch, 14-round repeat. The 14-stitch chart is knit 8 times per round, adding up to a total of 112 stitches in the pillow. The 14 rounds are knit for a total of 4 times, which means you’ll be knitting 56 rounds.
The longest floats in the pattern are 8 stitches so make sure you catch them and don’t make floats longer than 5 stitches! Personally, I catch floats already every 3rd stitch – I’ve found it to be a good “rhythm” for my tension while working with two different colors.
Pattern alternative: you can also make this throw pillow using only one color and, instead of working the chart with two colors, purling all the contrast color stitches. This version of the pattern was created by one of my amazing testers, Tara from Knits by Tara, and it’s absolutely brilliant!
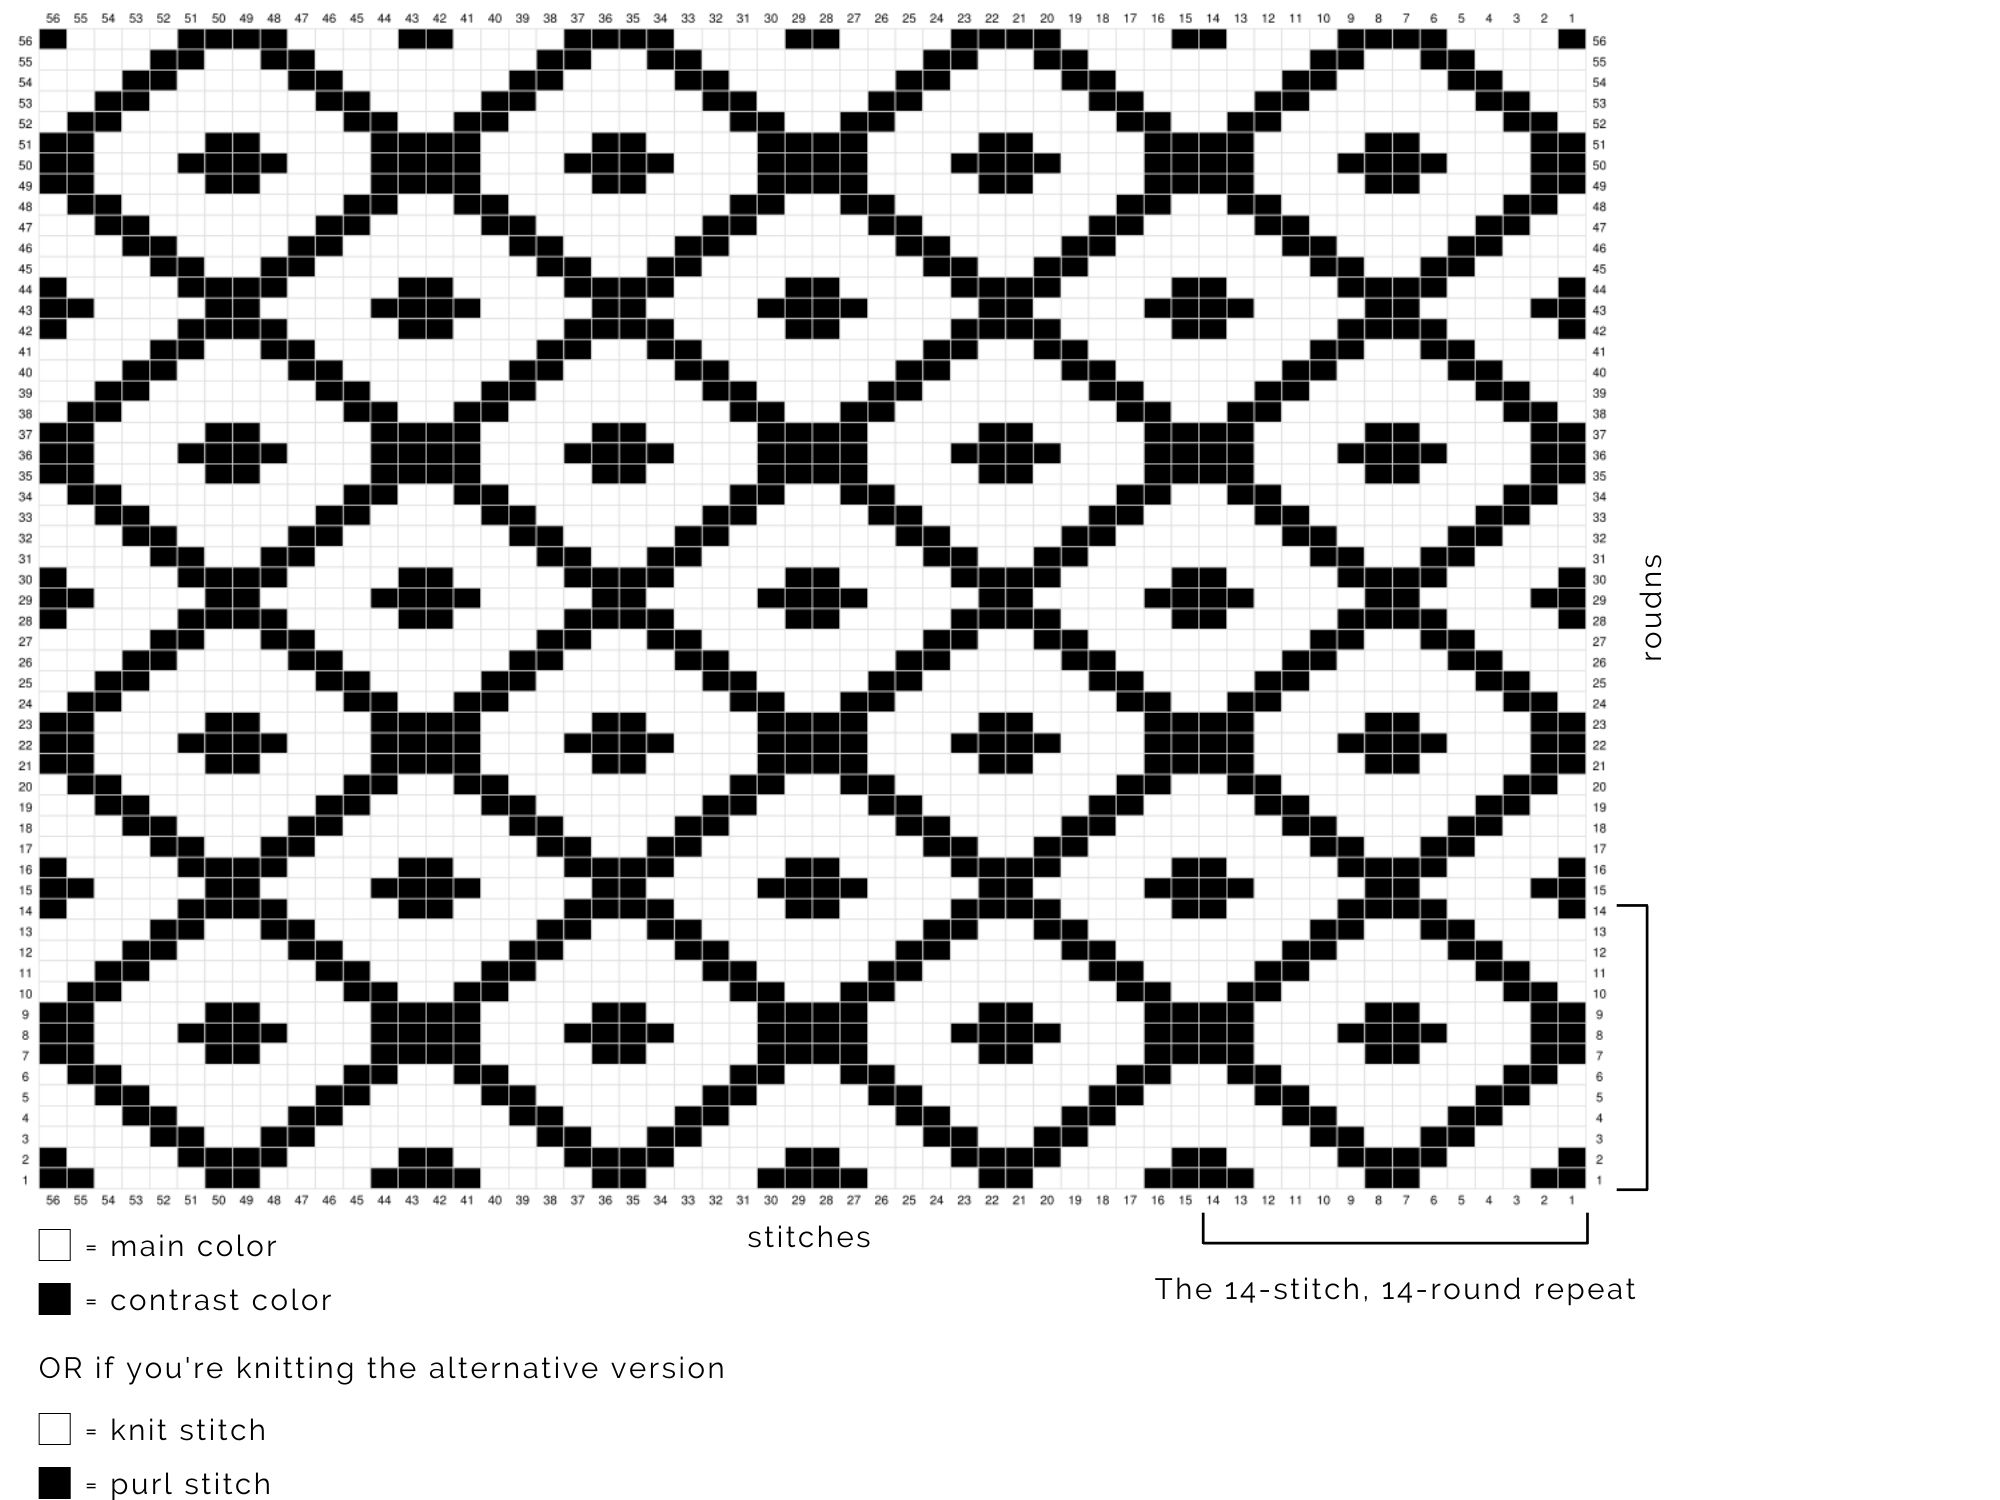
CHART OVERVIEW Here’s a 56-stitch x 56-round overview of the pattern – I think it gives a better overall idea of how the fair isle is going to look like once the pillow is finished! The stitch count in this chart is half the stitches of the work and the round count is complete, including all 56 rounds.
Click the image to open it bigger!
INSTRUCTIONS Cast on 112 stitches on your 8mm / US 11 circular needles (60cm/24”) using the main color. Make sure you leave a long tail; you’ll be using it to close the opening.
Join the work in the round and knit 1 round in stockinette stitch with the main color before starting the fair isle pattern.
Click the image to open it bigger!
Follow the 14-stitch knitting chart (the chart is knit 8 times per round, 8 x 14 sts = 112 sts), and knit rounds 1-14.
Repeat the chart rounds 1-14 another 3 times, knitting them a total of 4 times for the pillow (56 rounds).
Finish by knitting 1 round of stockinette stitch using the main color before binding off.
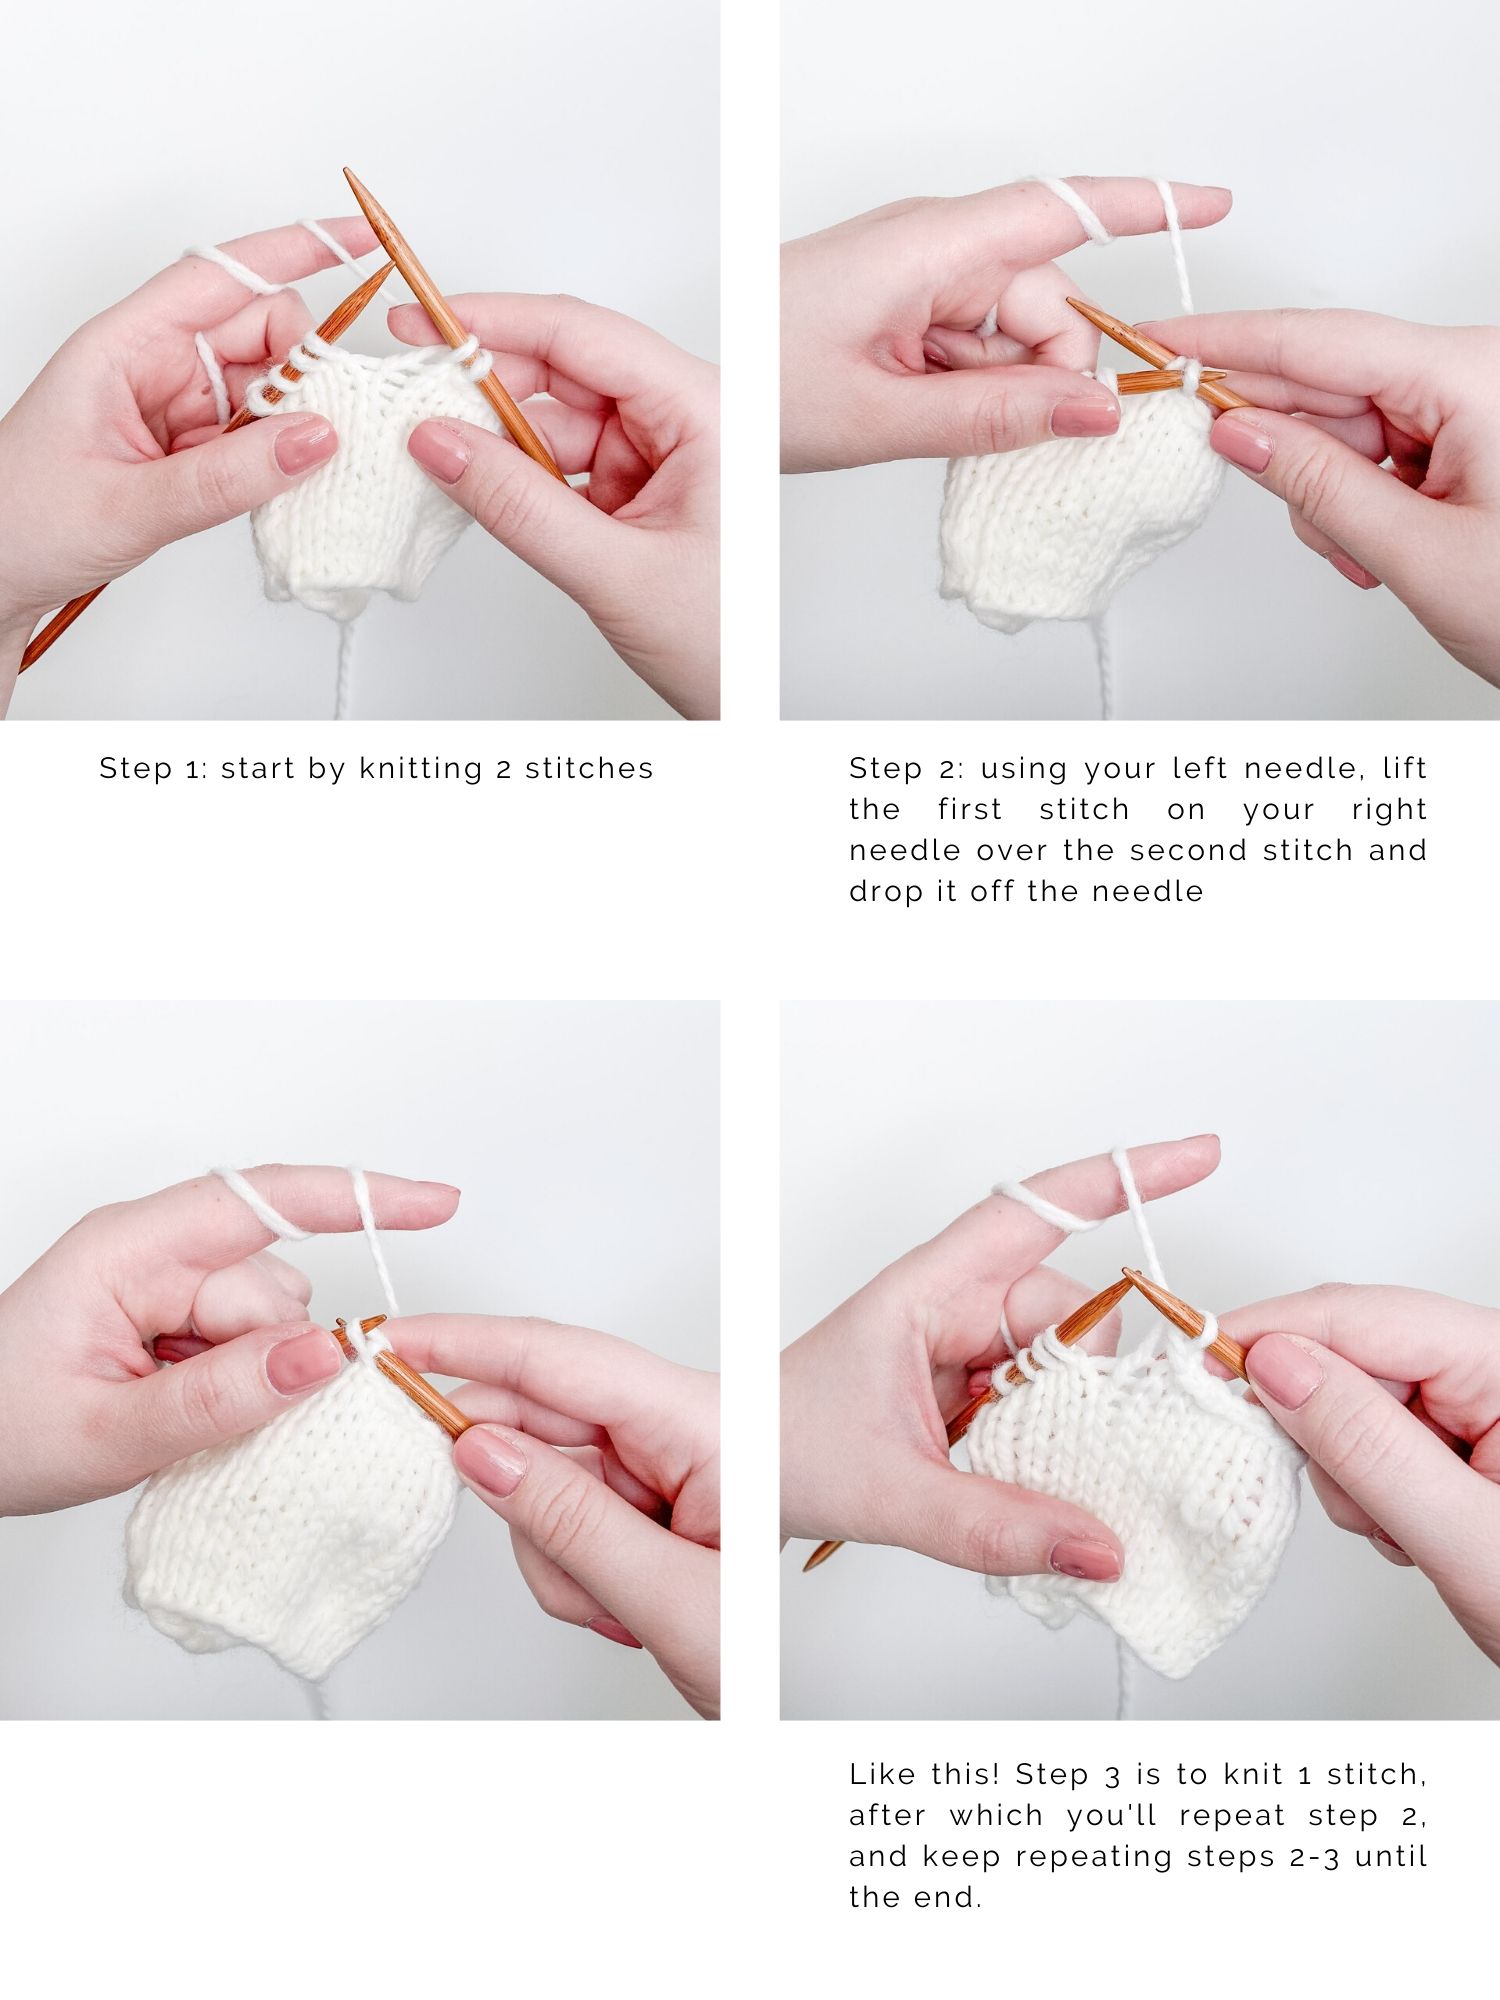
BINDING OFF Step 1: Knit 2 stitches Step 2: Using your left needle, lift the first stitch on your right needle over the second stitch and drop it off the needle Step 3: Knit 1 stitch
Keep repeating steps 2-3 until 1 stitch remains.
Cut the yarn leaving a long tail (you’ll use this tail to seam together the bind-off edge), pull the tail through the remaining stitch, thread through the very first stitch that was bound off in the beginning to close the round and pull gently to secure the work.
In these tutorials, I’m using a small test piece just to show you the techniques!
Click the image to open it bigger!
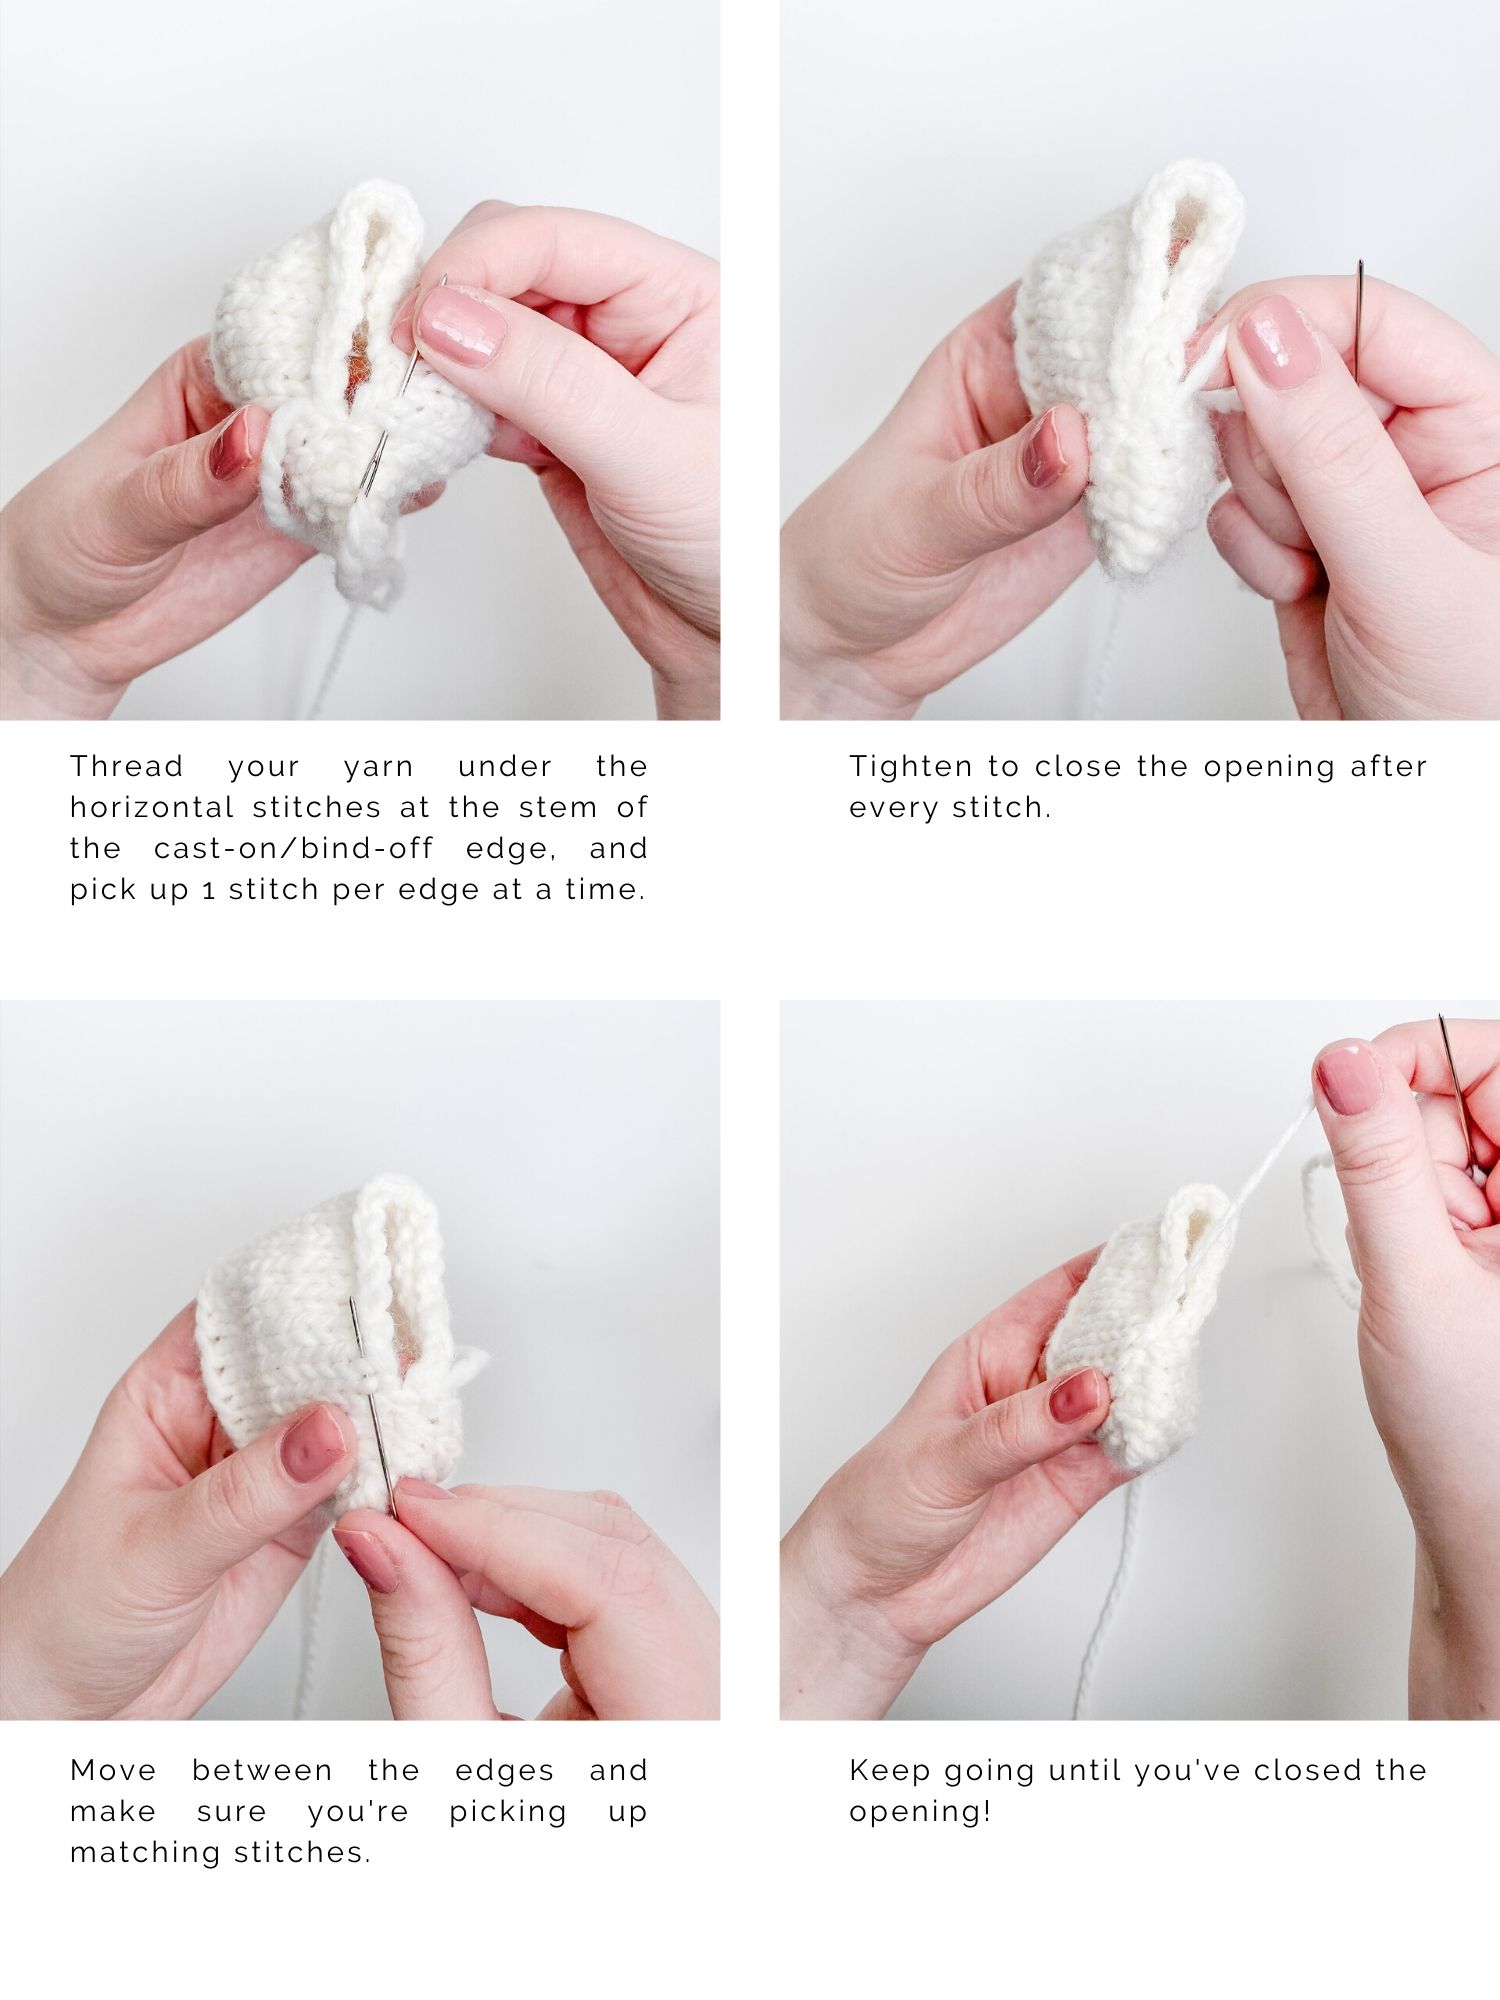
SEAMING To seam your pillow, you’ll be using the mattress stitch that creates an invisible horizontal seam.
Before starting, make sure the right side of your pillow is facing up (and that it’s not inside out).
The part where your round changed should be on the side of the pillow: this way, it’ll be less visible and you’ll be able to seam with the long tails that were left after casting on and binding off.
Align the pillow so that the fair isle pattern matches on both sides.
You can start either at the cast-on or bind-off edge.
The mattress stitch: thread the yarn under the horizontal stitches that you’ll find at the stem of the cast-on/bind-off edges. Pick up one stitch per edge at a time and move between the edges, always threading under matching stitches. Continue until you have seamed the opening and secure the tail by weaving in on the wrong side.
Click the image to open it bigger!
If you want to add tassels, attach them at this point before inserting the pillow (this way you can still secure the tassels by weaving in the ends on the wrong side).
Insert a 40x40cm / 16×16” pillow and seam together the second opening using the mattress stitch.
And voilà, your new throw pillow is now ready to make your home even cozier! I hope you enjoyed this pattern and will be returning to it in the future as well!
Hi friends! Today I’m coming to you with a little maker tip on how to determine exactly how much yarn you used for your project!
Let’s start with the information you’ll need: – Weight of full skein (in grams)
– Yardage / Meters of full skein
– Weight of your project (in grams)
Tools needed:
– Kitchen scale (to weigh your project)
– Calculator (like the one on your phone)
If you don’t have the label of the full skein on you anymore, you can always search the yarn you used online and find the information either on the yarn brand’s website or Ravelry, just to name a few! This method works for projects that use a single color.
And then onto the calculations!
Step 1: Weigh your project on a kitchen scale Step 2: Divide project weight by full skein weight Step 3: Multiply the yardage (or meters) of the full skein by the number obtained in Step 2
EXAMPLE
Let’s say I had a full skein of yarn that weighed 200g and had 220 meters of yarn in it, and I knit a pair of socks.
Step 1: I weigh my project and find out it weighs 180 grams Step 2: I divide the project weight by the full skein weight 180g/200g = 0.9 Step 3: I multiply the yardage (or meters) of the full skein by the number from Step 2 : 0.9 x 220m = 198m
And voilà, I have the exact amount of yarn I used for my project which, in this case, would be 198 meters!
Understanding the calculations: in step 2, by dividing the project weight by the full skein weight, you’ll end up having a percentage. 180 grams of 200 grams is 90% (or 0,9). As you now have a percentage, you can use it to multiply the yardage of the full skein to have the equivalent of the percentage in yards or meters as well, instead of only grams.
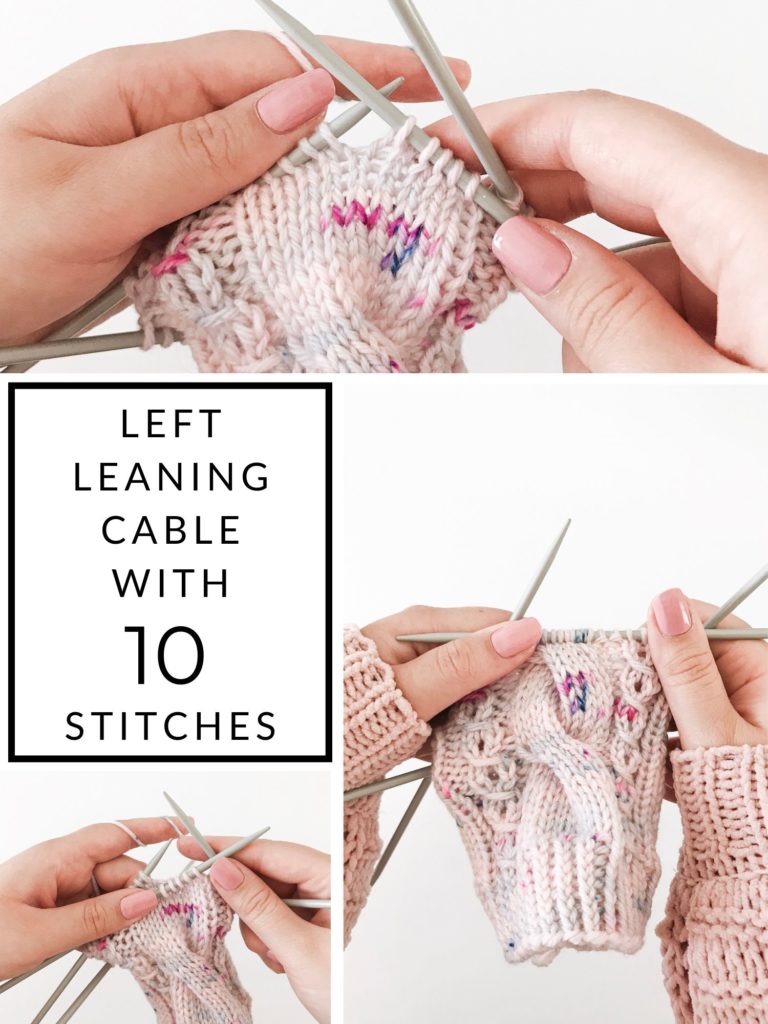
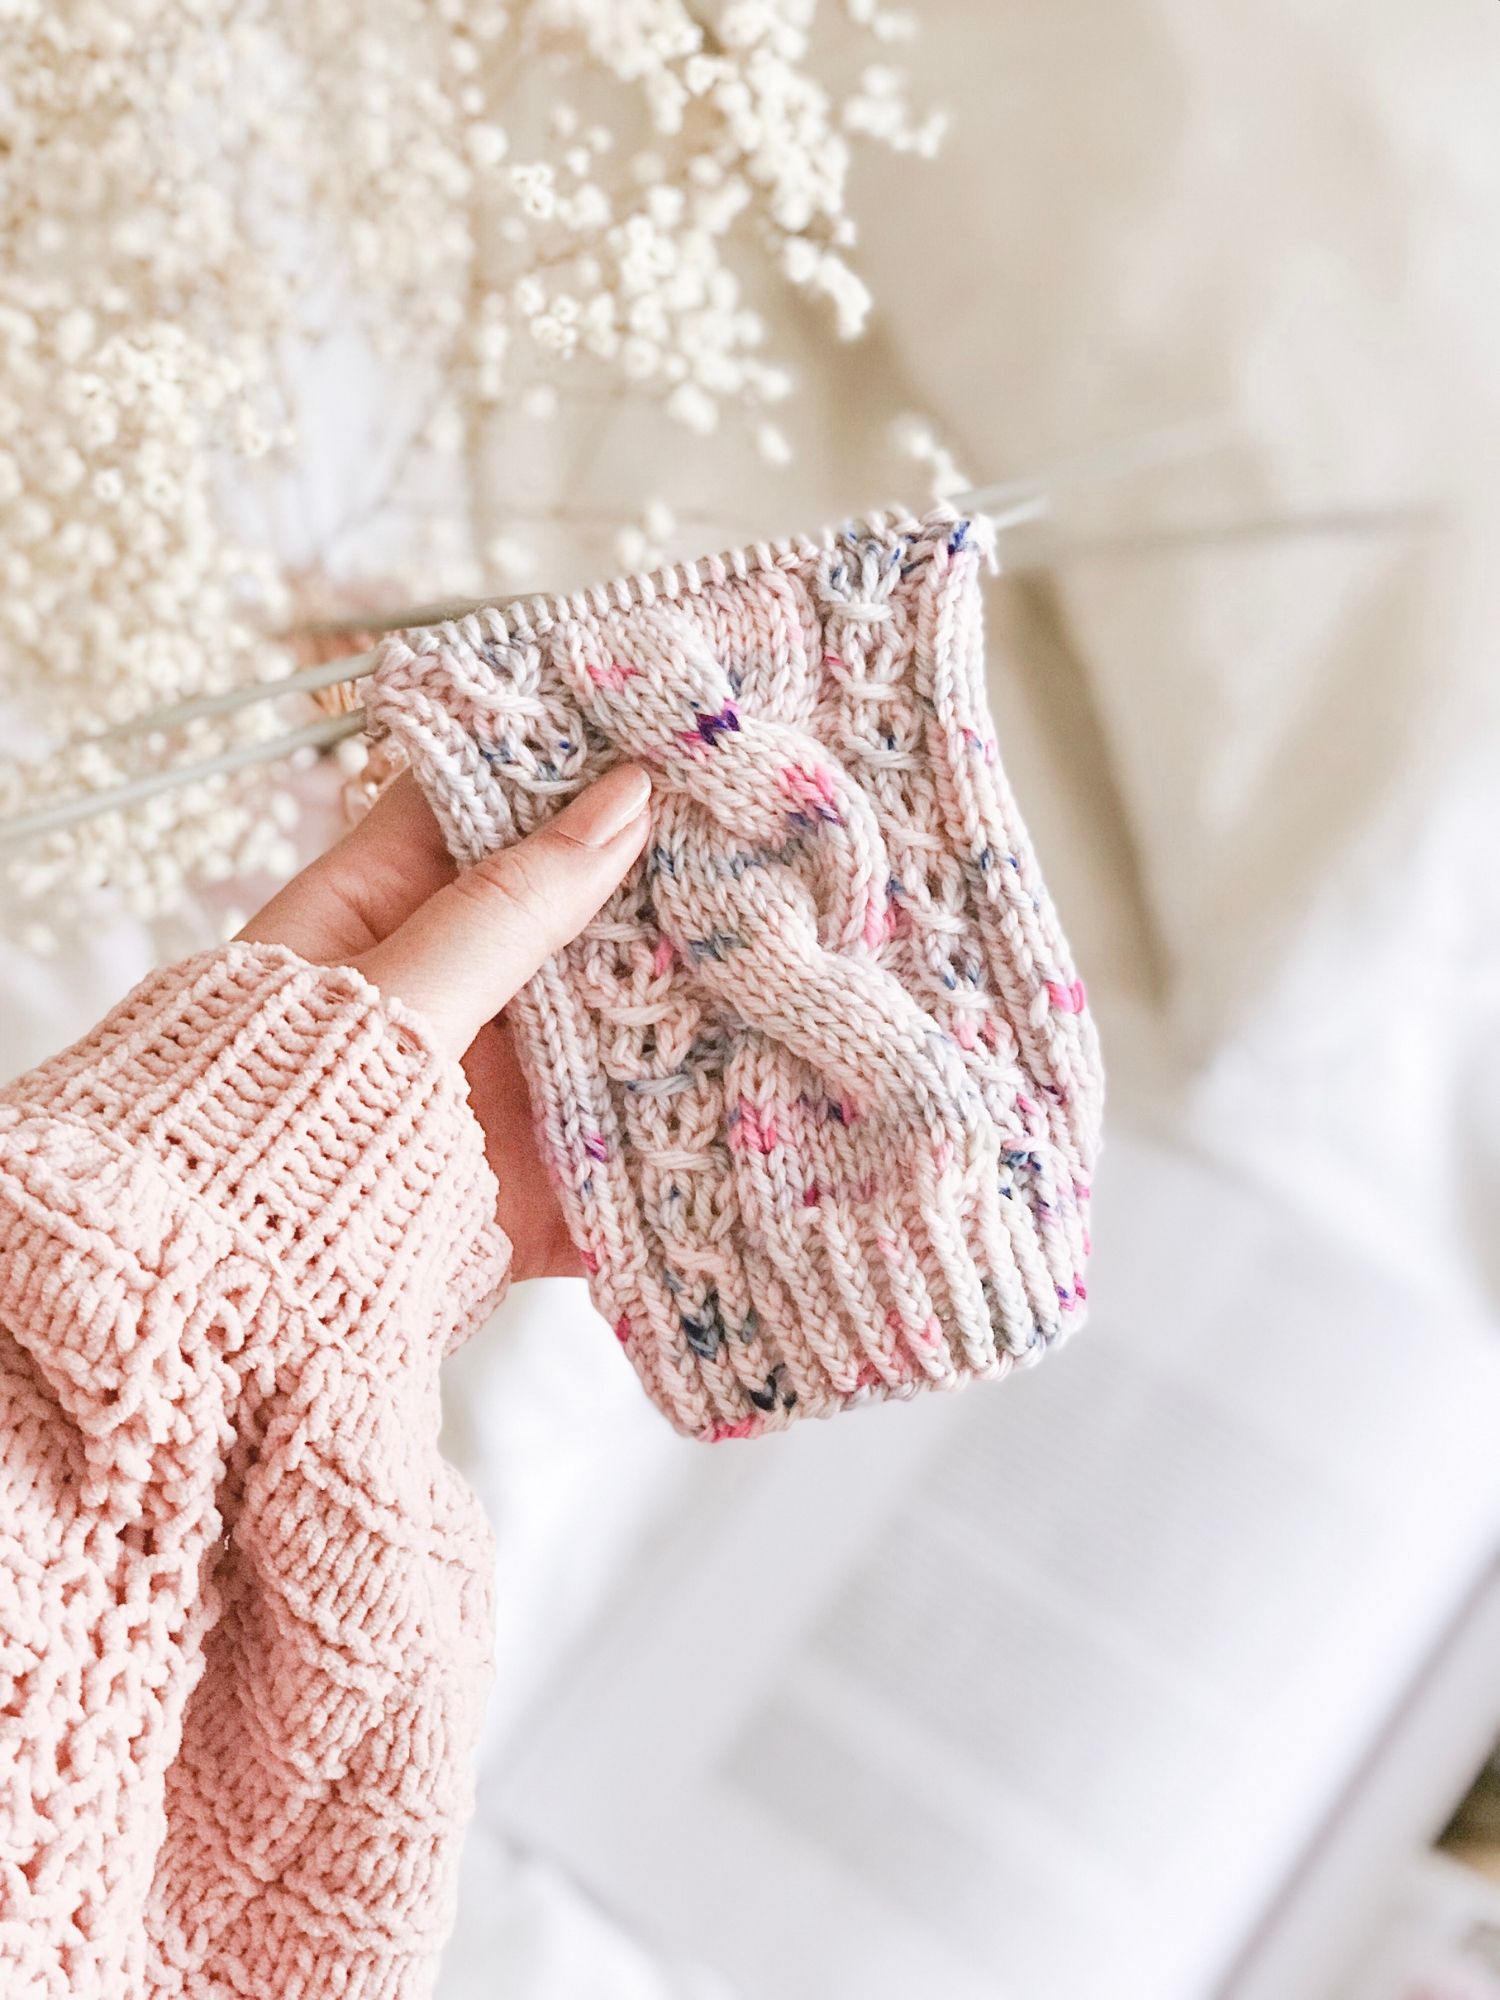
If I had to pick one knitting technique/texture to use for the rest of my life, that’d definitely be cables. I absolutely LOVE cables! They’re easy, quick to learn and add amazing texture and detail to any knit piece. I’ve used them in all my beanie designs and have a few cable sock designs coming out as well. This big, 10-stitch cable will be used in one of them so let’s get to the instructions!
A left leaning cable is made by slipping stitches onto a cable needle in front of the work. All simple cables work the same way and these instructions can therefore be used for any sized left leaning cable: by adjusting the number of stitches slipped onto the cable needle you’ll be able to vary the size of the cable! For example if you’d like to make a 6-stitch cable, you’d slip 3 stitches onto the cable needle, knit 3 and then knit the stitches on the cable needle and so on. But in this one, we’re slipping 5 stitches onto the cable needle, leaving them in front of the work, knitting 5 stitches and then knitting the stitches on the cable needle. In my patterns, I’d name this C10F: the cable is 10 stitches in size and the cable turn is made in the front.
My beautiful yarn is Worsted Superwash Merino in the colorway Peony by Unicorn Yarn Co, find all her amazing yarns here!
So let’s get to the pictures!
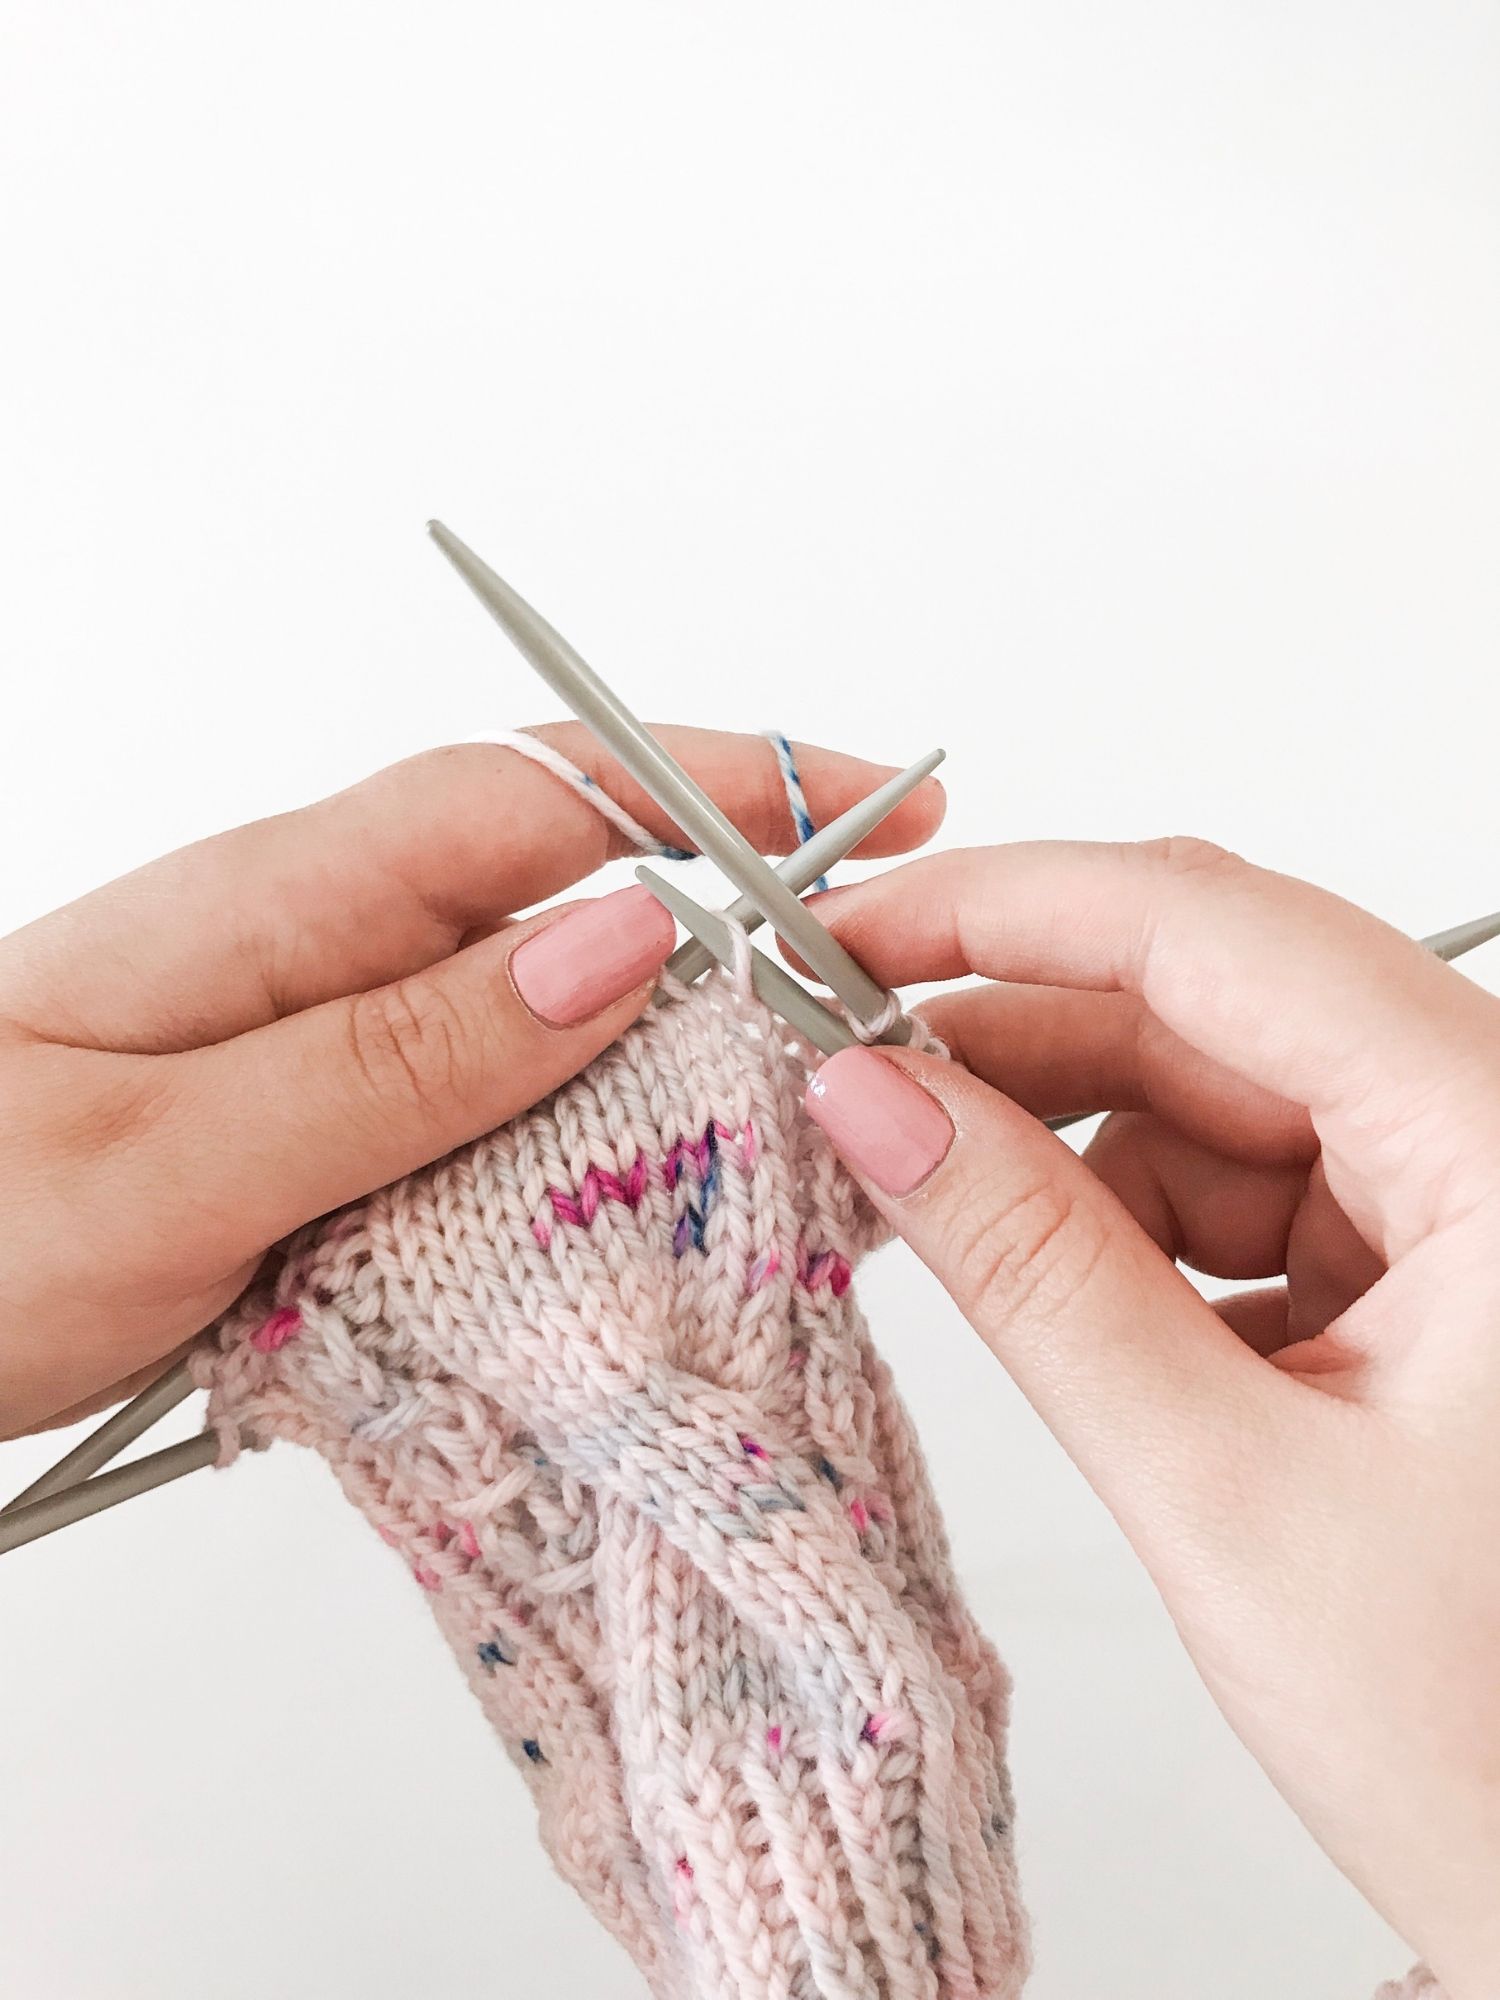
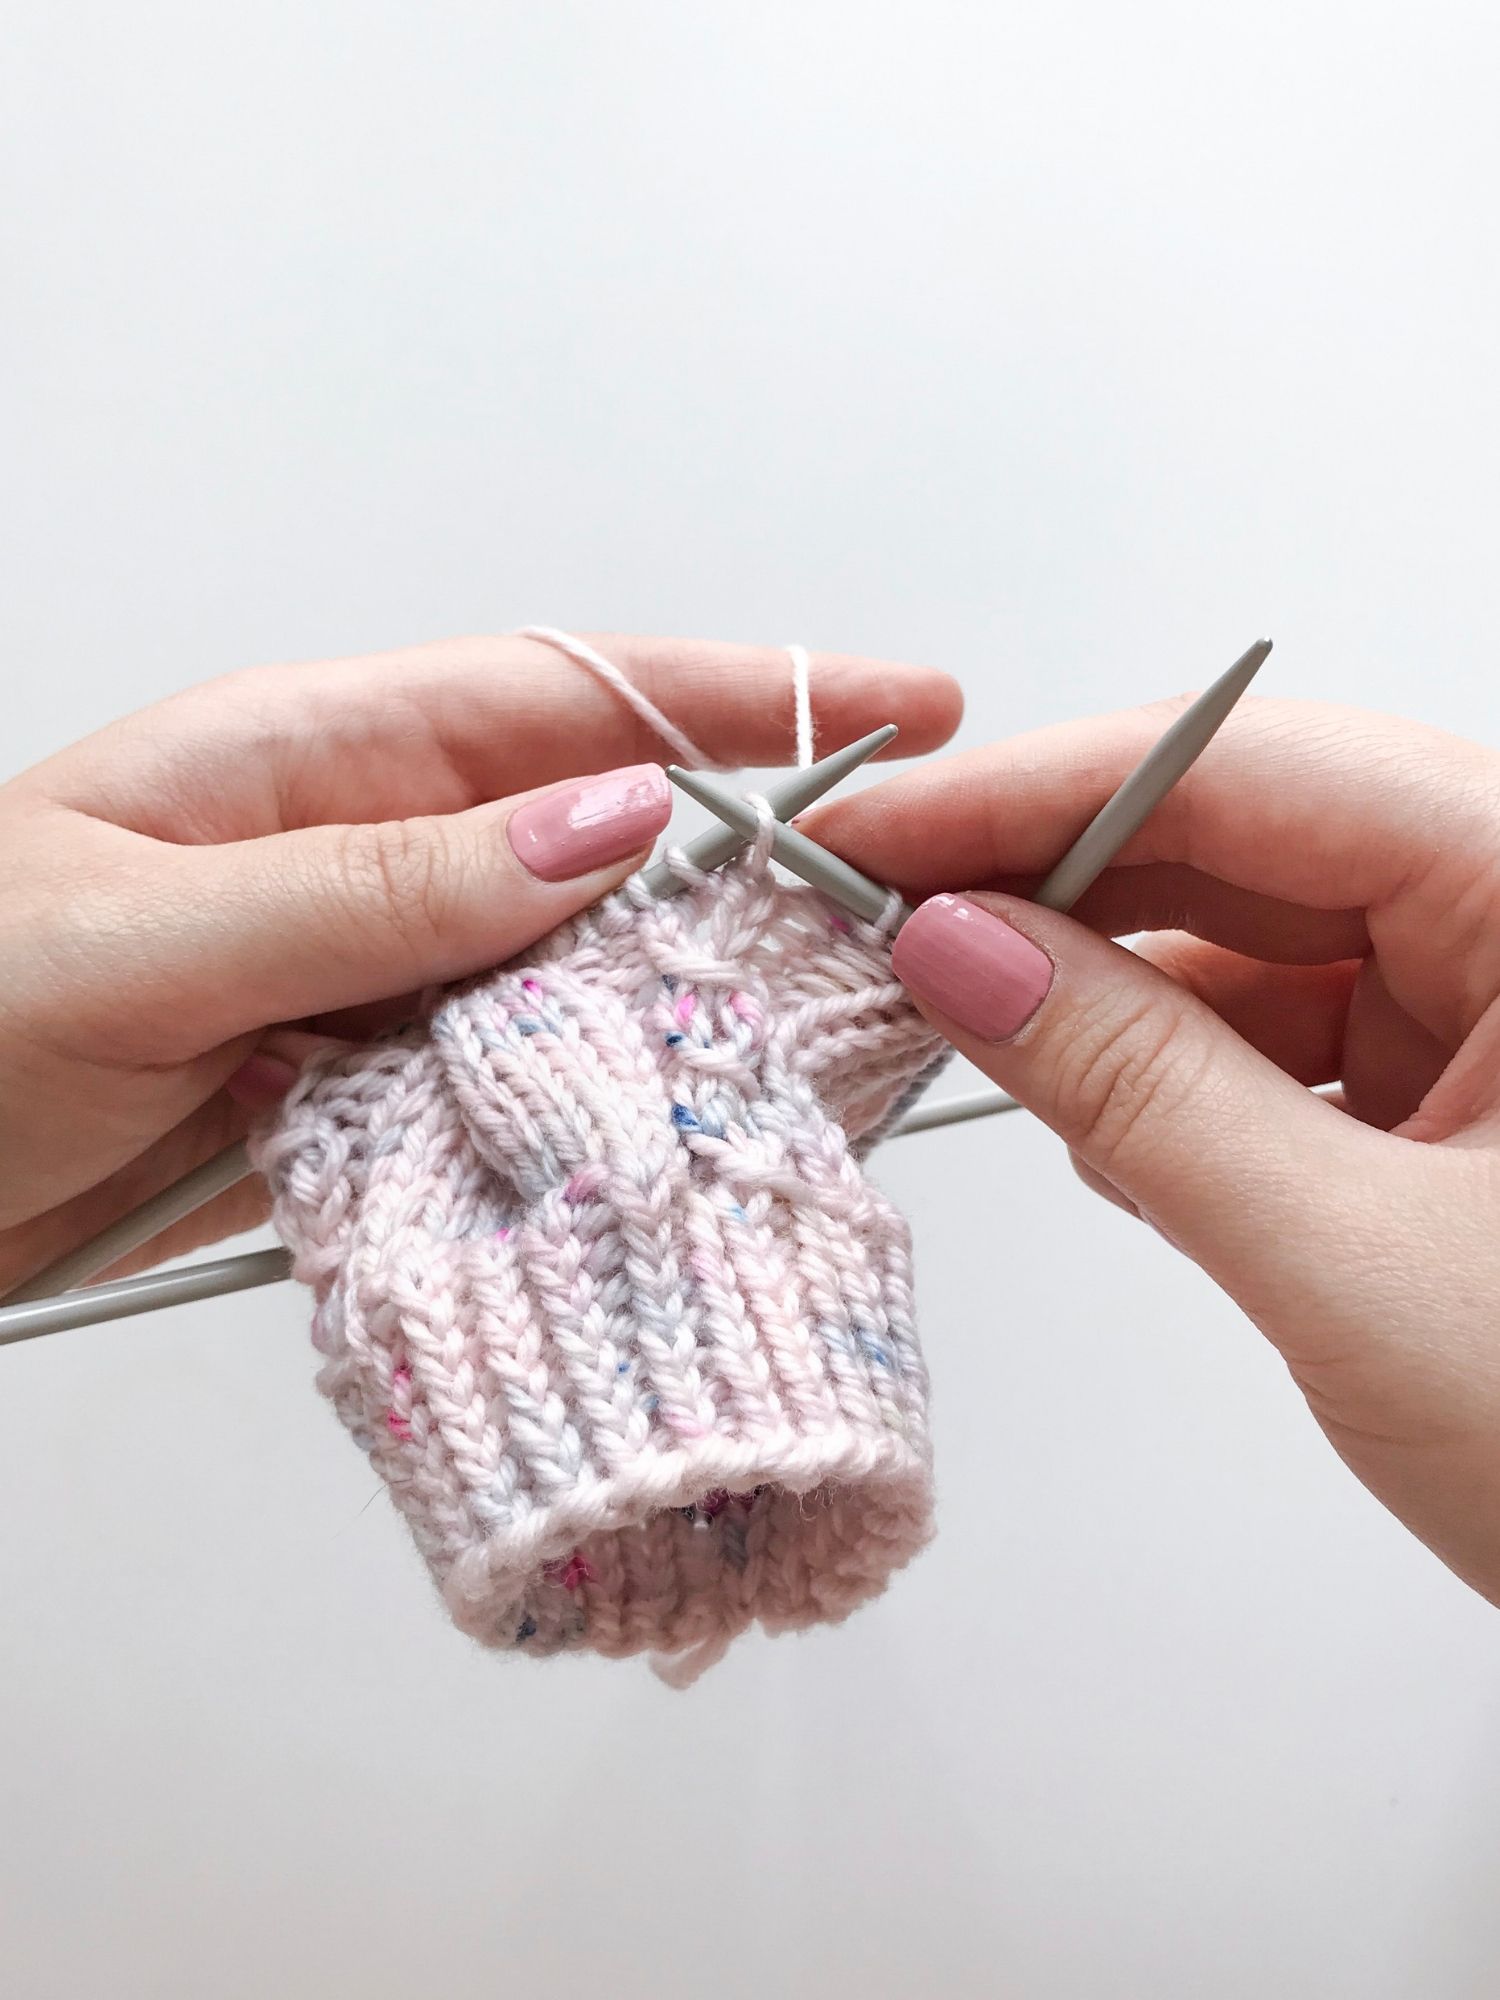
Step 1: slip 5 stitches purlwise (one by one) onto the cable needle in front of the work. Slipping the stitches purlwise is essential – you don’t want to twist them!
After step one, your cable needle or extra DPN should look like this!
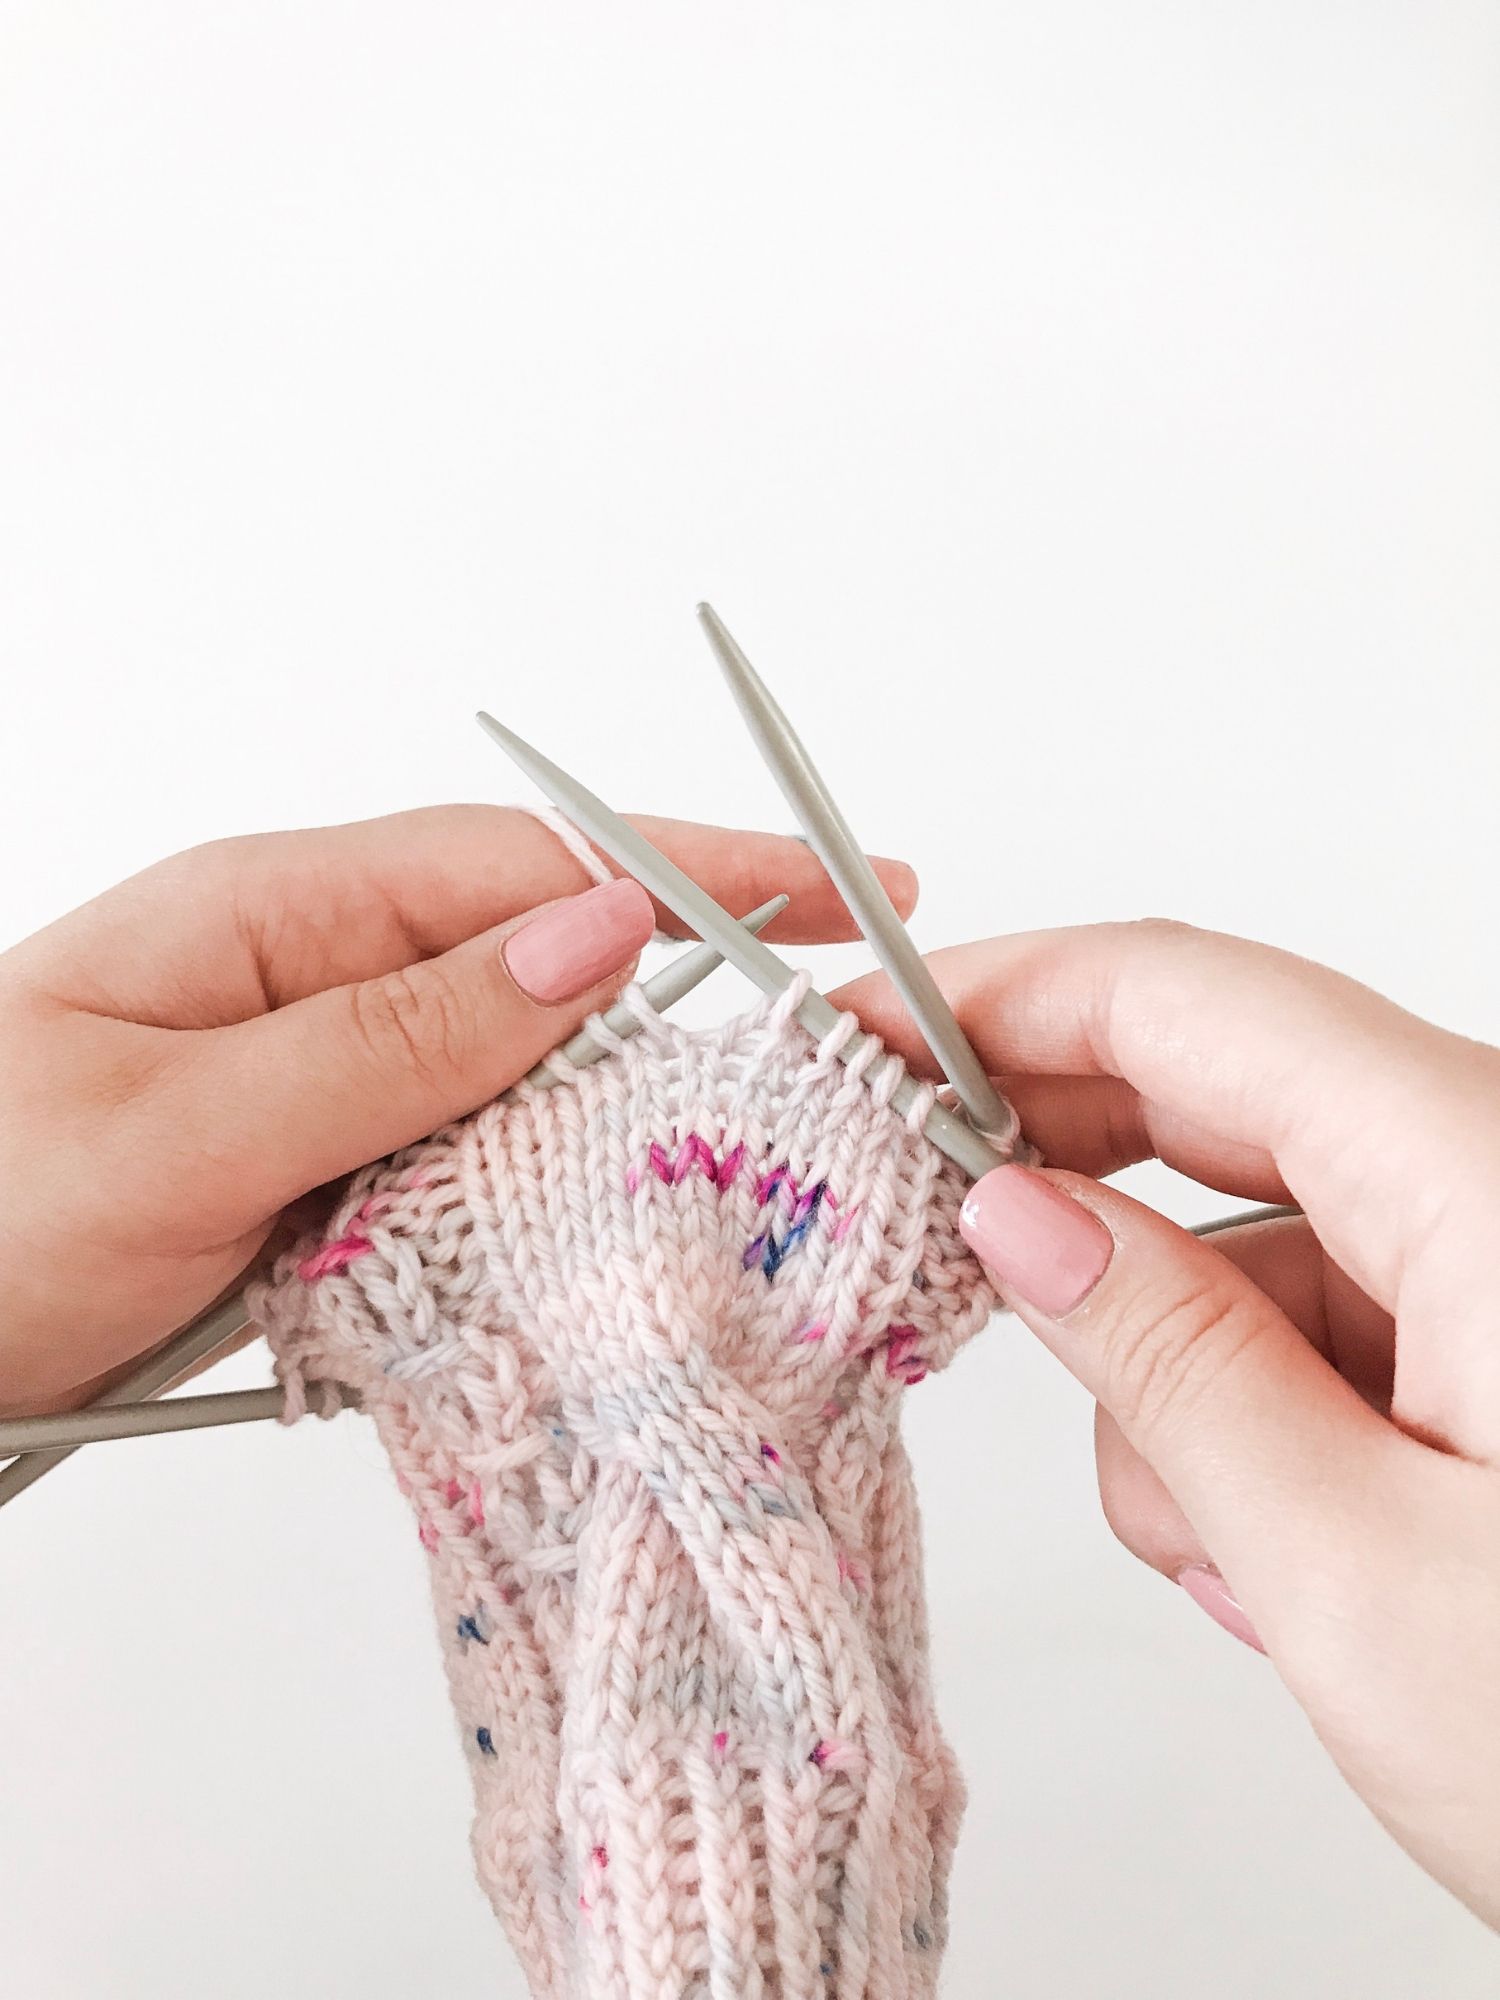
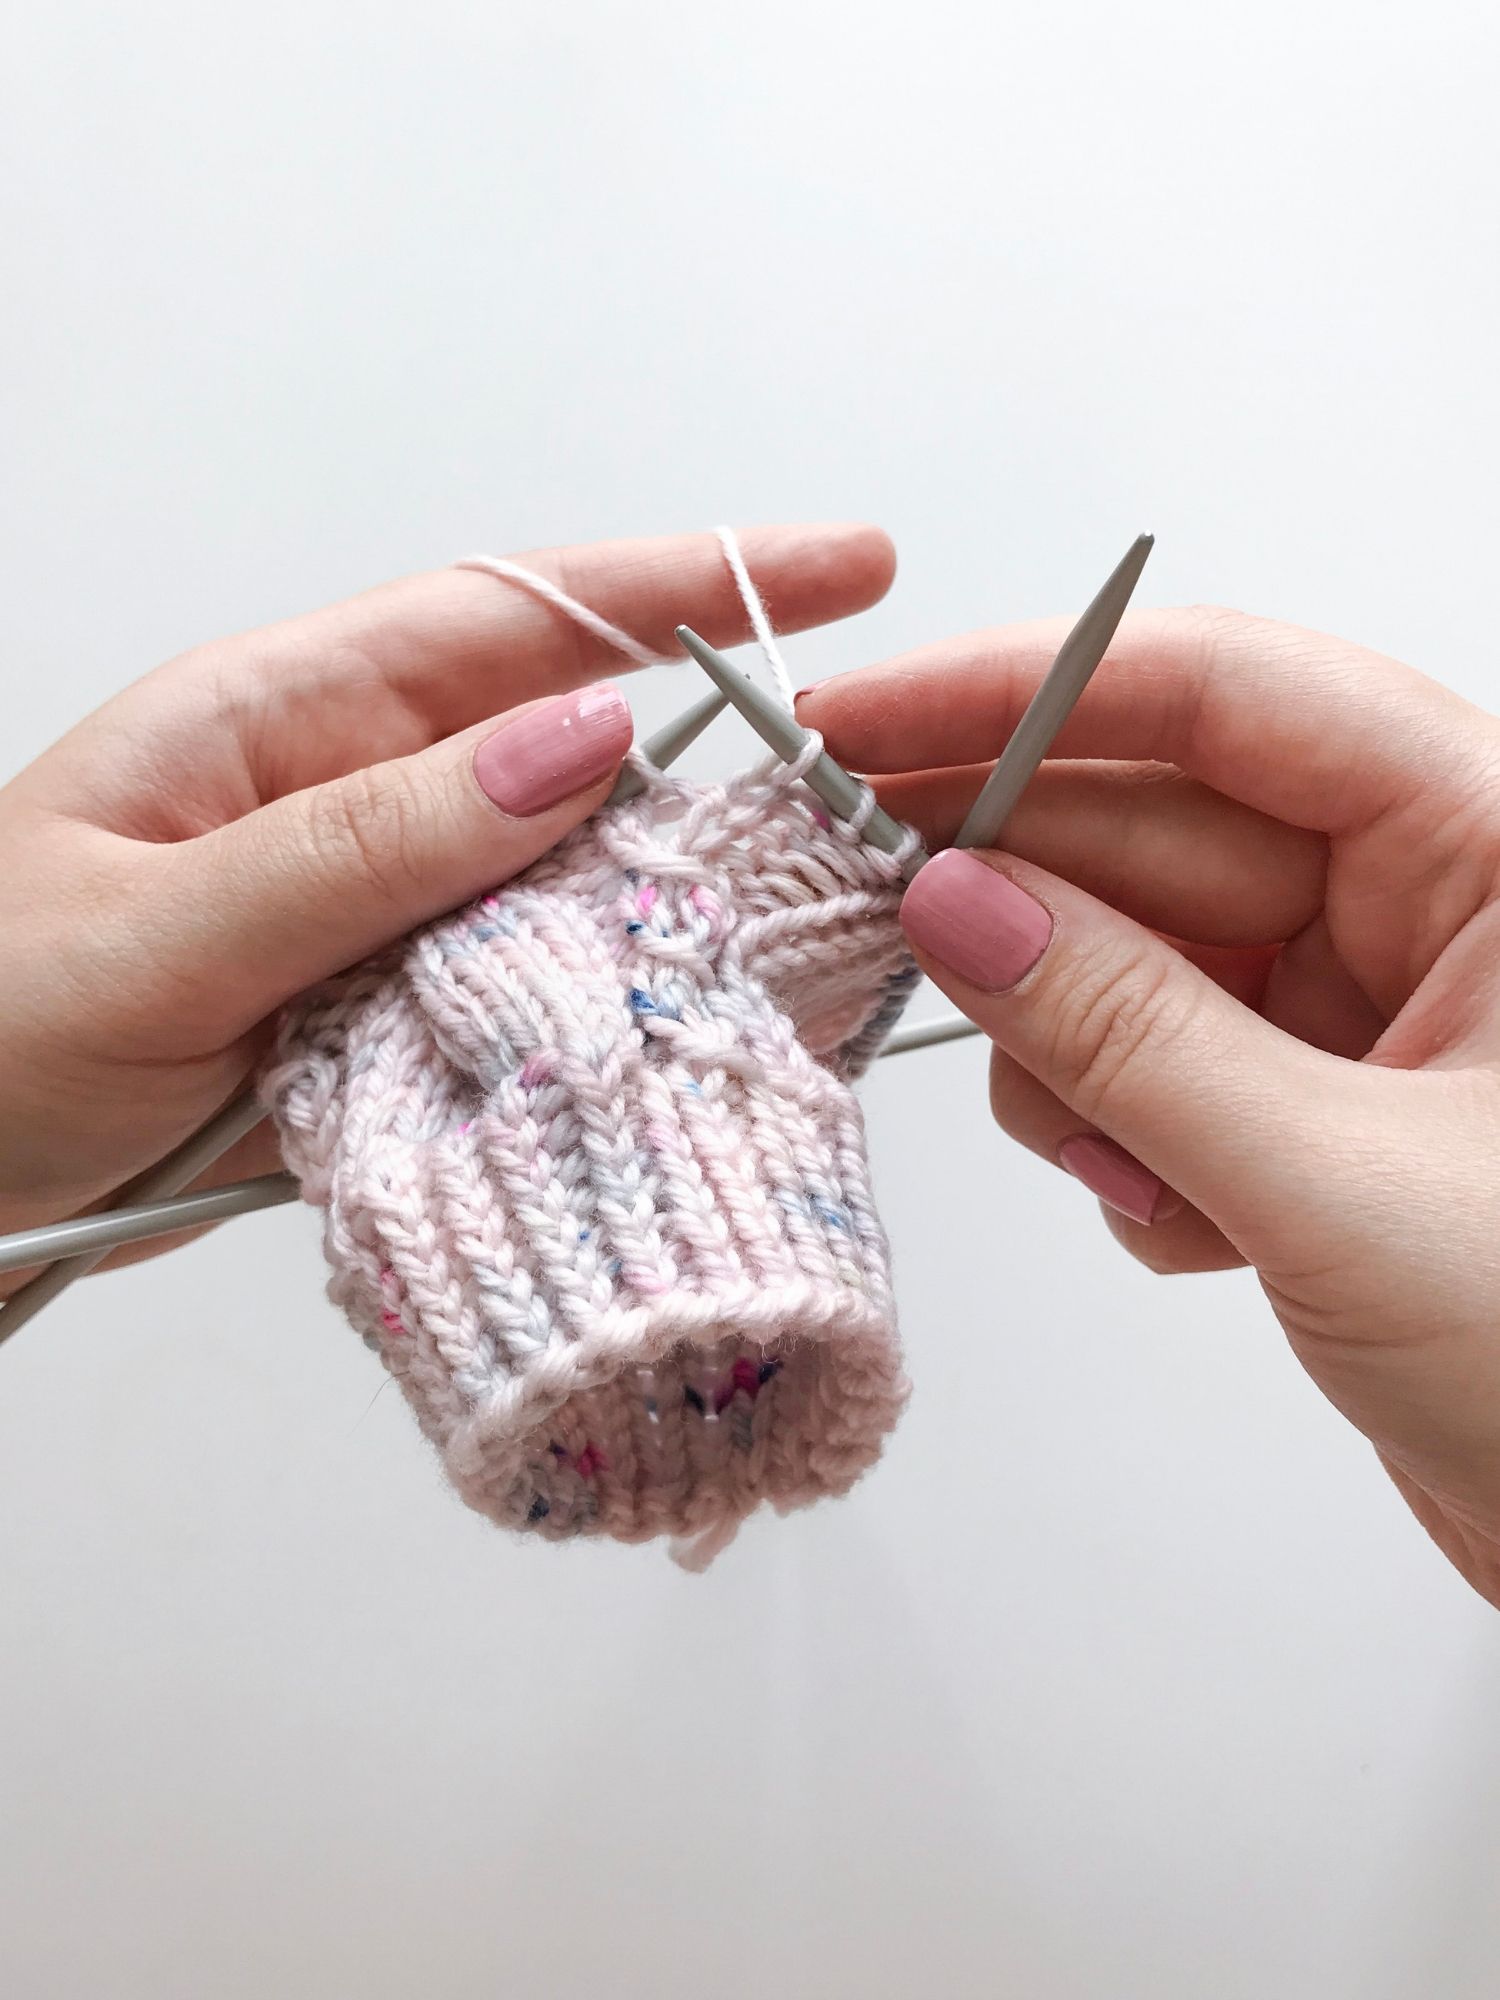
If you do your cables with a DPN, align the needle with your left needle so that you have space and can comfortably knit 5 stitches from the left needle.
Step 2: knit 5 stitches from the left needle like you normally would.
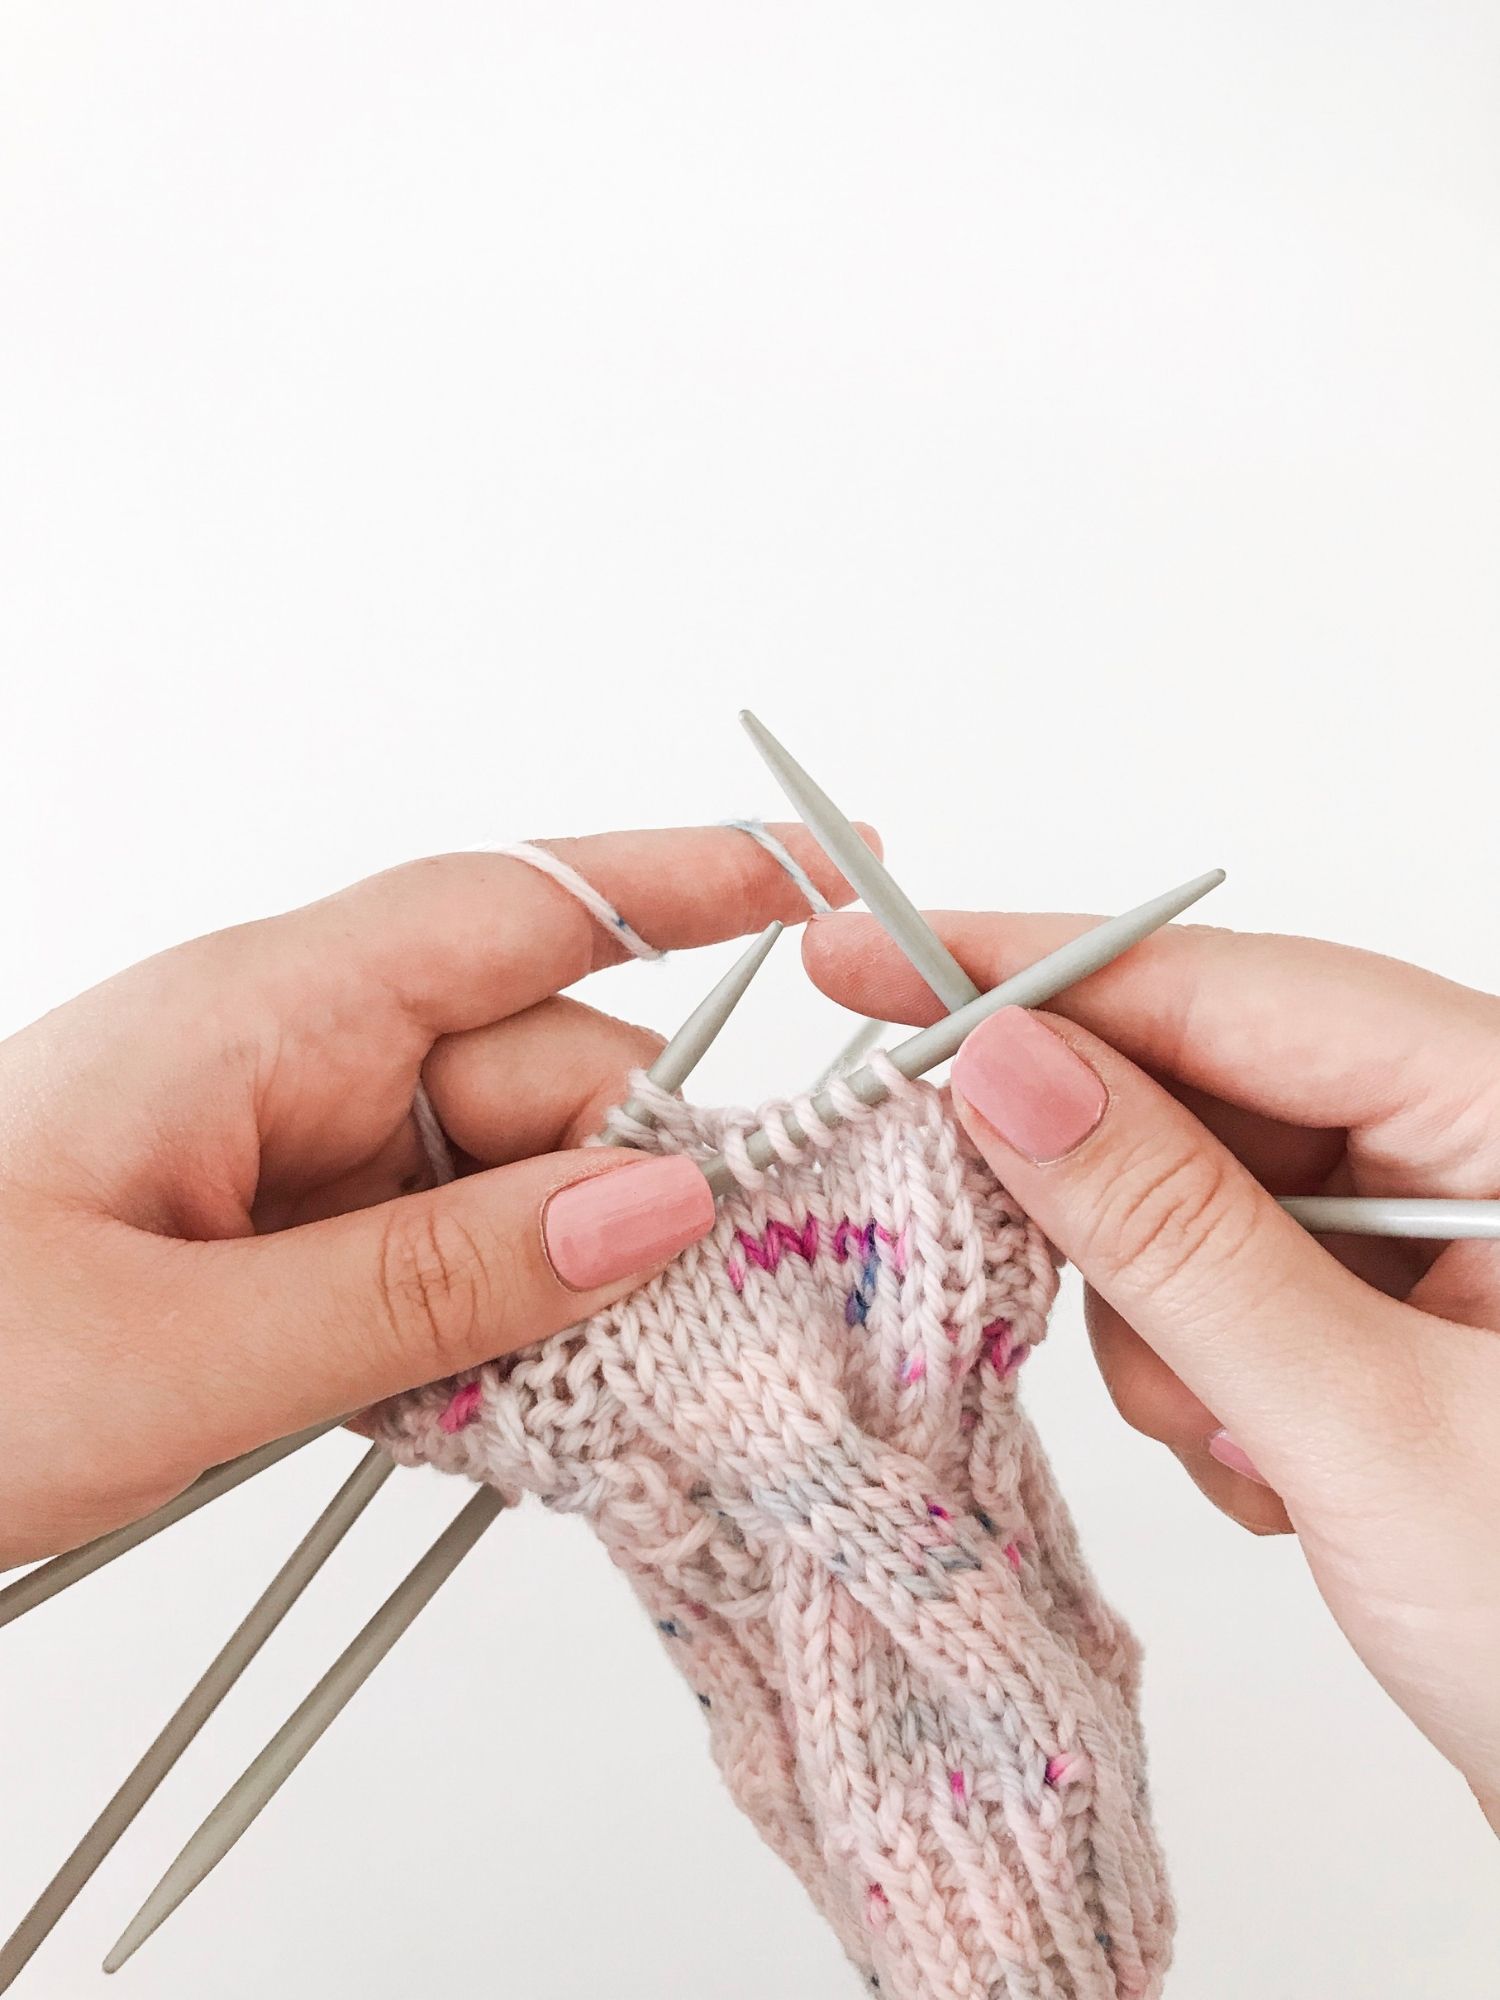
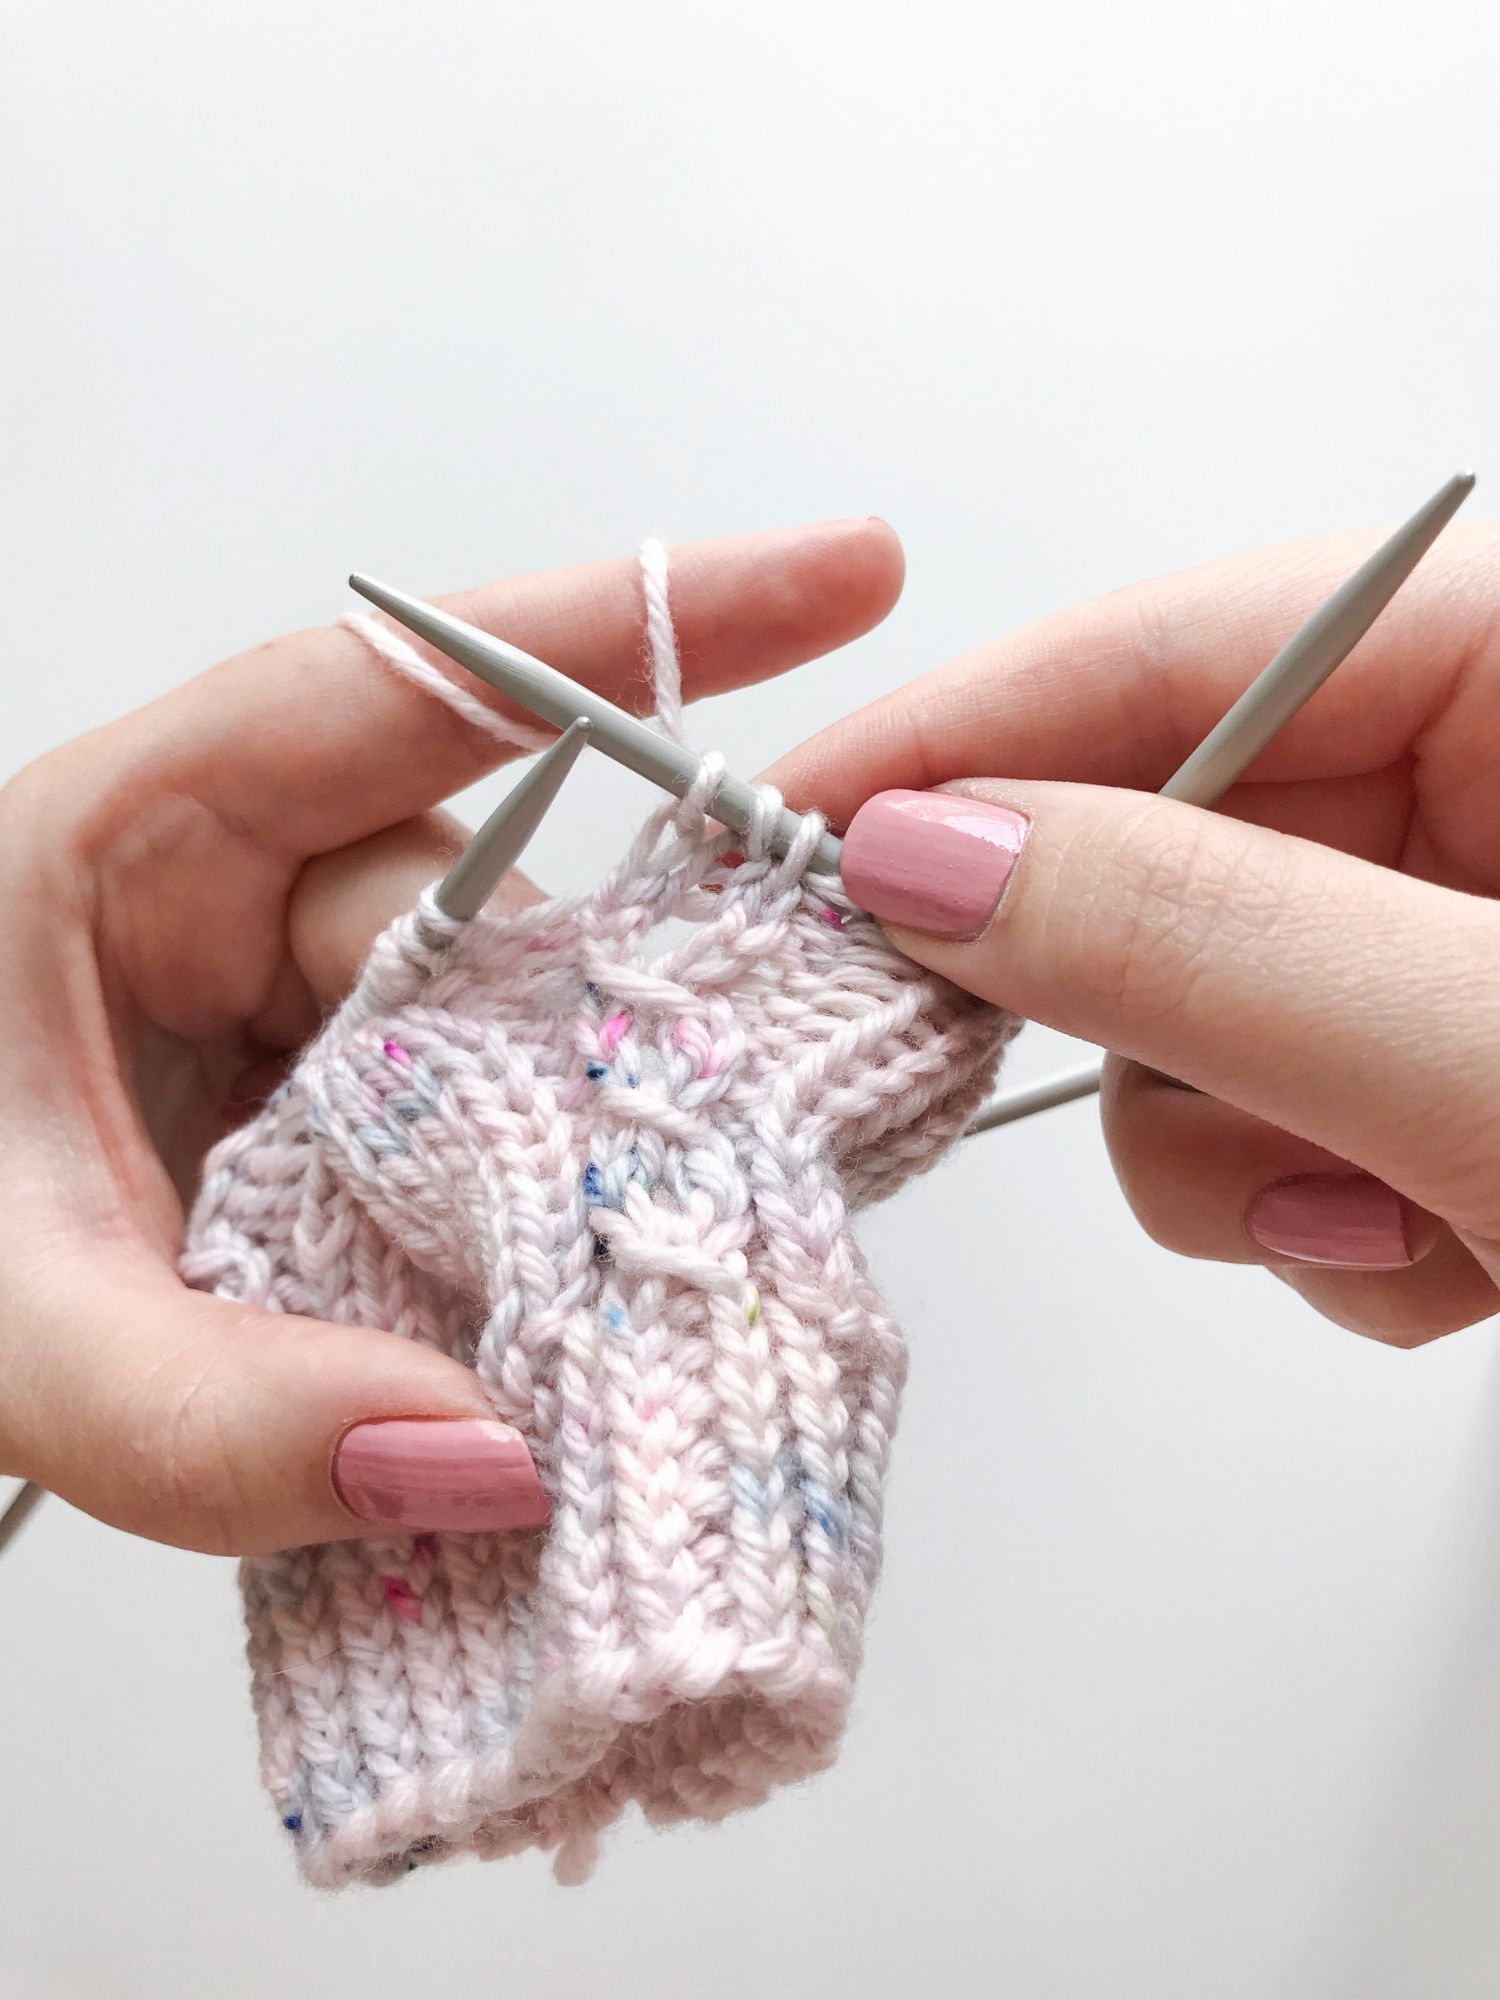
5 stitches done, now onto the stitches that are waiting on the cable needle!
Step 3: knit 5 stitches from the cable needle.
And voilà, your cable is ready – easy, fun and look at that texture!
I also have a tutorial for the little lace stitch on both sides of the big cable, find it here!
I’ll be off to knit some more cables now, I hope you enjoyed this tutorial!
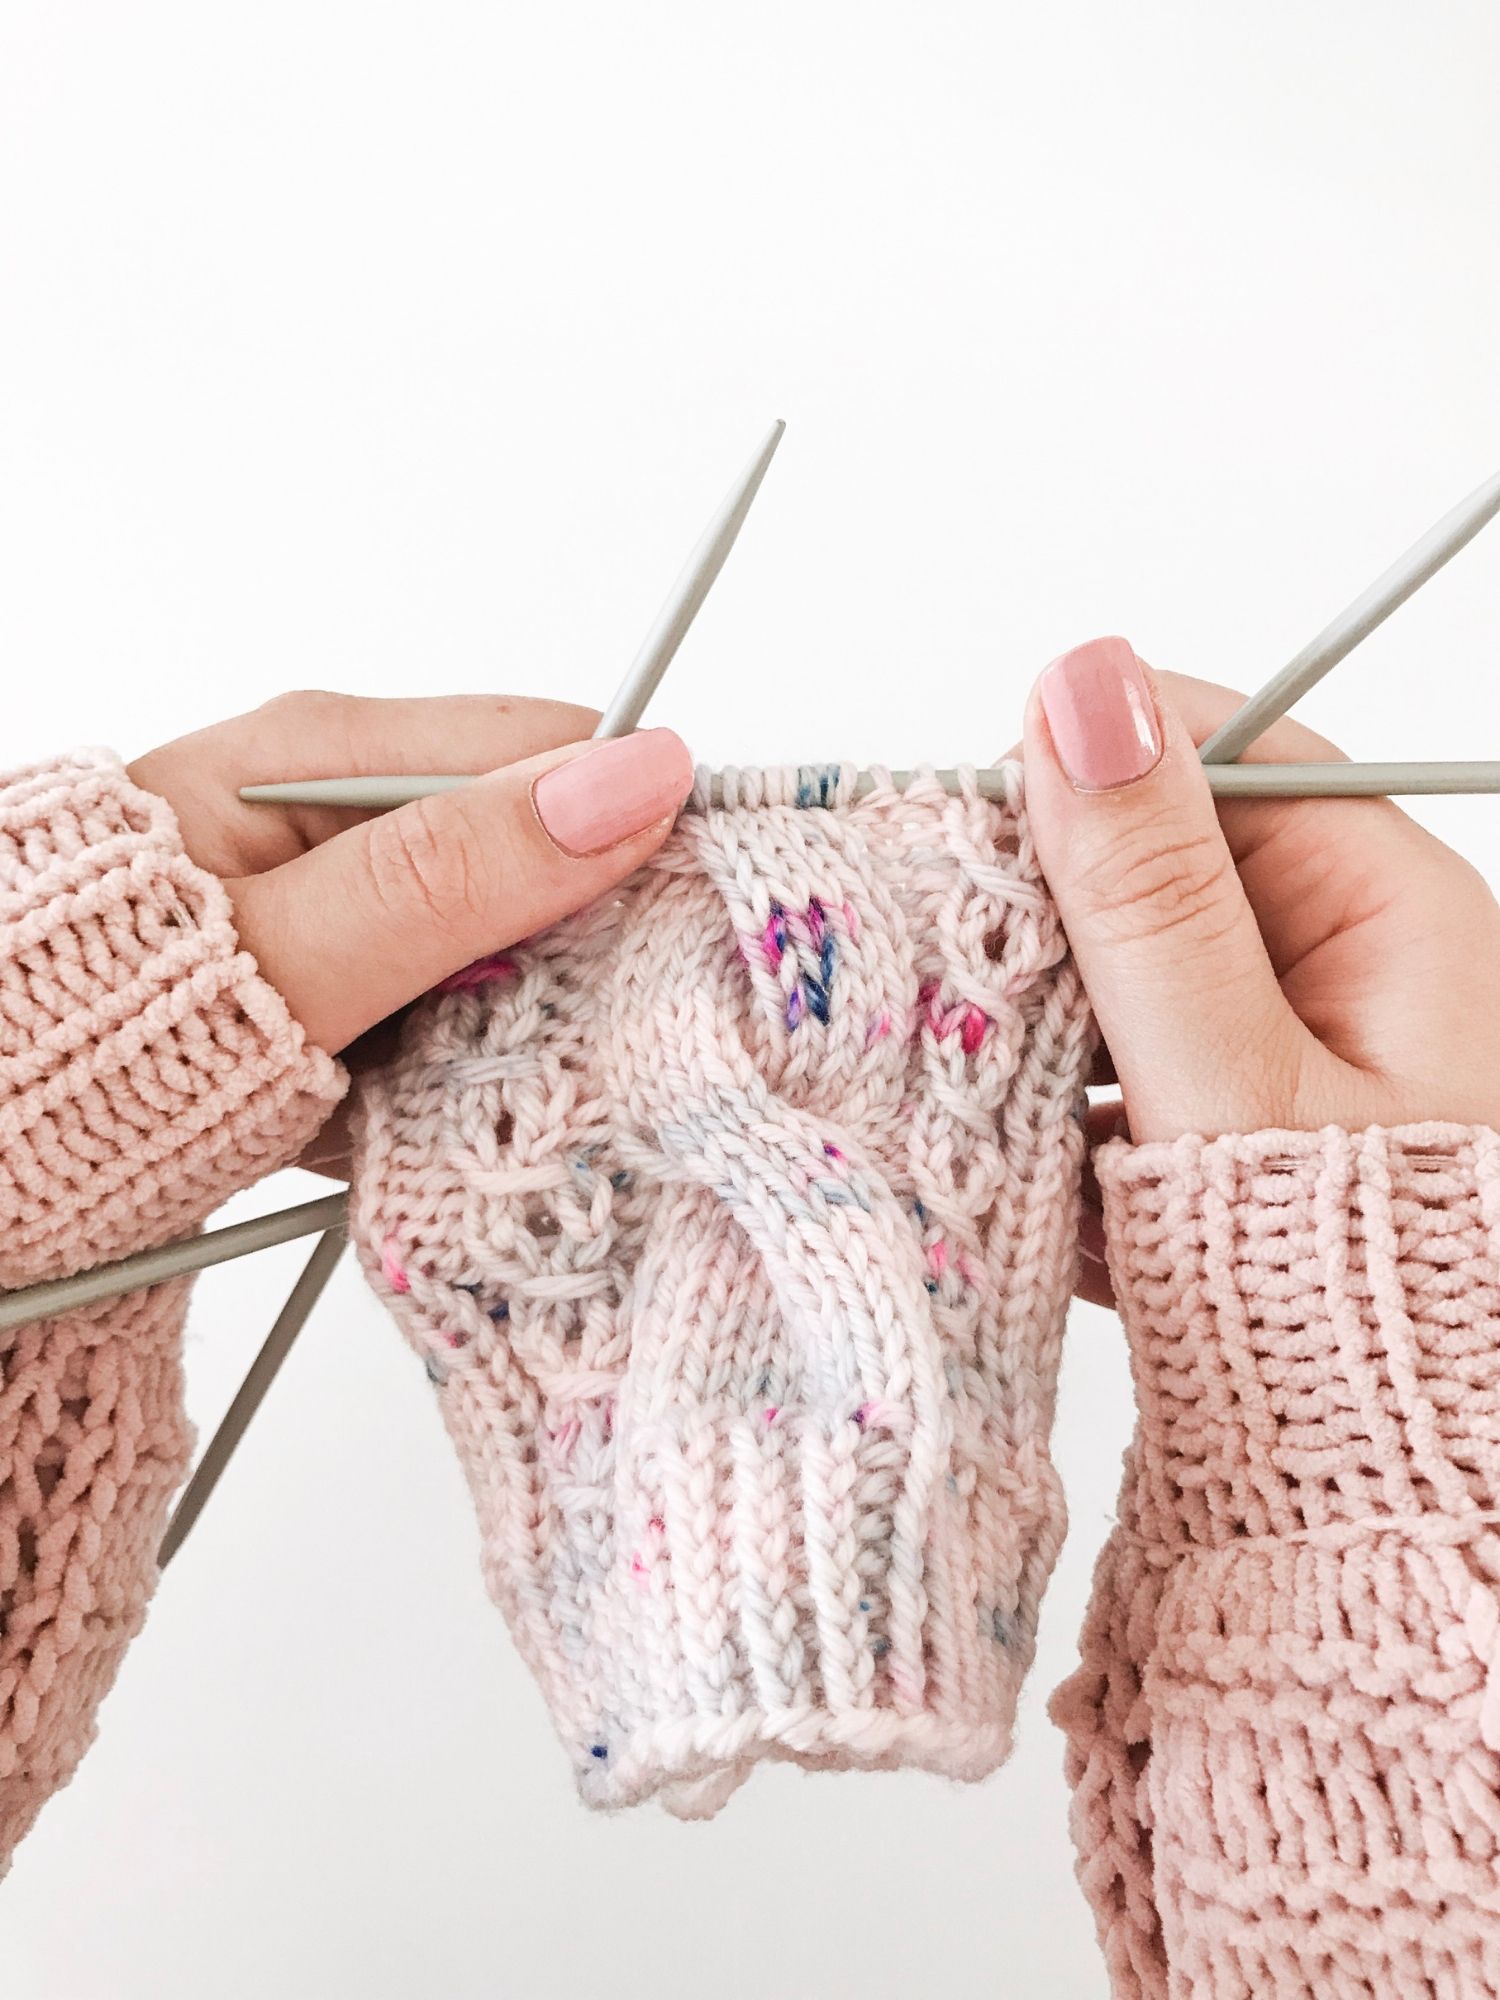
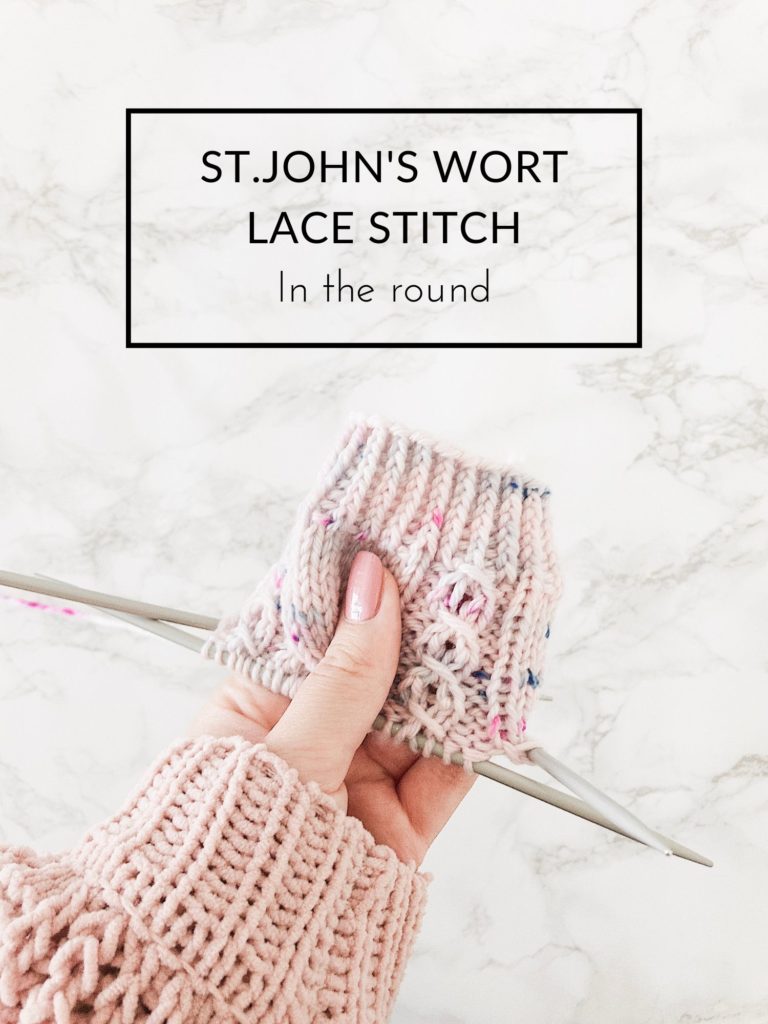
Hi guys! Today’s post is all about the St.John’s Wort lace stitch knit in the round: I love the vibe of this stitch as it looks like a tiny cable and creates a beautiful and delicate detail into your knit piece! I’m currently knitting a pair of socks with this simple lace pattern and it’s blown my mind away with its ease and elegance.
How pretty does it look with the big cable!
This 3-stitch pattern is repeated over 4 rounds and it’s fun, easy and creates a cable-like look without a cable needle! Here are the written instructions:
The pattern now consists of 6 stitches, that you can repeat for as many times as needed per round. Rounds 1-4 are repeated.
But back to the 3-stitch version, and trust me when I say I got you covered; here’s a bunch of tutorial pictures for rounds 1 and 2, and even a Youtube video tutorial at the end of the post!
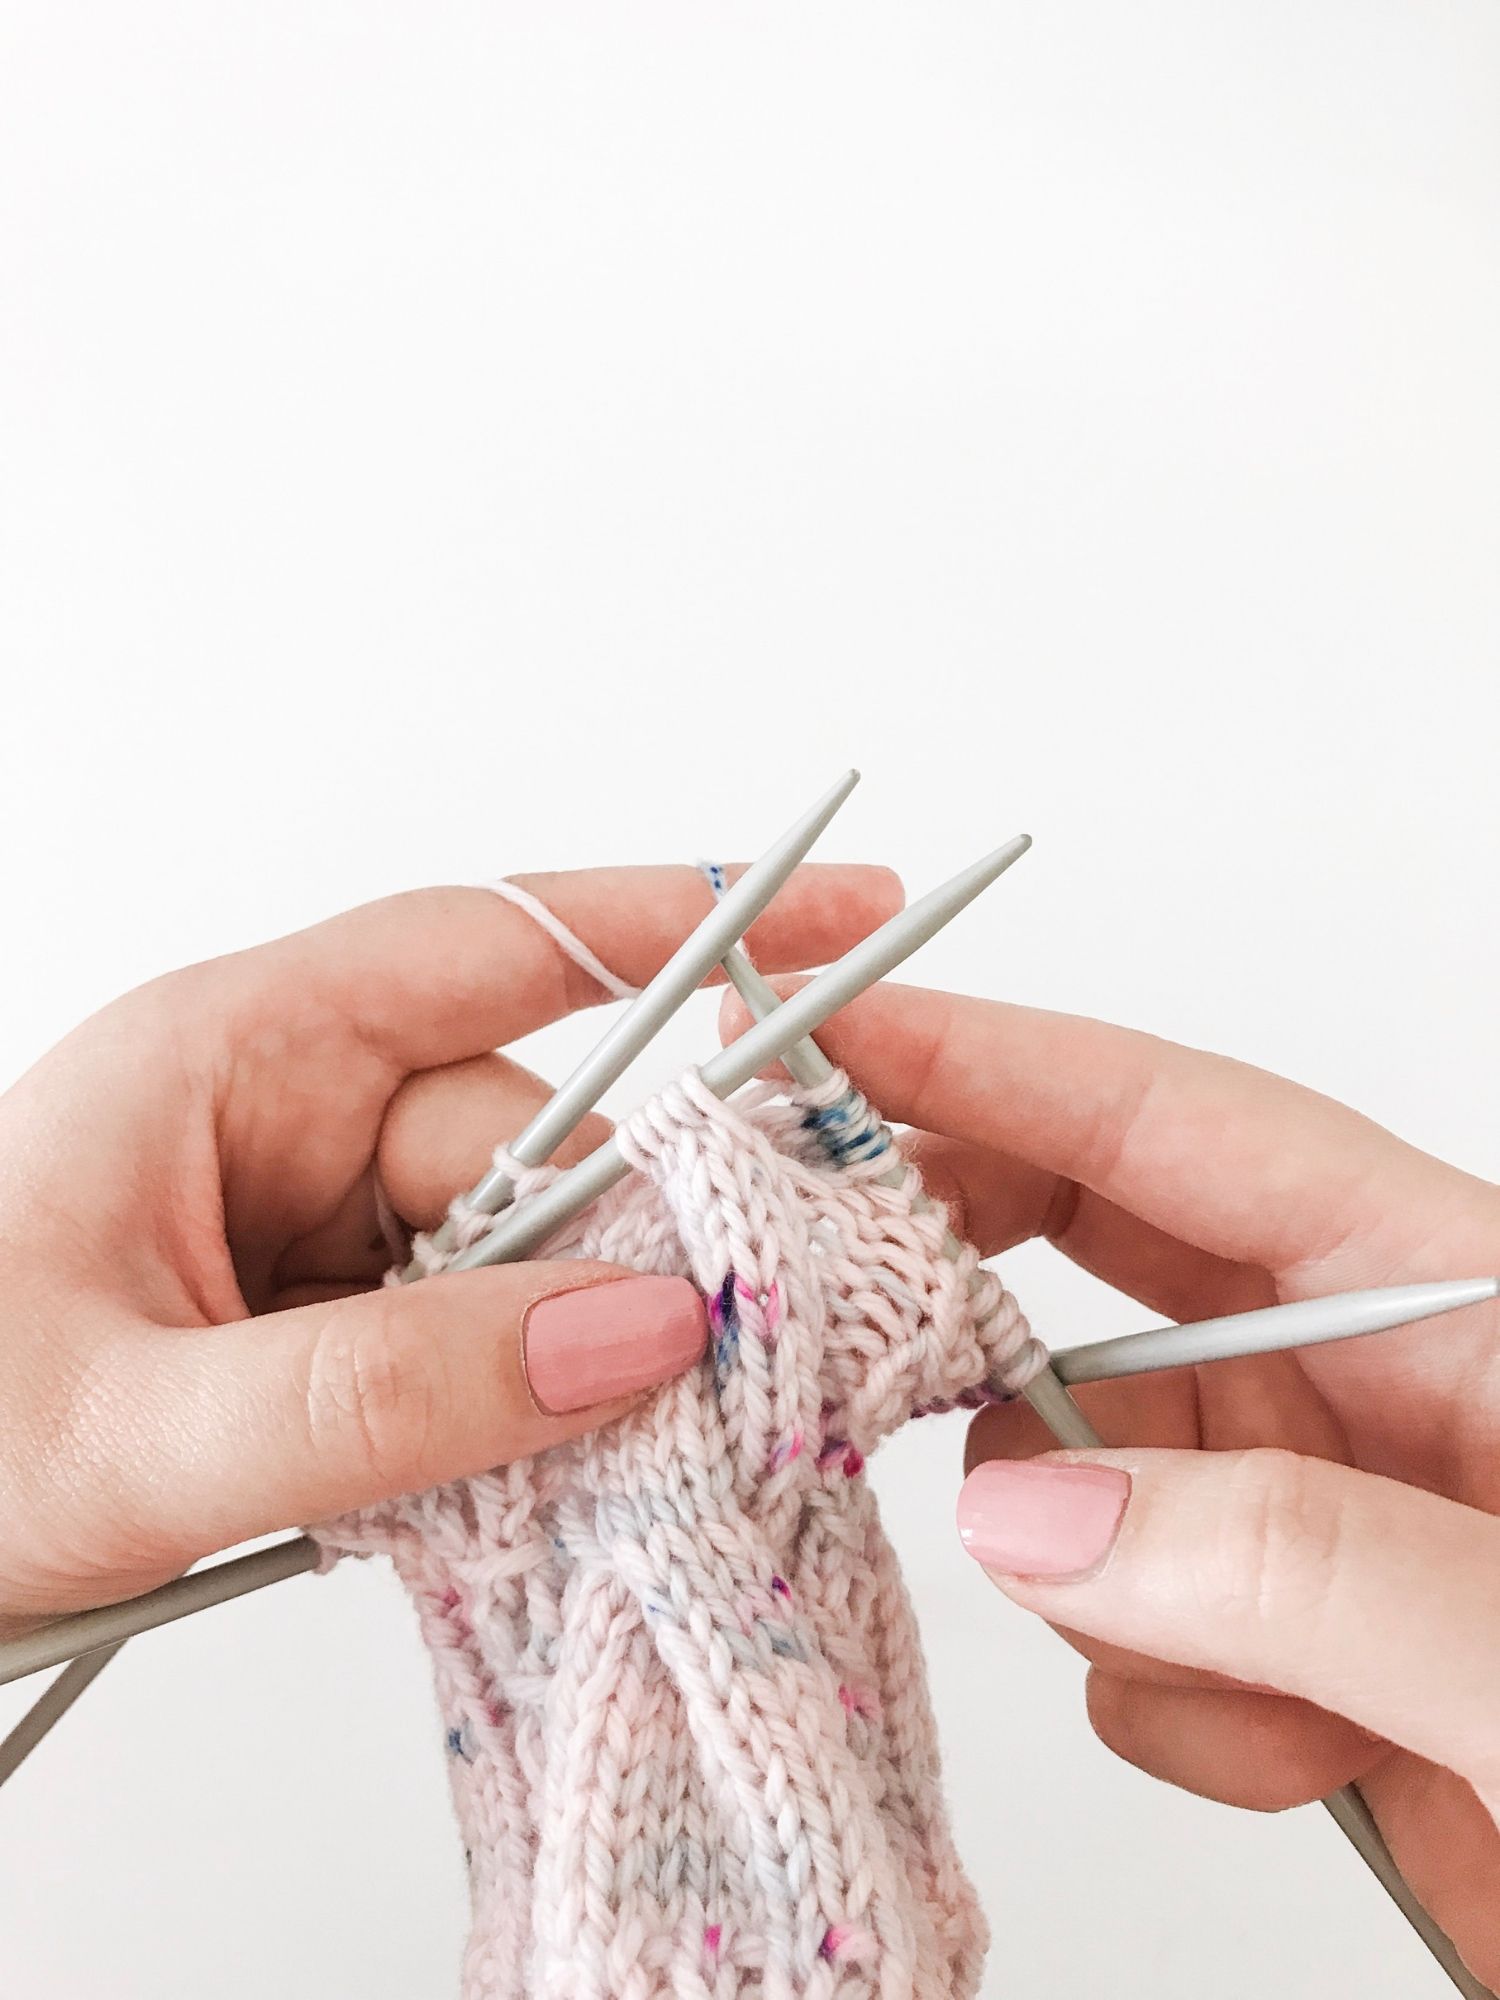
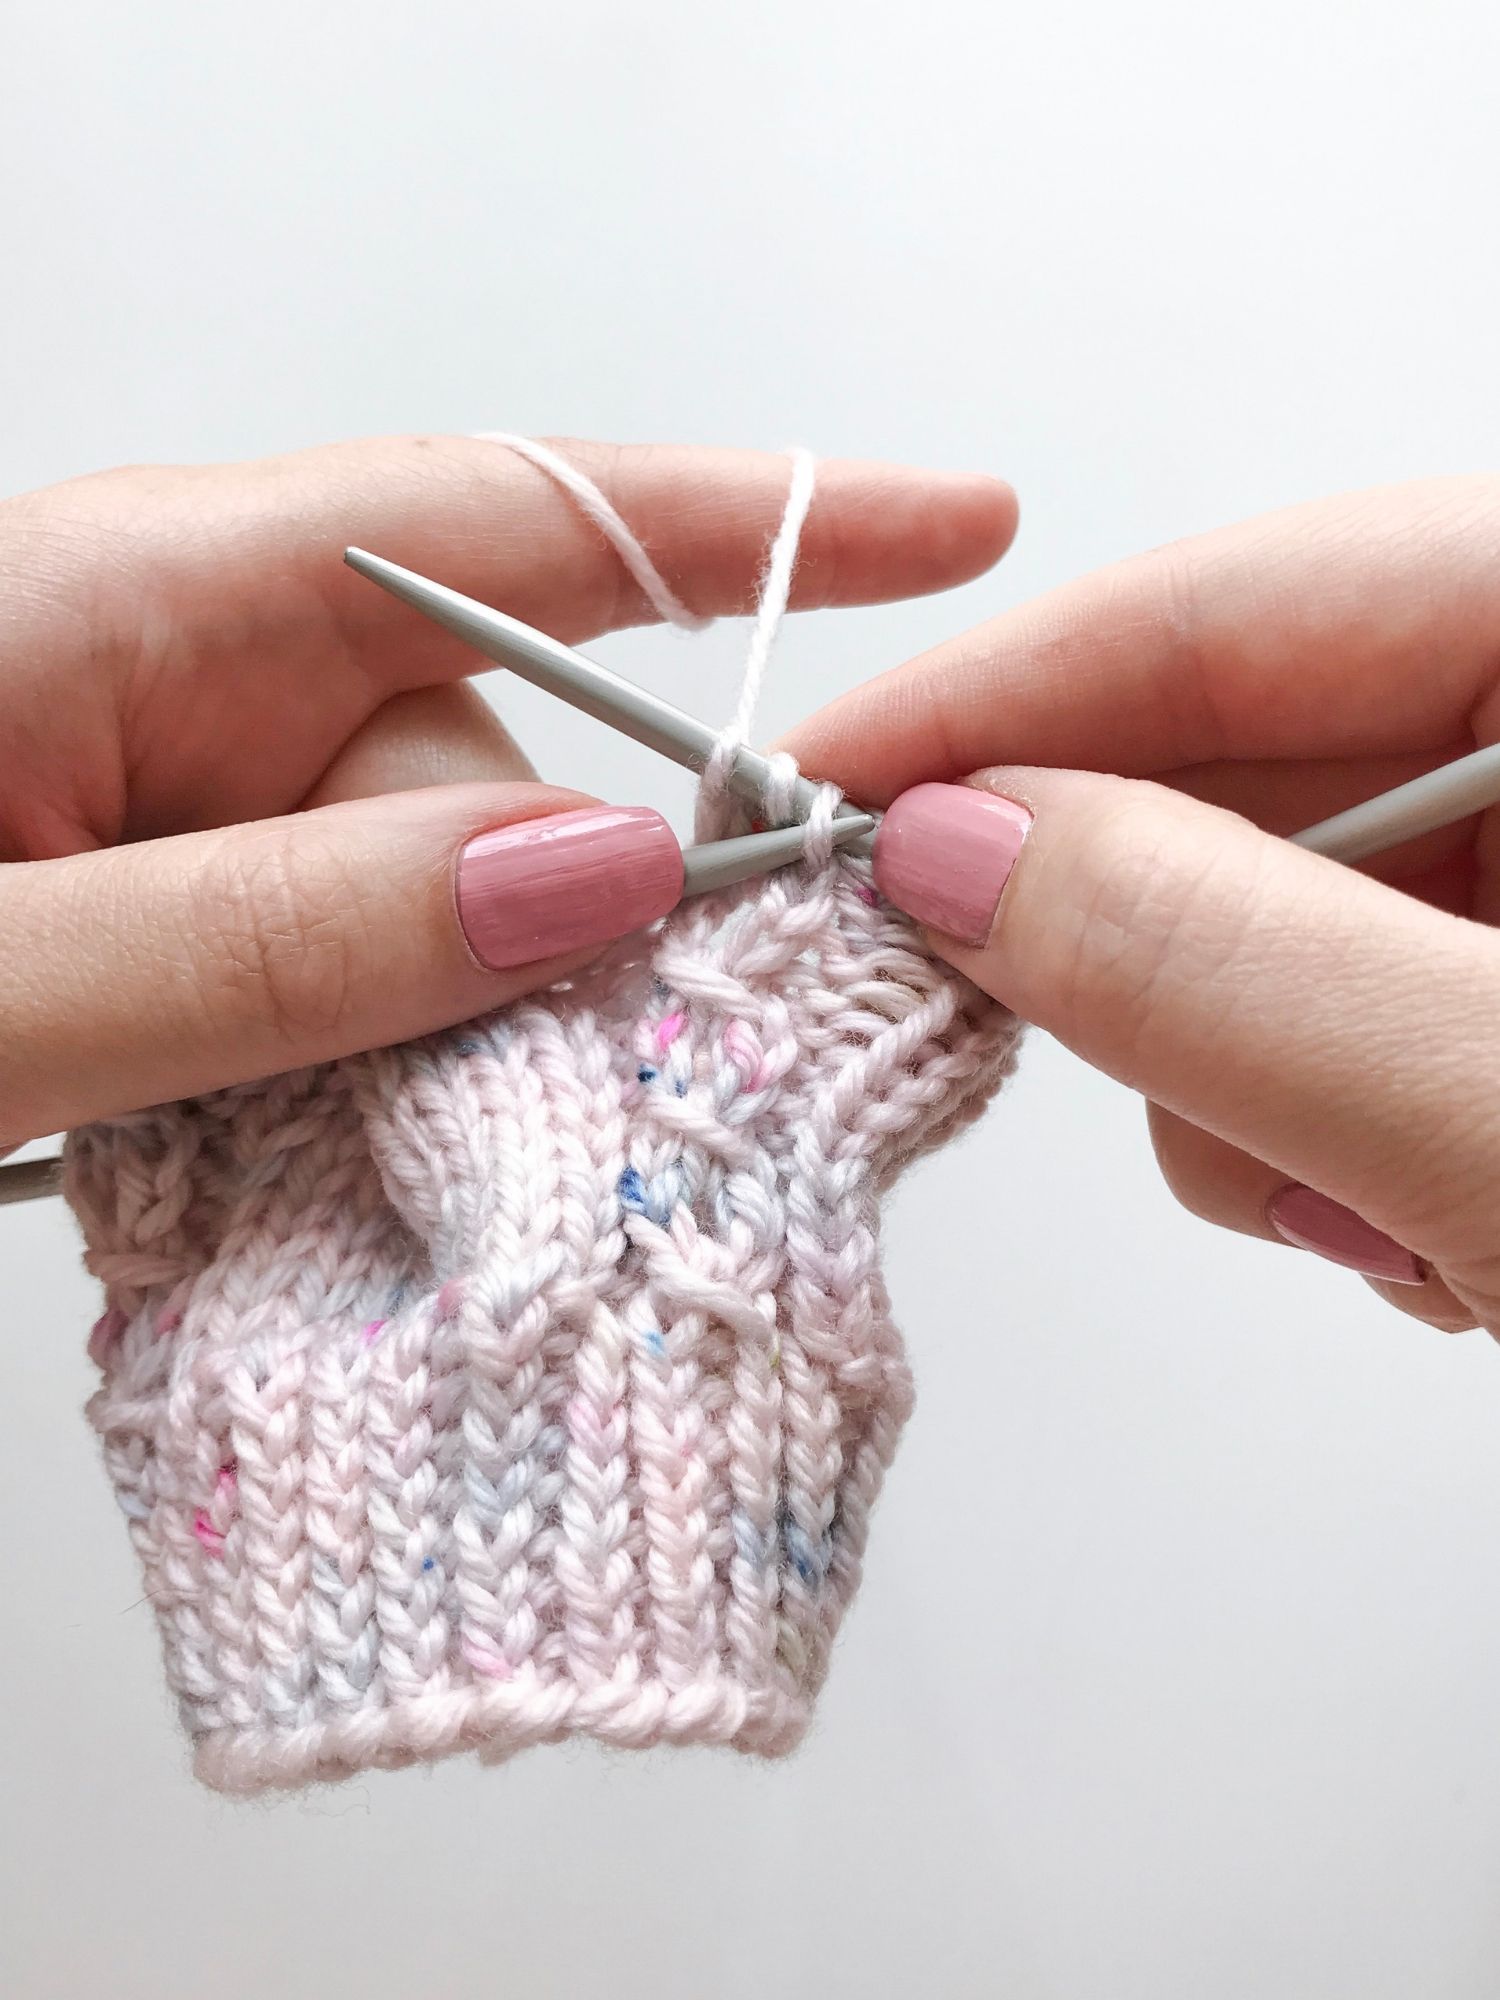
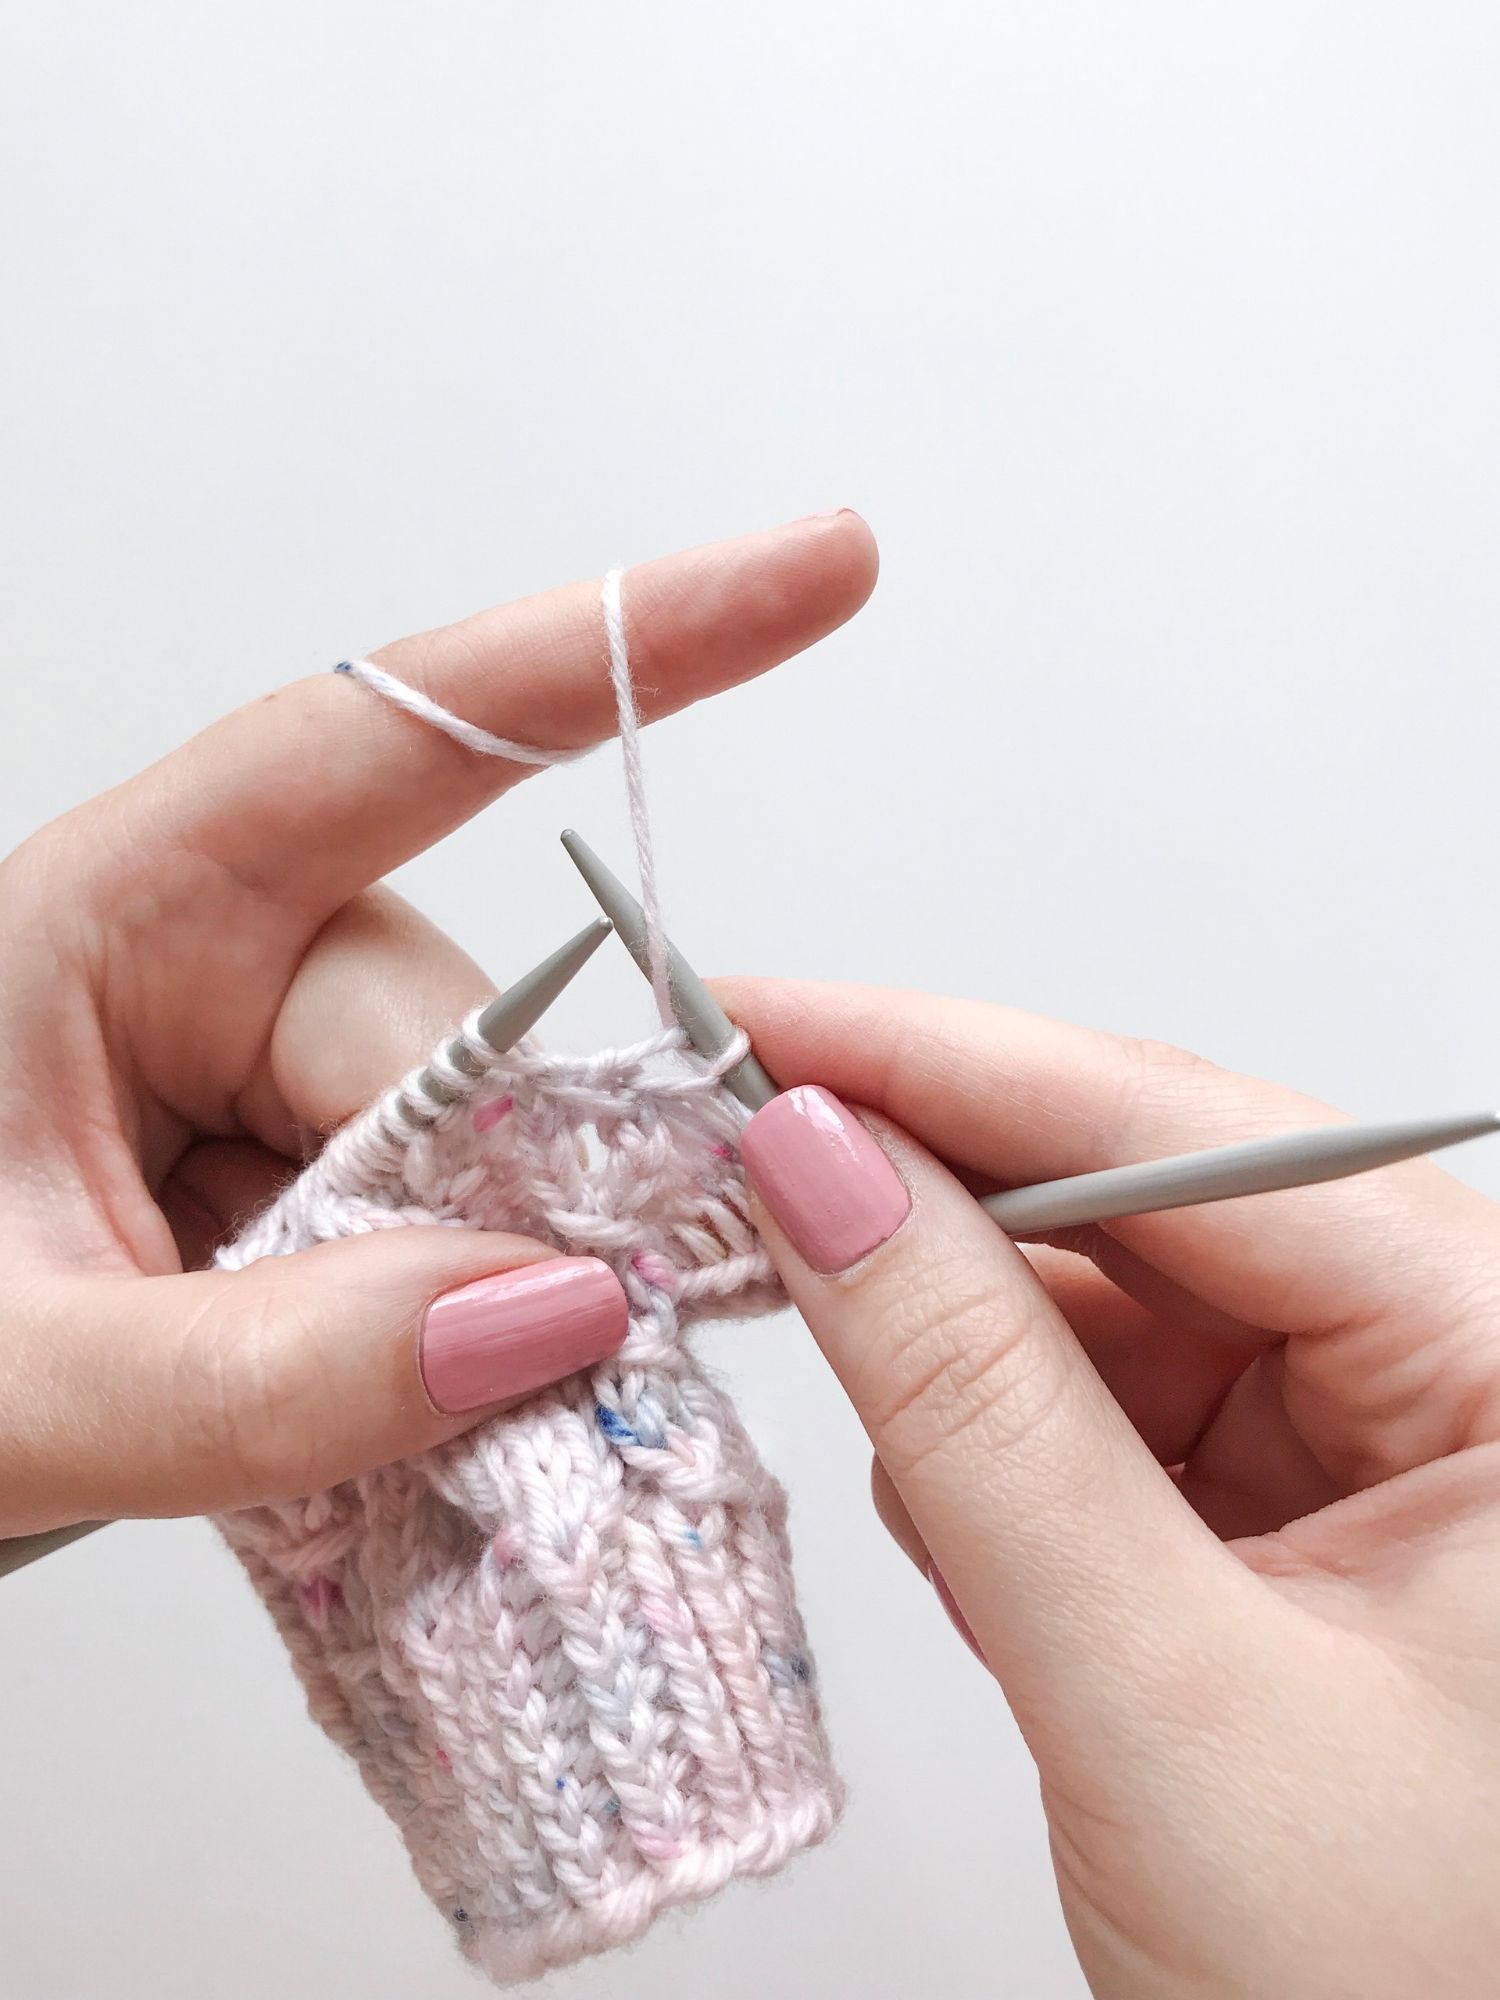
Round 1: slip 1 stitch purlwise…
…and pass it onto the right needle!
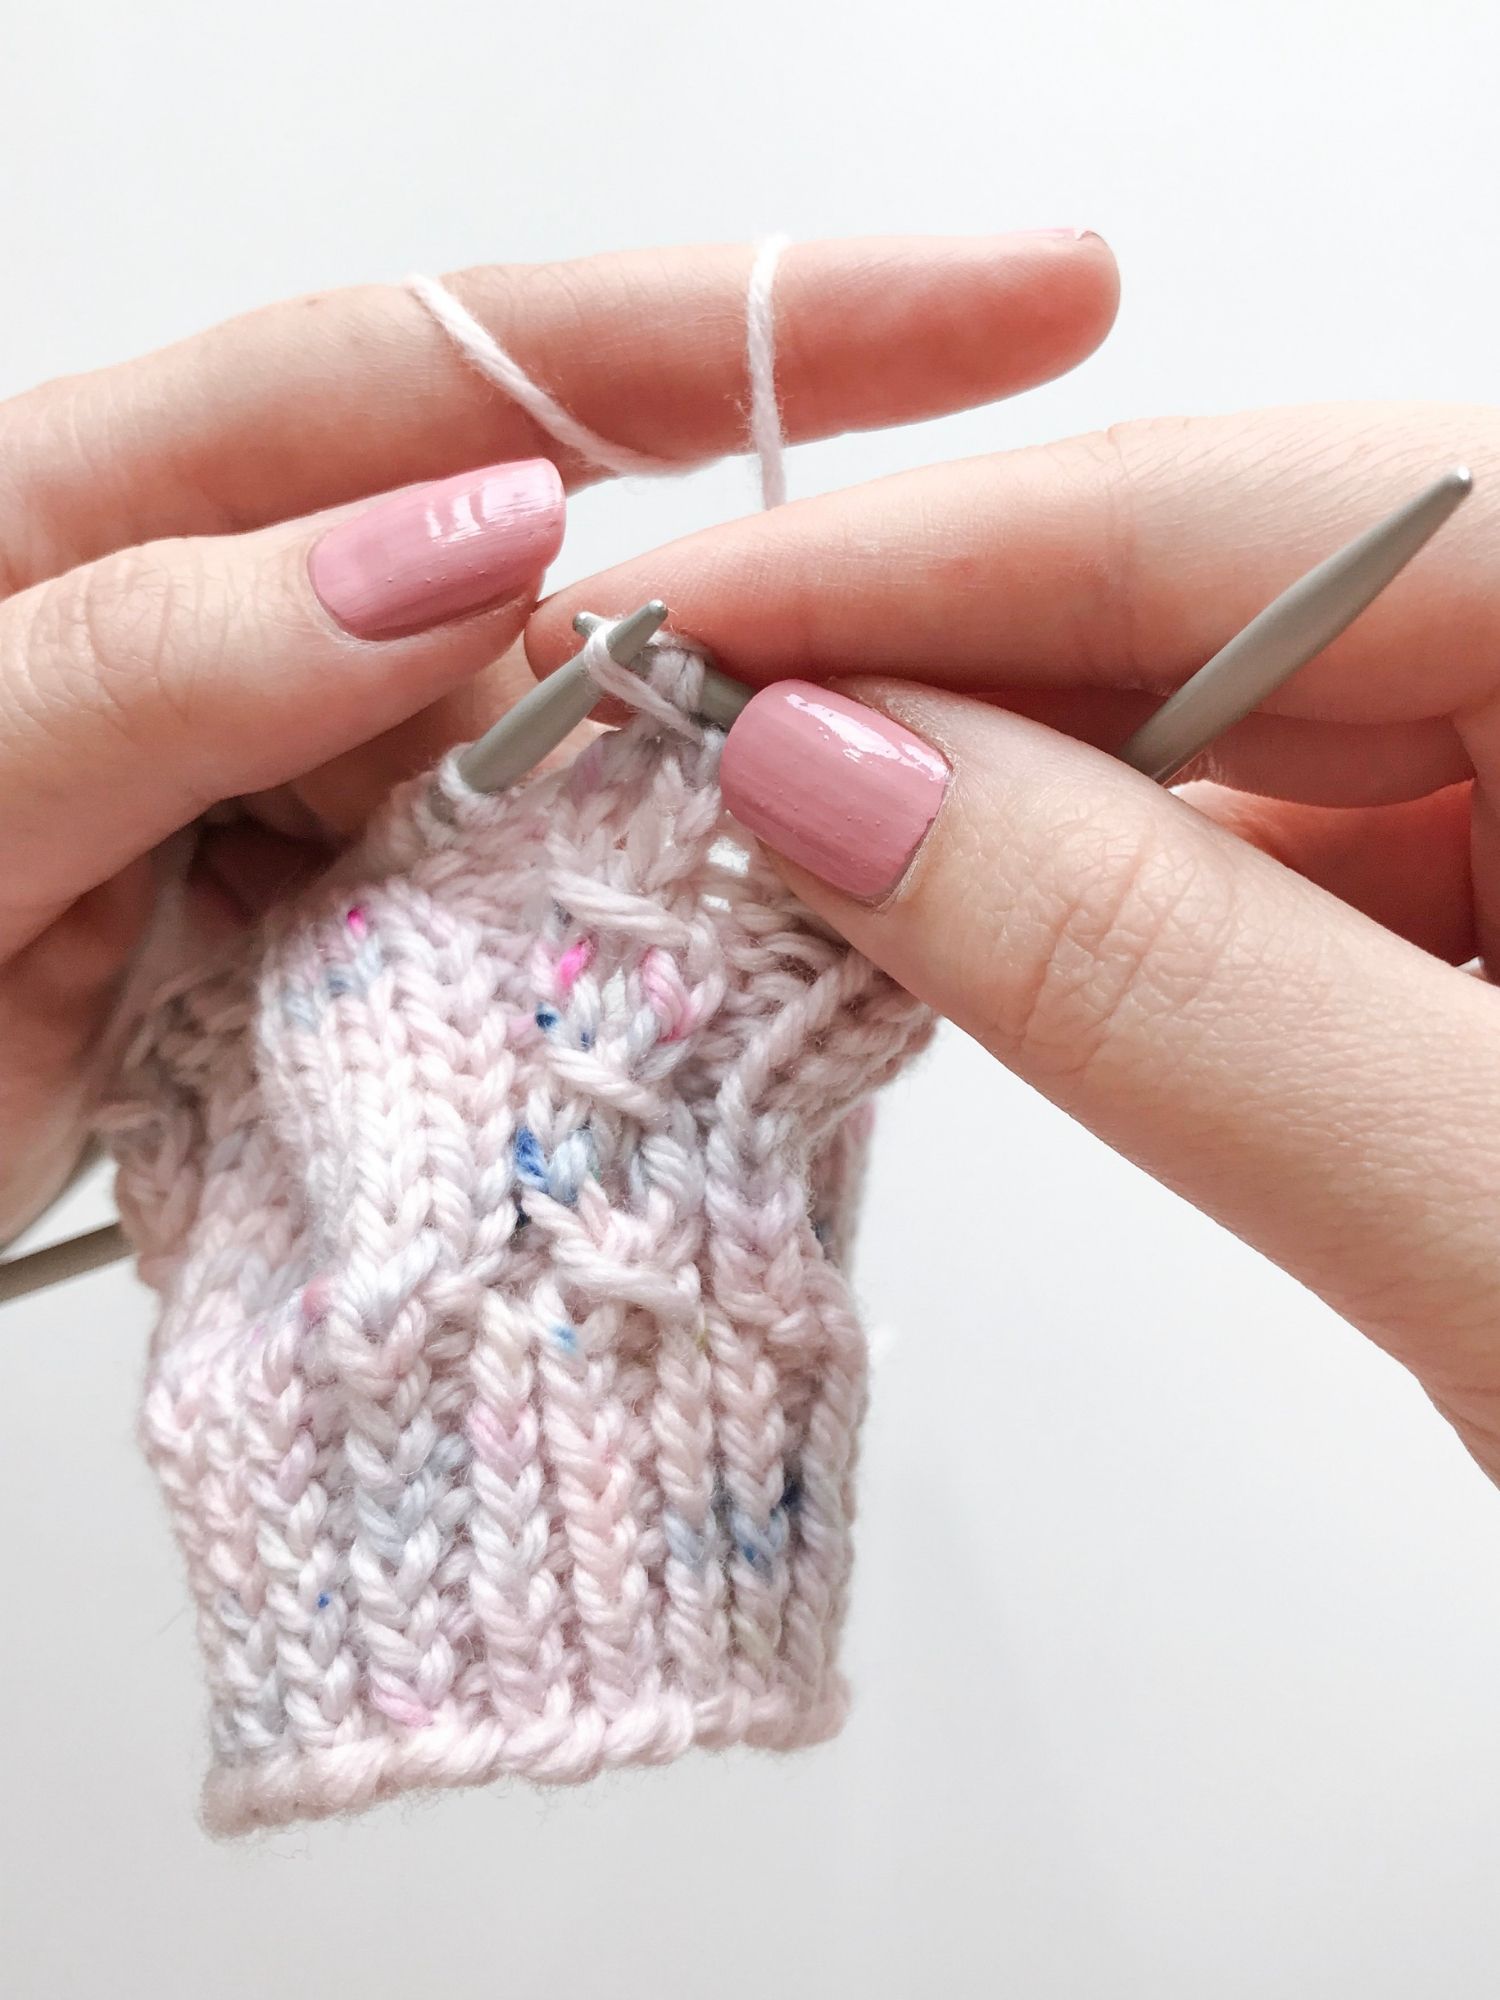
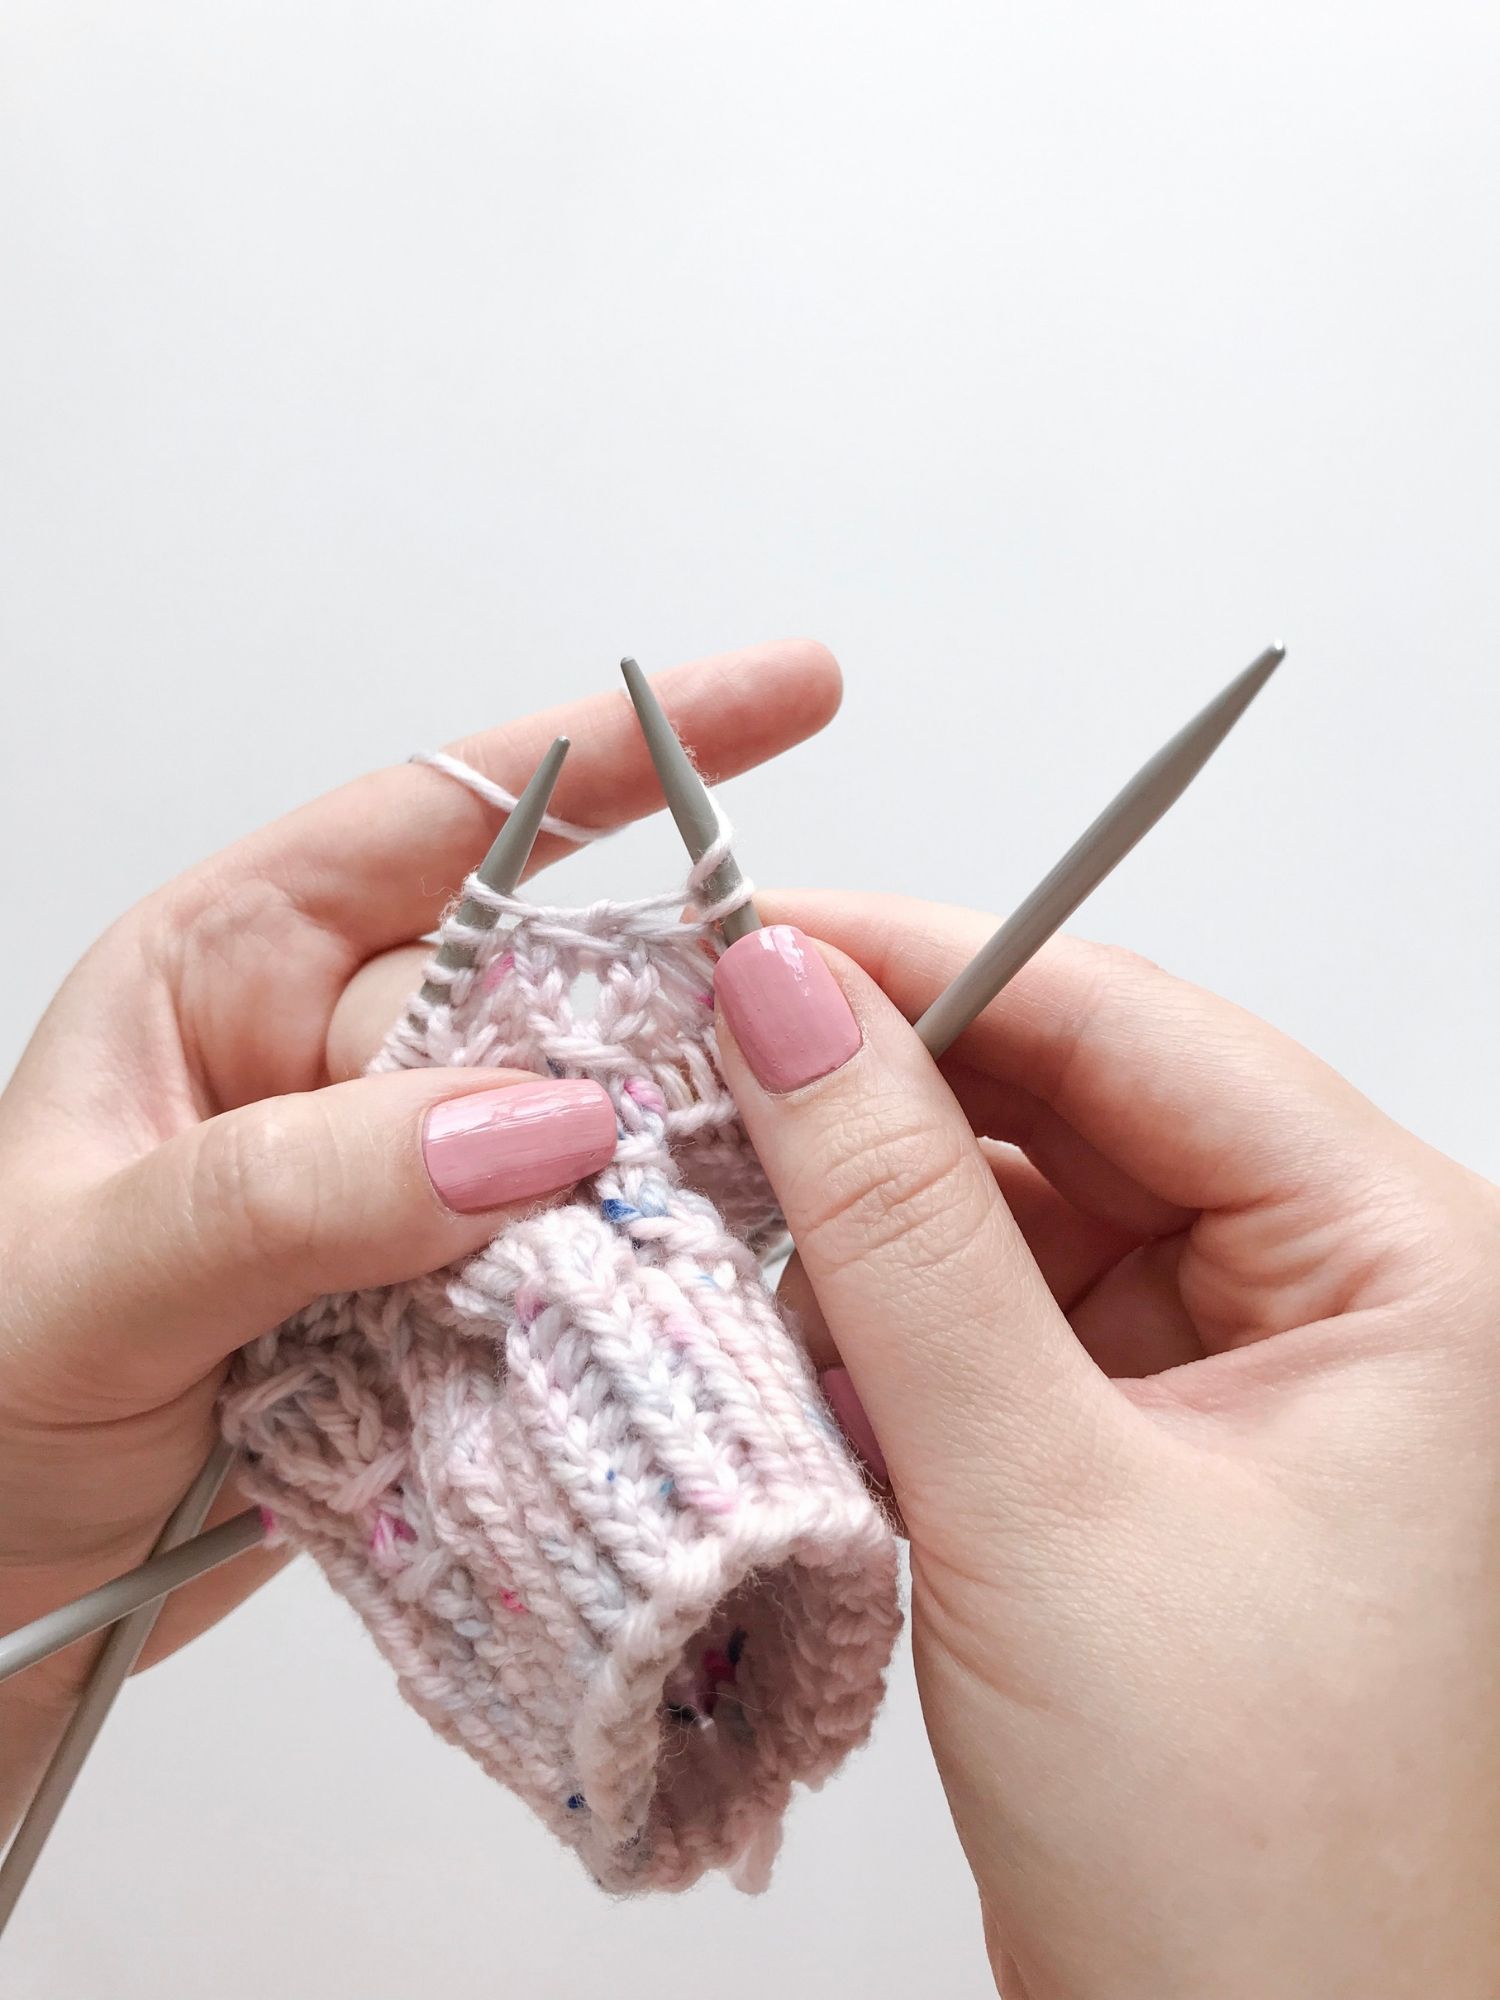
Knit 2 stitches.
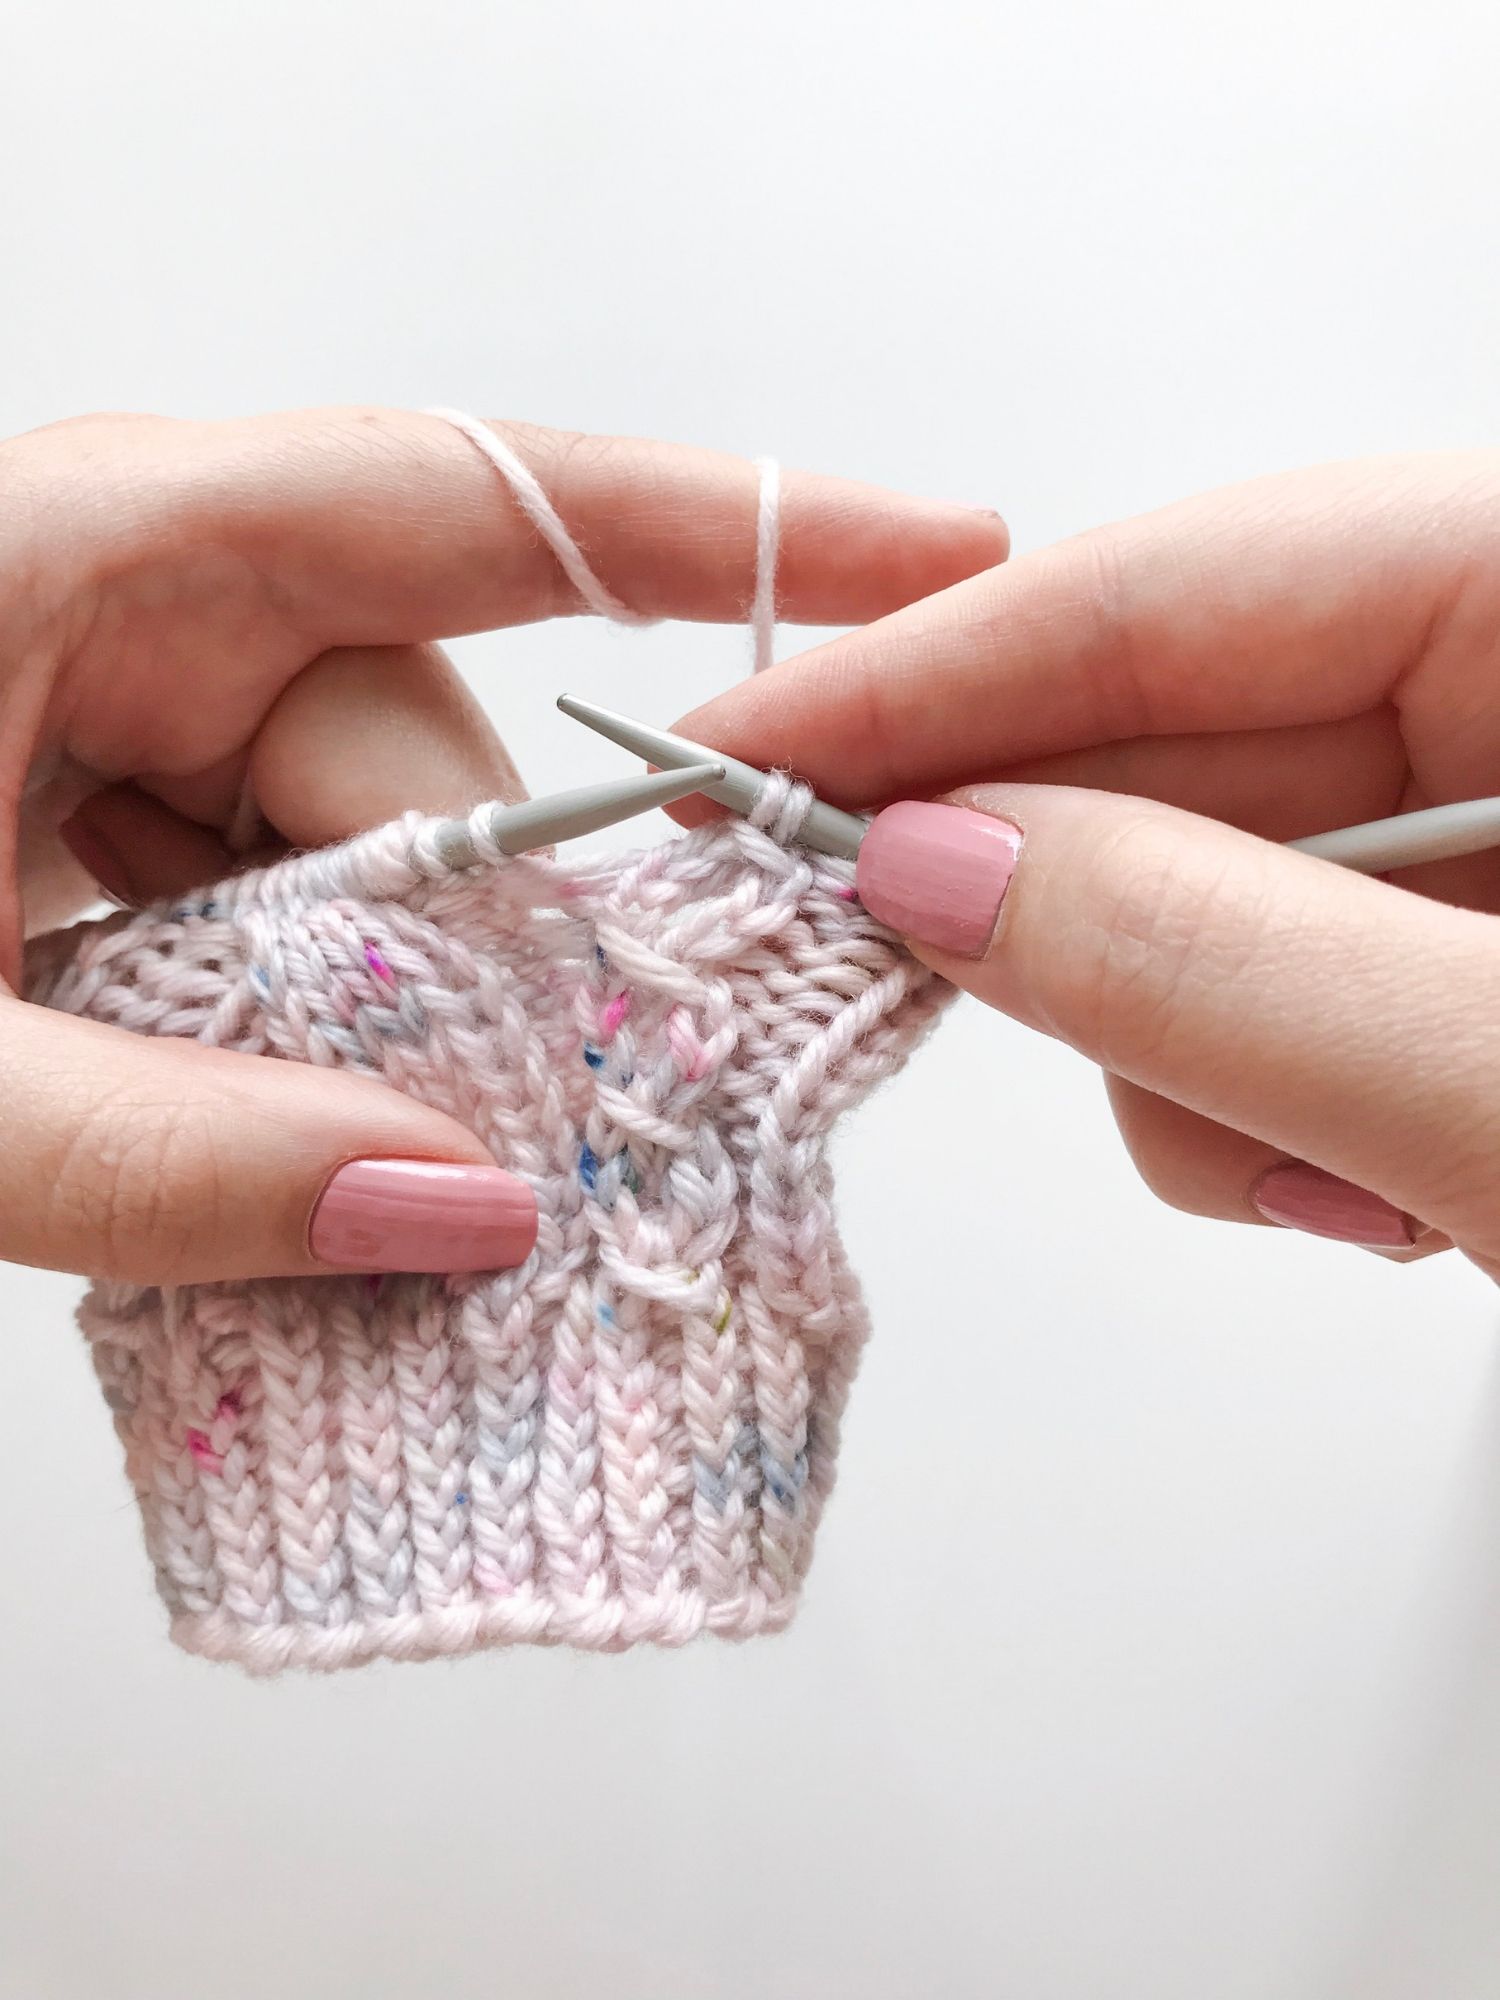
Pass the slipped stitch…
…over the two knit stitches.
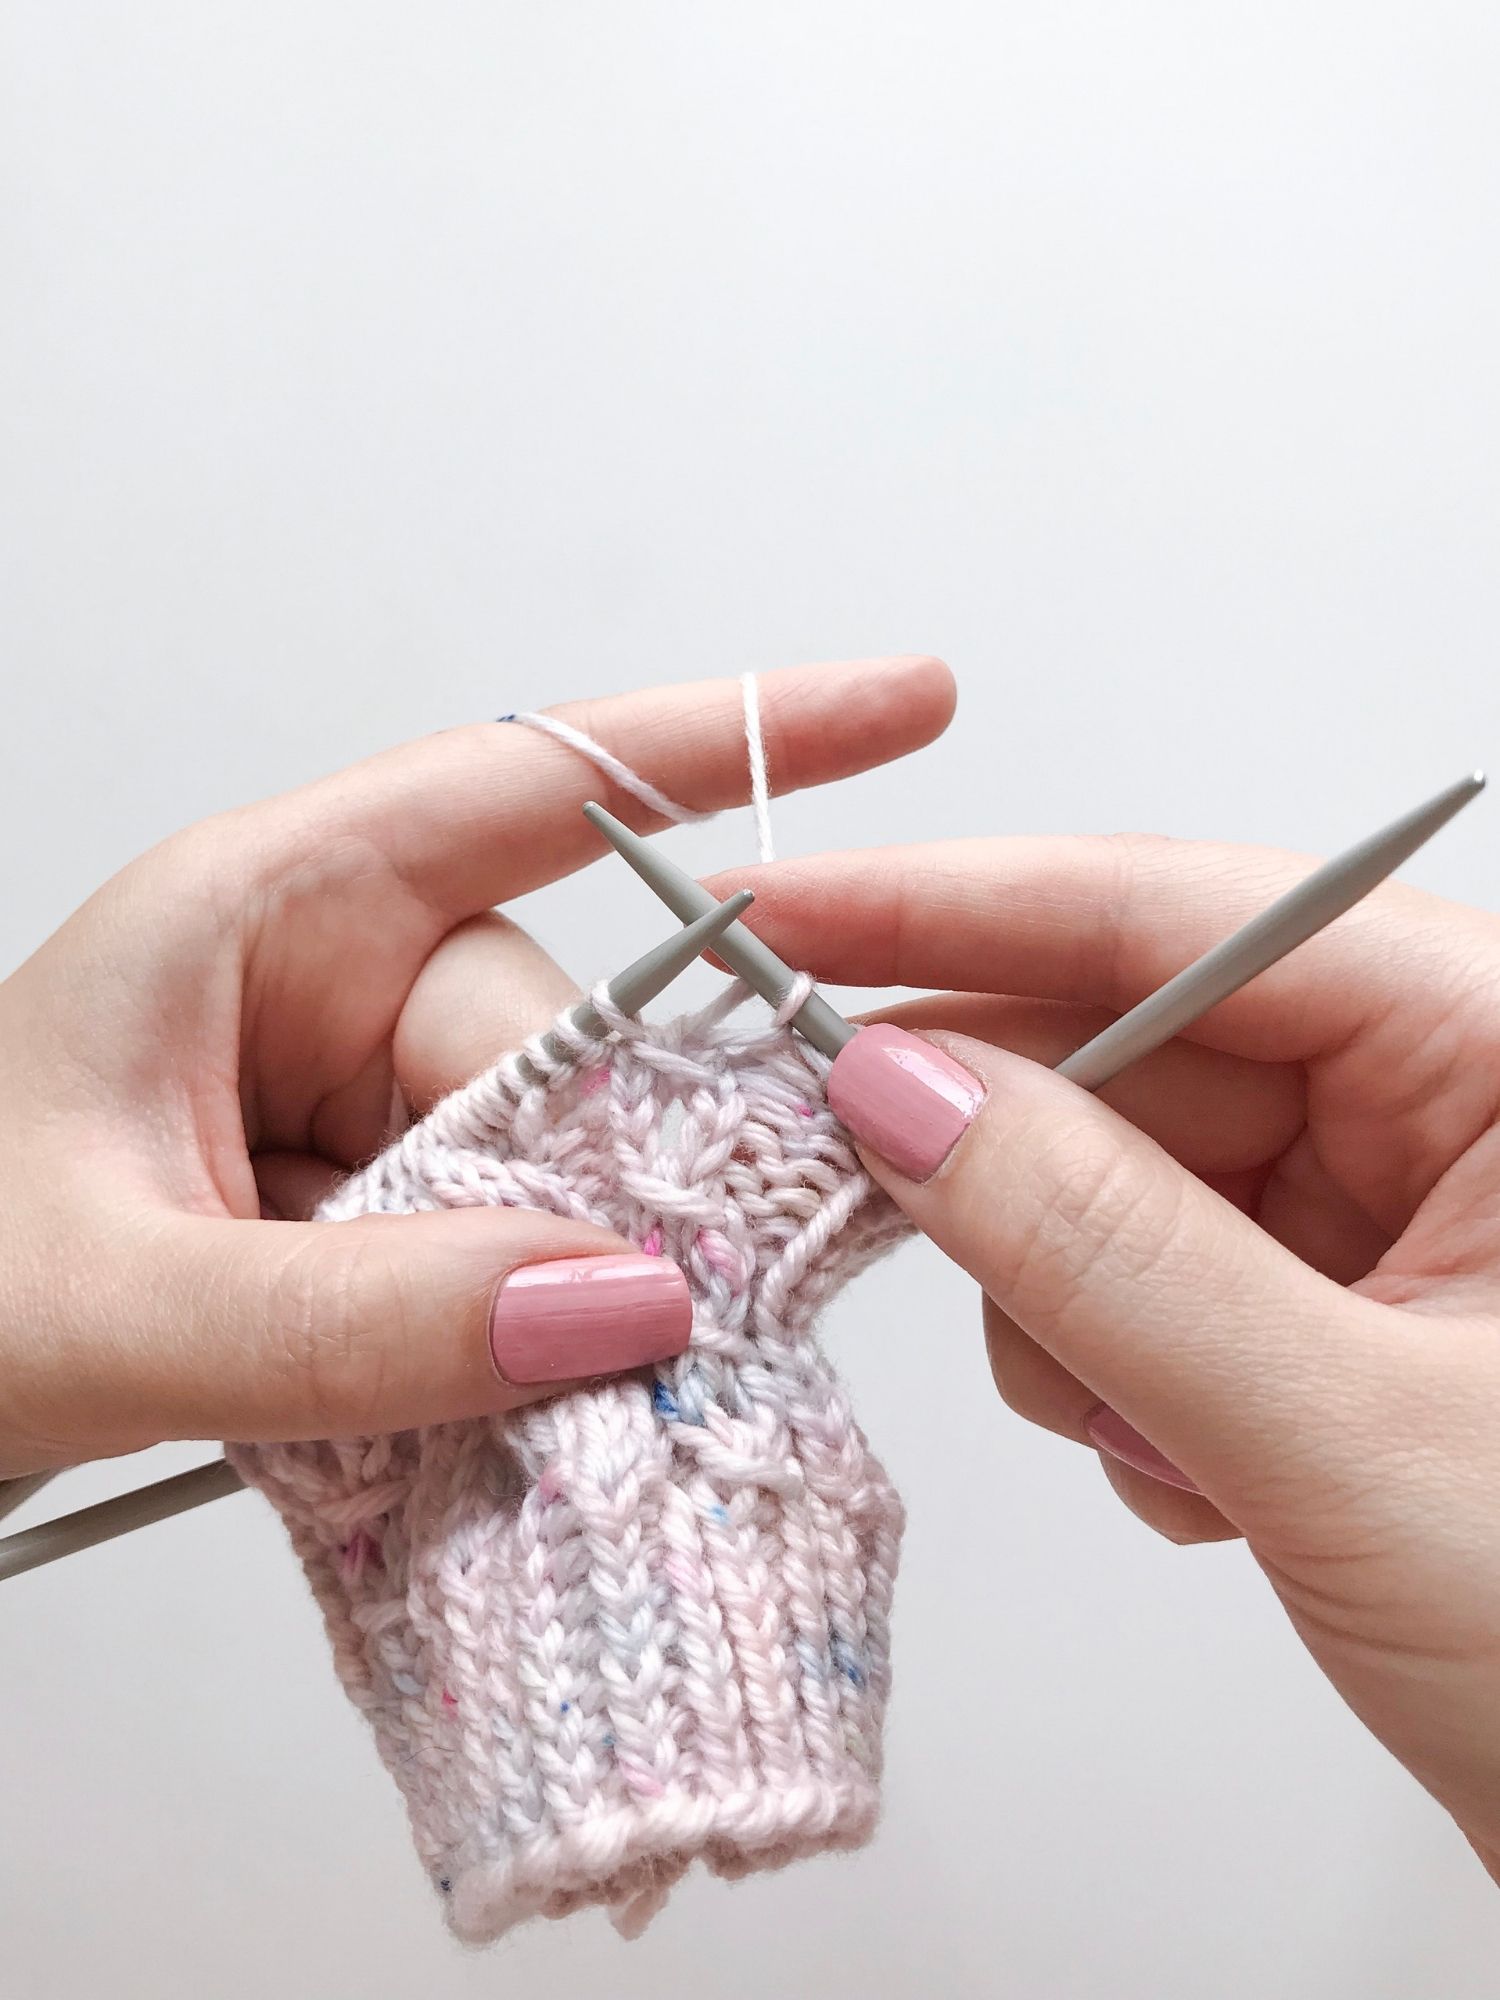
TADAA this is what it looks like after round 1!
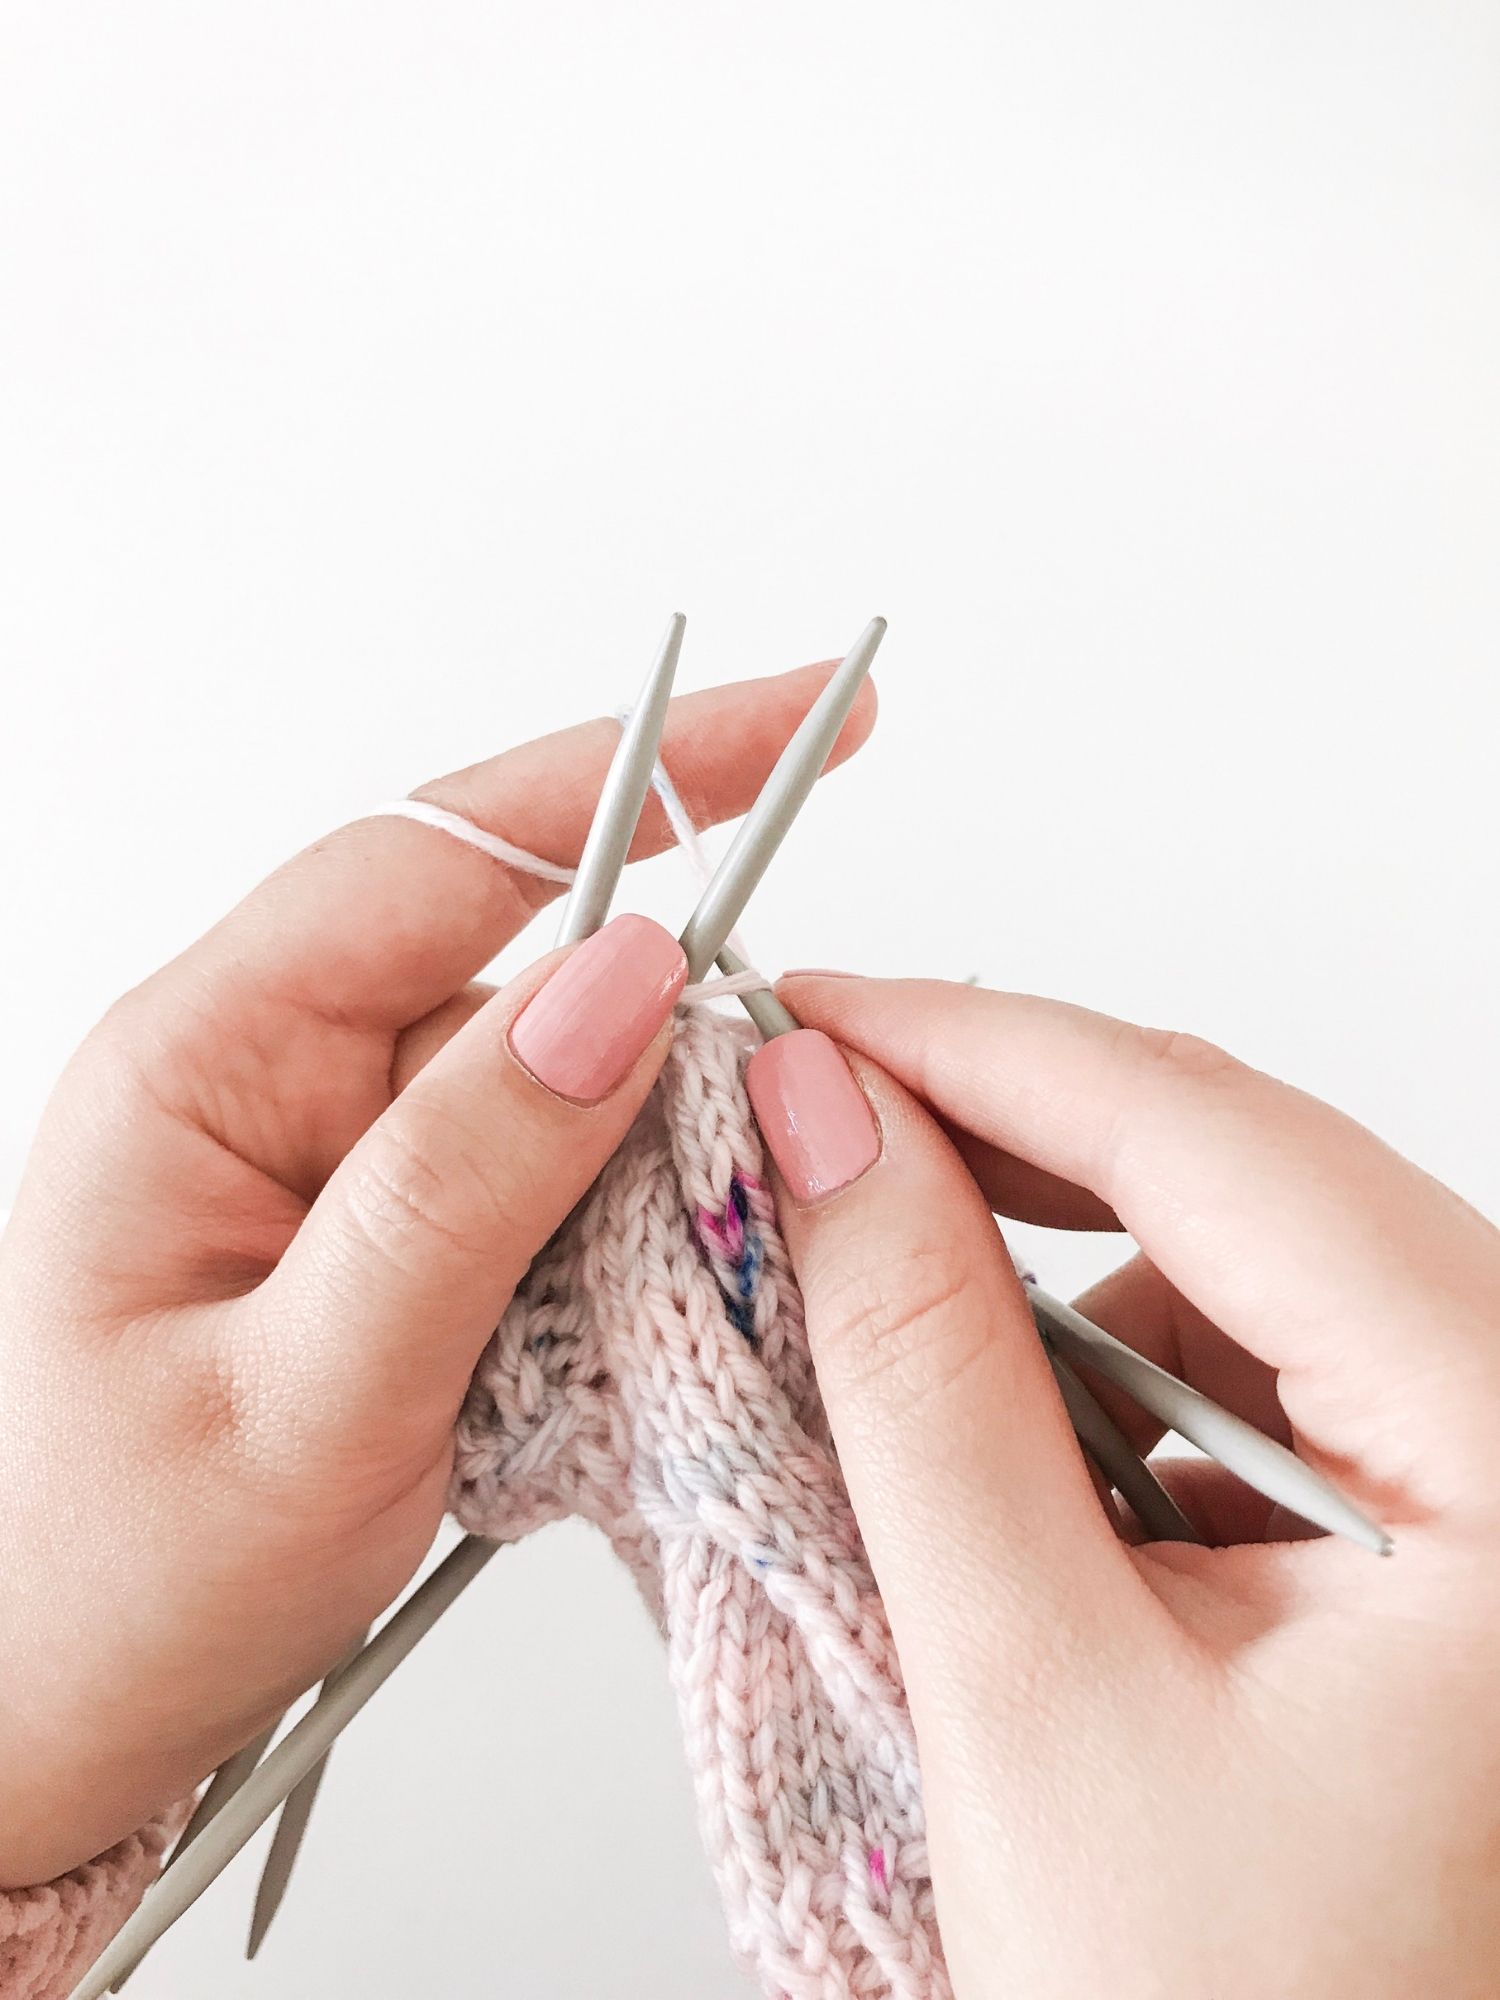
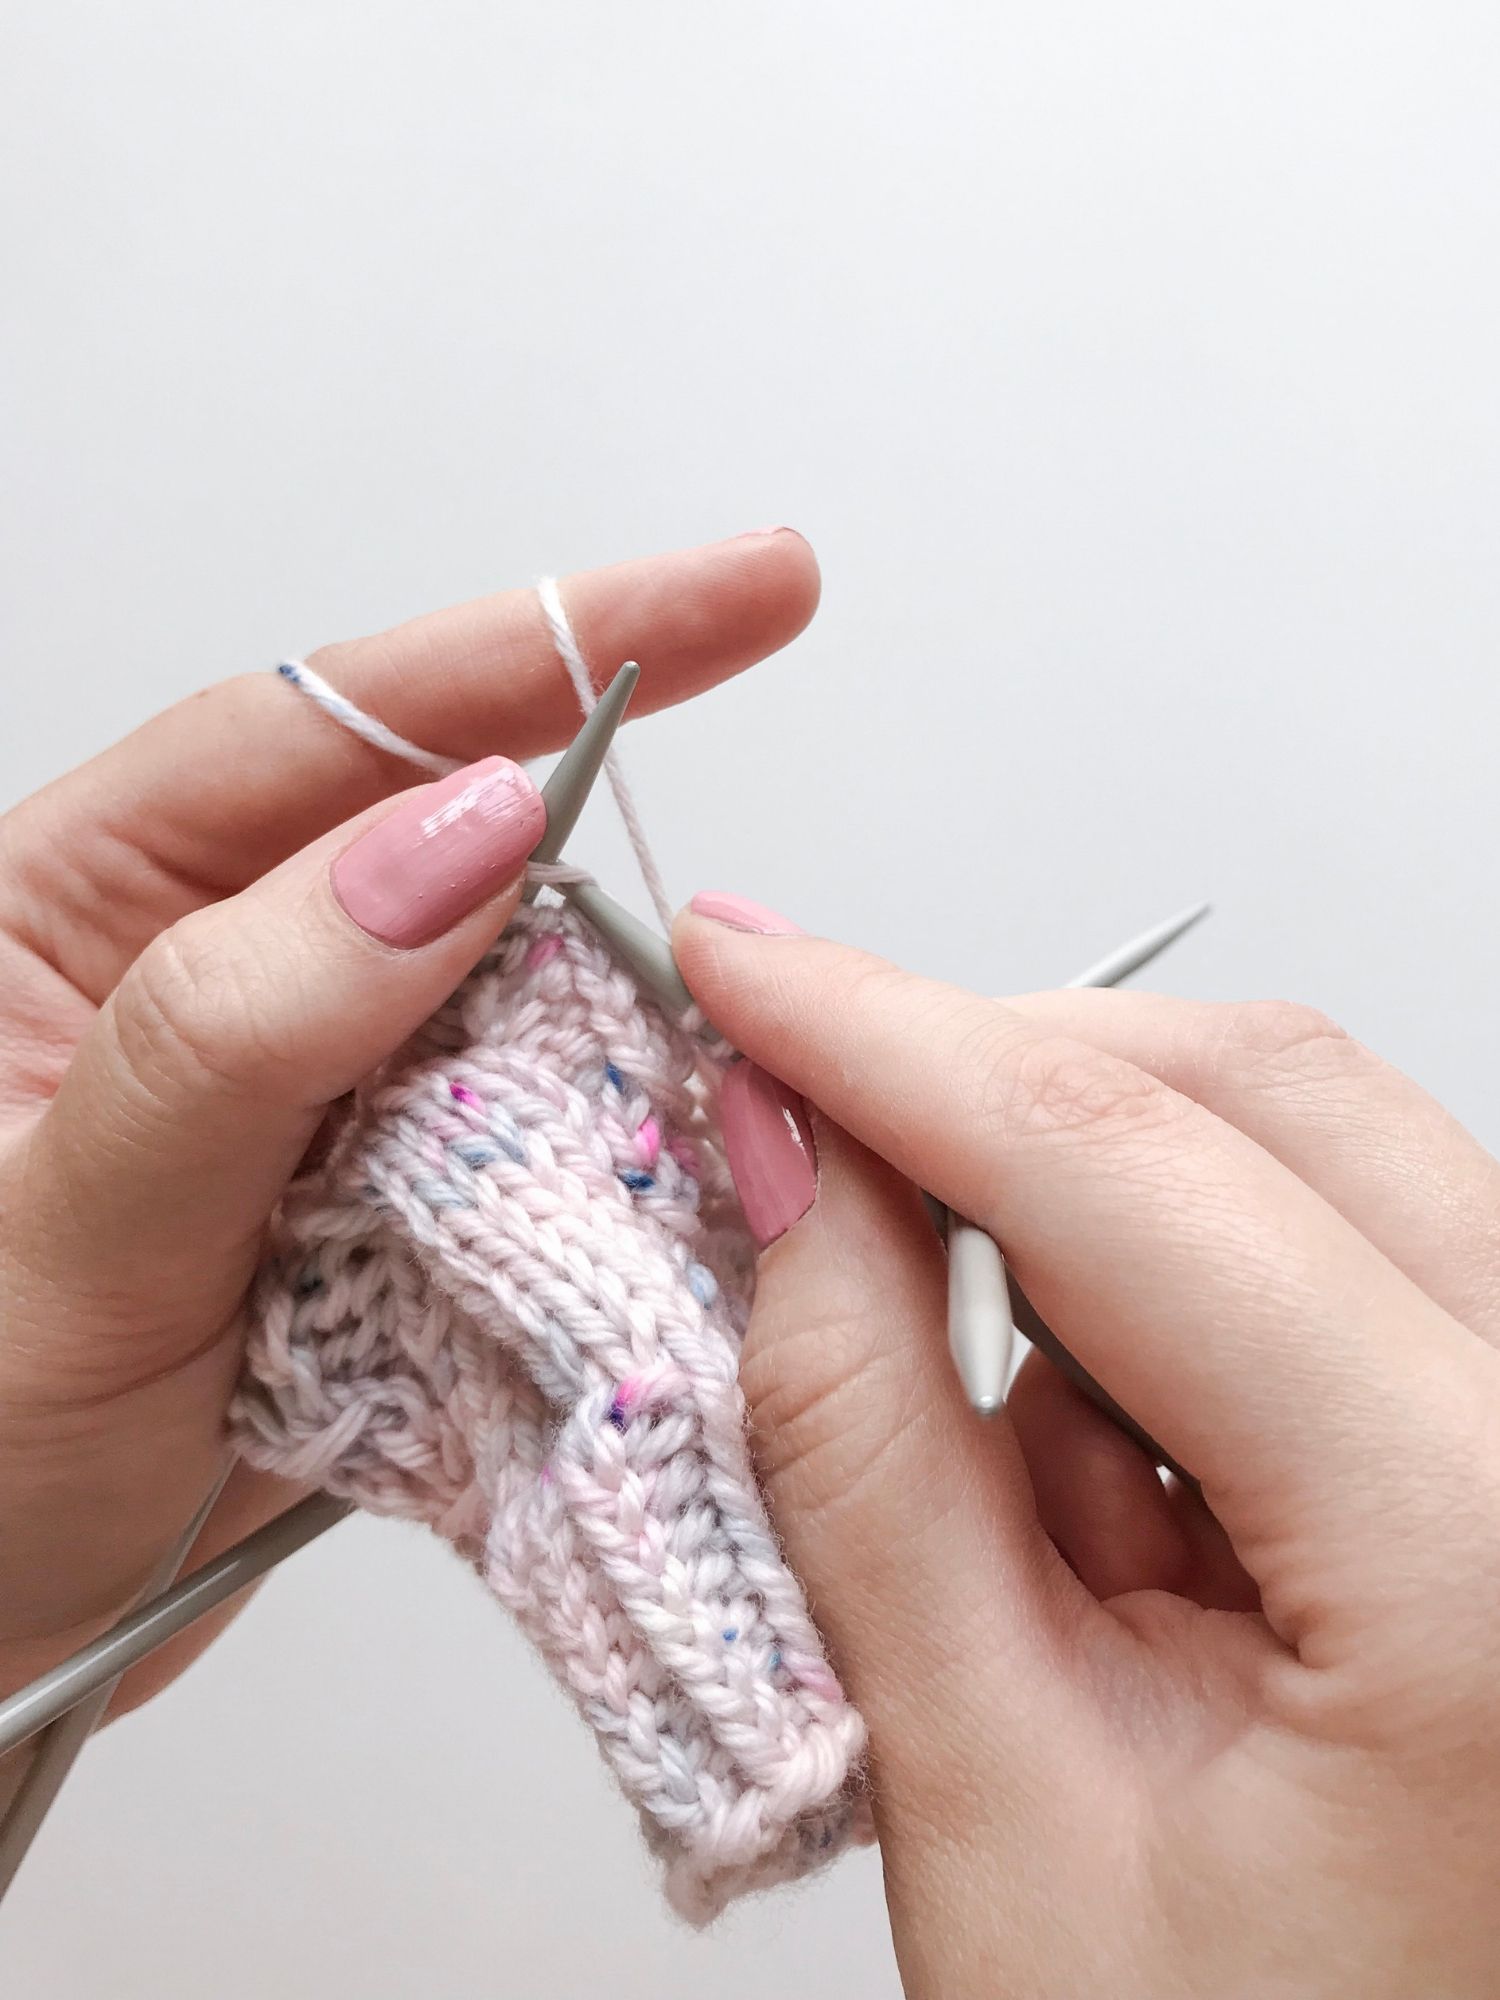
Round 2: start by knitting one stitch.
Bring the yarn to the front…
…and yarn over.
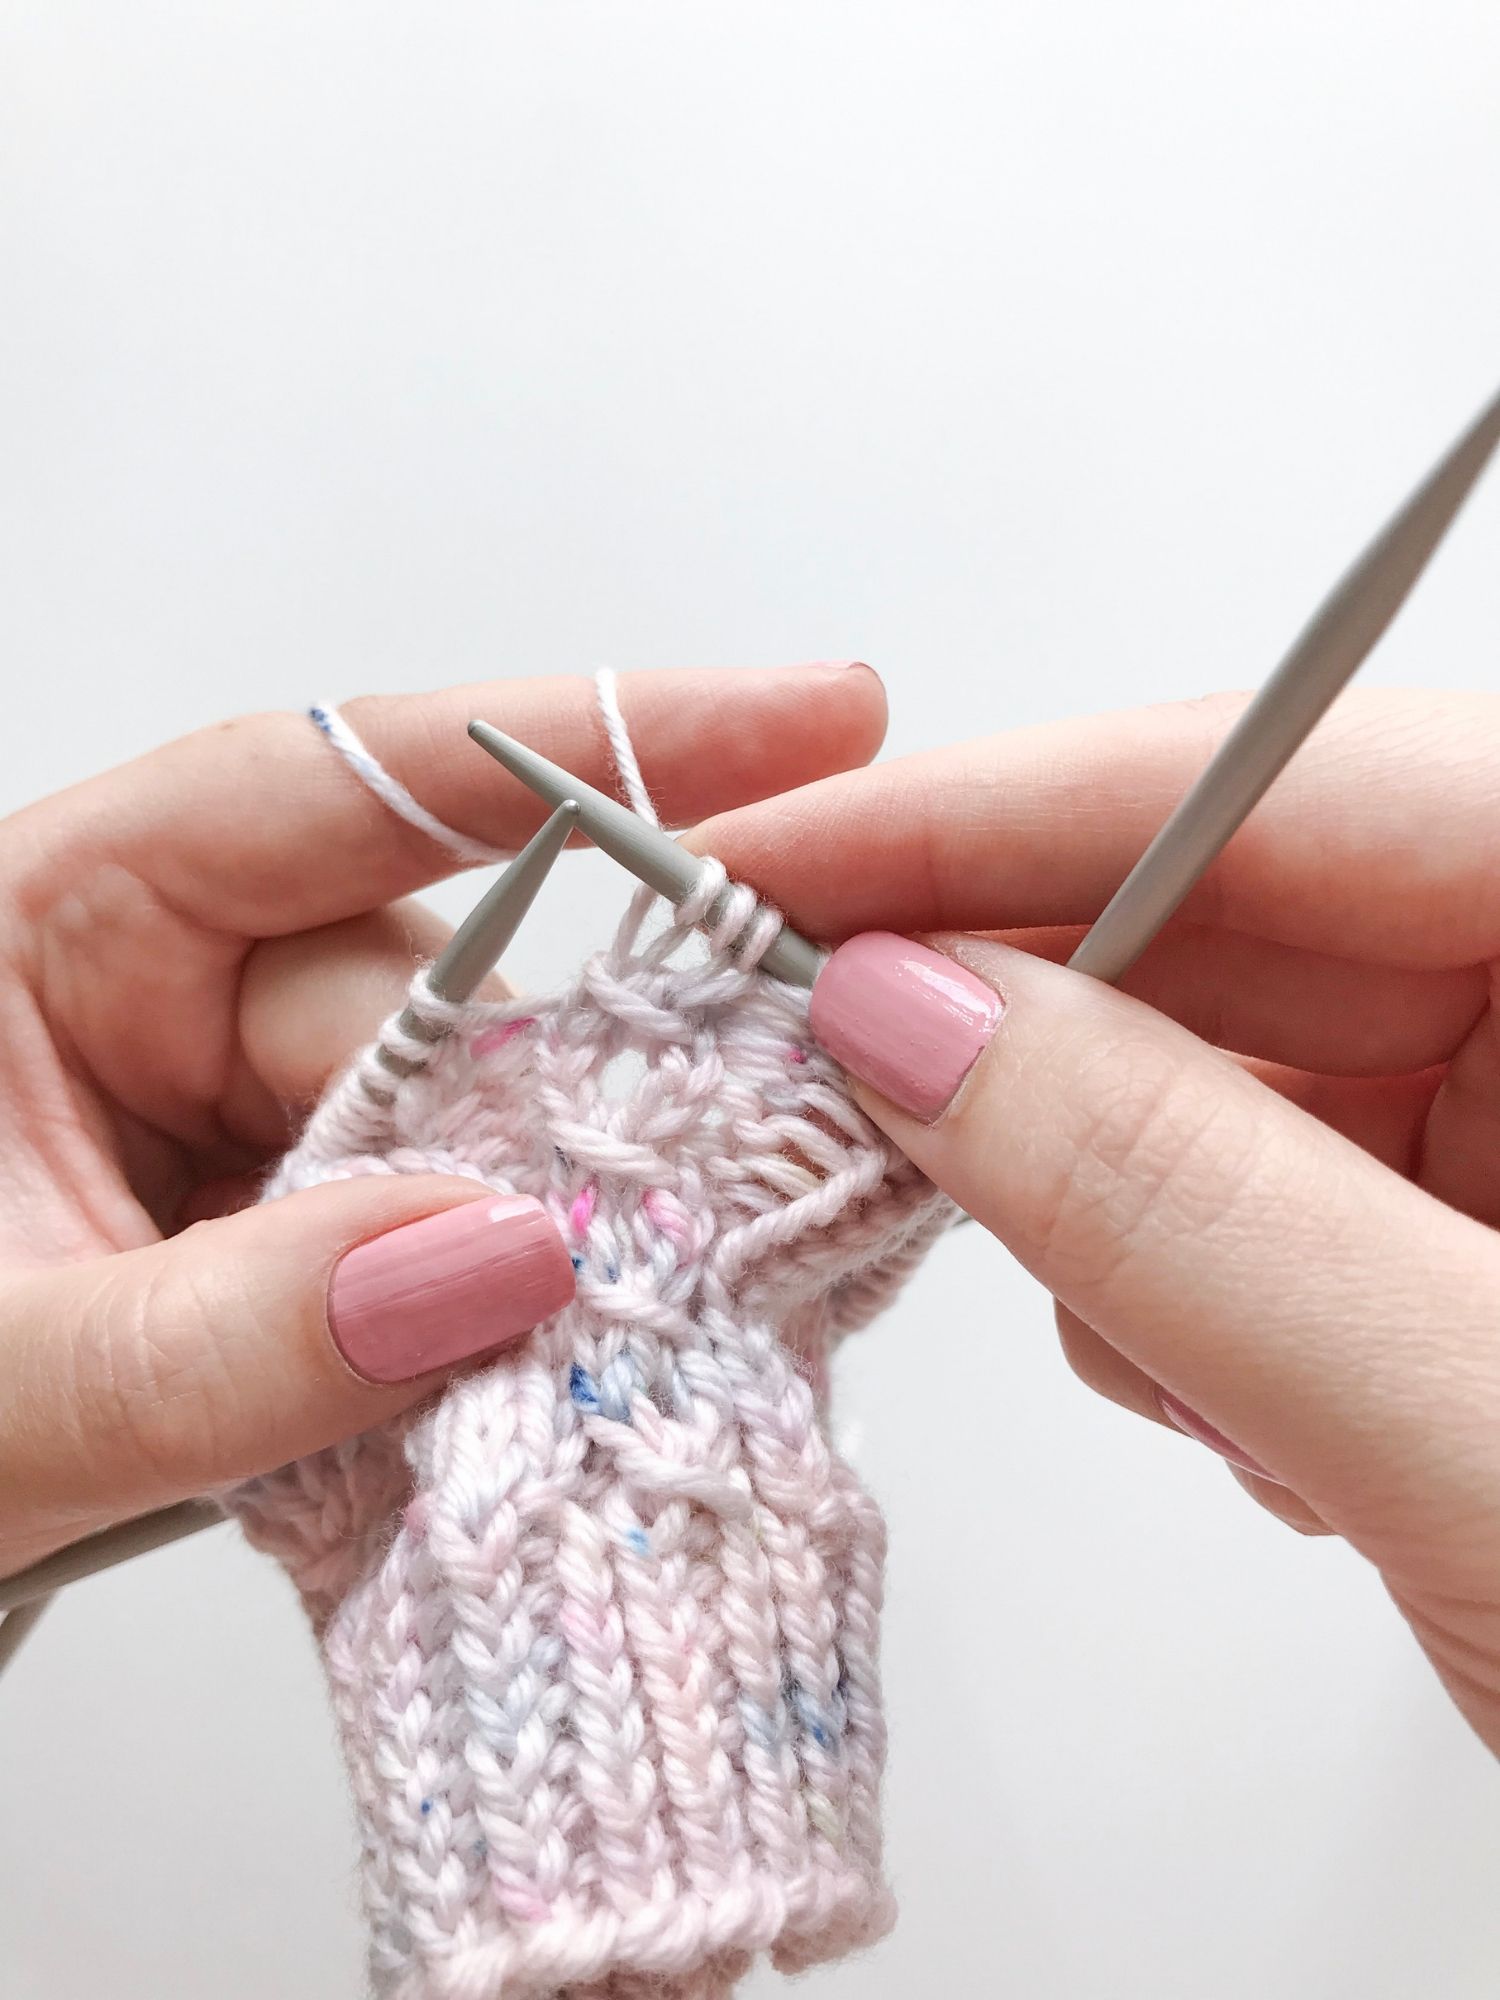
Knit 1 stitch.
Et voilà, round 2 done!
In the video tutorial below I included all rounds (1-4), and if you’re not yet subscribing to my Youtube channel you definitely should!
To wrap things up, my obsession level is at 100 and I have a feeling you’ll be seeing a LOT more of this lace stitch in my future projects!